
Reading Time: 17 minutes
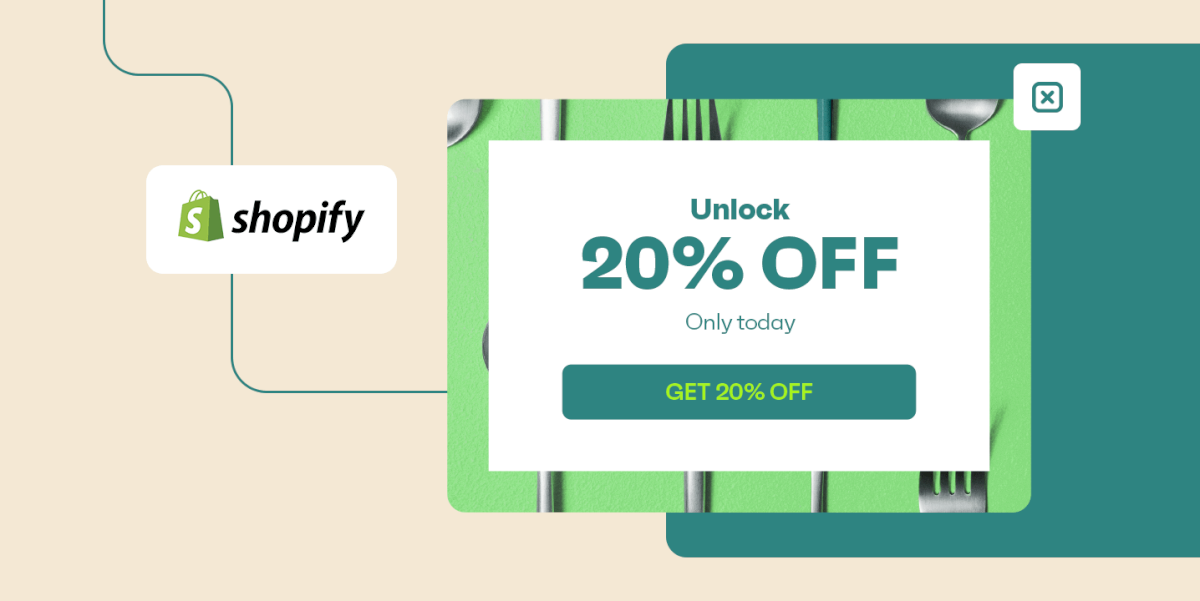
Shopify popups are essential for converting browsers into buyers. You can use either native tools or apps to create popups that capture emails, promote sales, and reduce cart abandonment — plus, you can add them to your store for free.
Appropriate popup targeting turns these interruptions into helpful moments. Show welcome discounts to new visitors, shipping offers at checkout, or win-back deals to past customers to make them feel like natural extensions of your shopping experience.
Join us below to master popup creation, targeting, and optimization for your Shopify store.
3 methods to add Shopify popups
Want popups on your Shopify store? You’ve got three routes — apps that handle everything, Shopify’s built-in tool, or writing code yourself:
1. Third-party popup apps
To add a Shopify popup, head to the Shopify App Store and you’ll find Omnisend, Privy, OptiMonk, Justuno, Poptin, Wisepops, and about 50 other apps competing for your attention.
Most work the same way — install, pick a template, customize colors to match your brand, and publish. The fundamental differences show in triggers and targeting.
Exit-intent catches abandoning visitors, scroll percentage waits until they’re engaged, and time delays prevent annoying immediate popups. Better apps segment by location, device, or past purchases — showing different offers to first-time visitors versus returning customers.
Expect to pay $20–100 monthly for decent features. Free versions exist, but limit impressions or add watermarks.
Pros
- Professional designs and templates ready to use
- Advanced targeting and trigger options
- Built-in analytics and A/B testing
- No coding knowledge required
Cons
- Monthly subscription fees add up
- Another third-party service to manage
- Limited customization within app constraints
2. Shopify Forms app
Shopify quietly launched Forms as its answer to popup apps. You can find it in your admin under Marketing > Shopify Forms. No installation needed — it’s already there.
The templates cover basics — email signups, discount codes, and age verification. Pick one, adjust the text, and change button colors. That’s about it for customization. Your captured emails flow straight into Shopify’s customer list and are ready for email campaigns.
Missing features become obvious fast. No exit popups, no A/B tests, no “show after scrolling 50%” options. But zero cost and zero setup complexity make it perfect for testing whether popups work for your store.
Pros
- Completely free with Shopify
- Direct integration with Shopify
- Simple setup in minutes
- No external accounts needed
Cons
- Basic templates only
- No advanced triggers or targeting
- Limited design customization
- No performance analytics
3. Custom code implementation
Open your theme editor, create a new snippet called popup.liquid, and start coding. You control every pixel, every animation, every condition for display.
JavaScript handles the logic — localStorage tracks if someone already saw your Shopify email popup, setTimeout controls delays, and event listeners watch for exit intent.
CSS positions everything and adds transitions. Liquid pulls in dynamic content like product names or customer tags.
The learning curve is significant if you’re not already comfortable with code. One misplaced bracket breaks your entire store. Plus, you’re debugging across browsers, fixing mobile layouts, and updating everything when Shopify changes its architecture.
But you’ll never pay app fees or hit feature walls. Your popup does what you program it to do.
Pros
- Complete control over design and functionality
- No recurring fees
- Integrate with any system
- Build unique features that apps don’t offer
Cons
- Requires coding knowledge
- Time-intensive to build and maintain
- You handle all debugging
- Risk of breaking your store
Method 1: Adding popups with Omnisend
Omnisend’s form builder creates popups, embedded forms, flyouts, and landing pages from the same interface. You’ll find templates for email collection, SMS capture, cart abandonment prevention, and product recommendations.
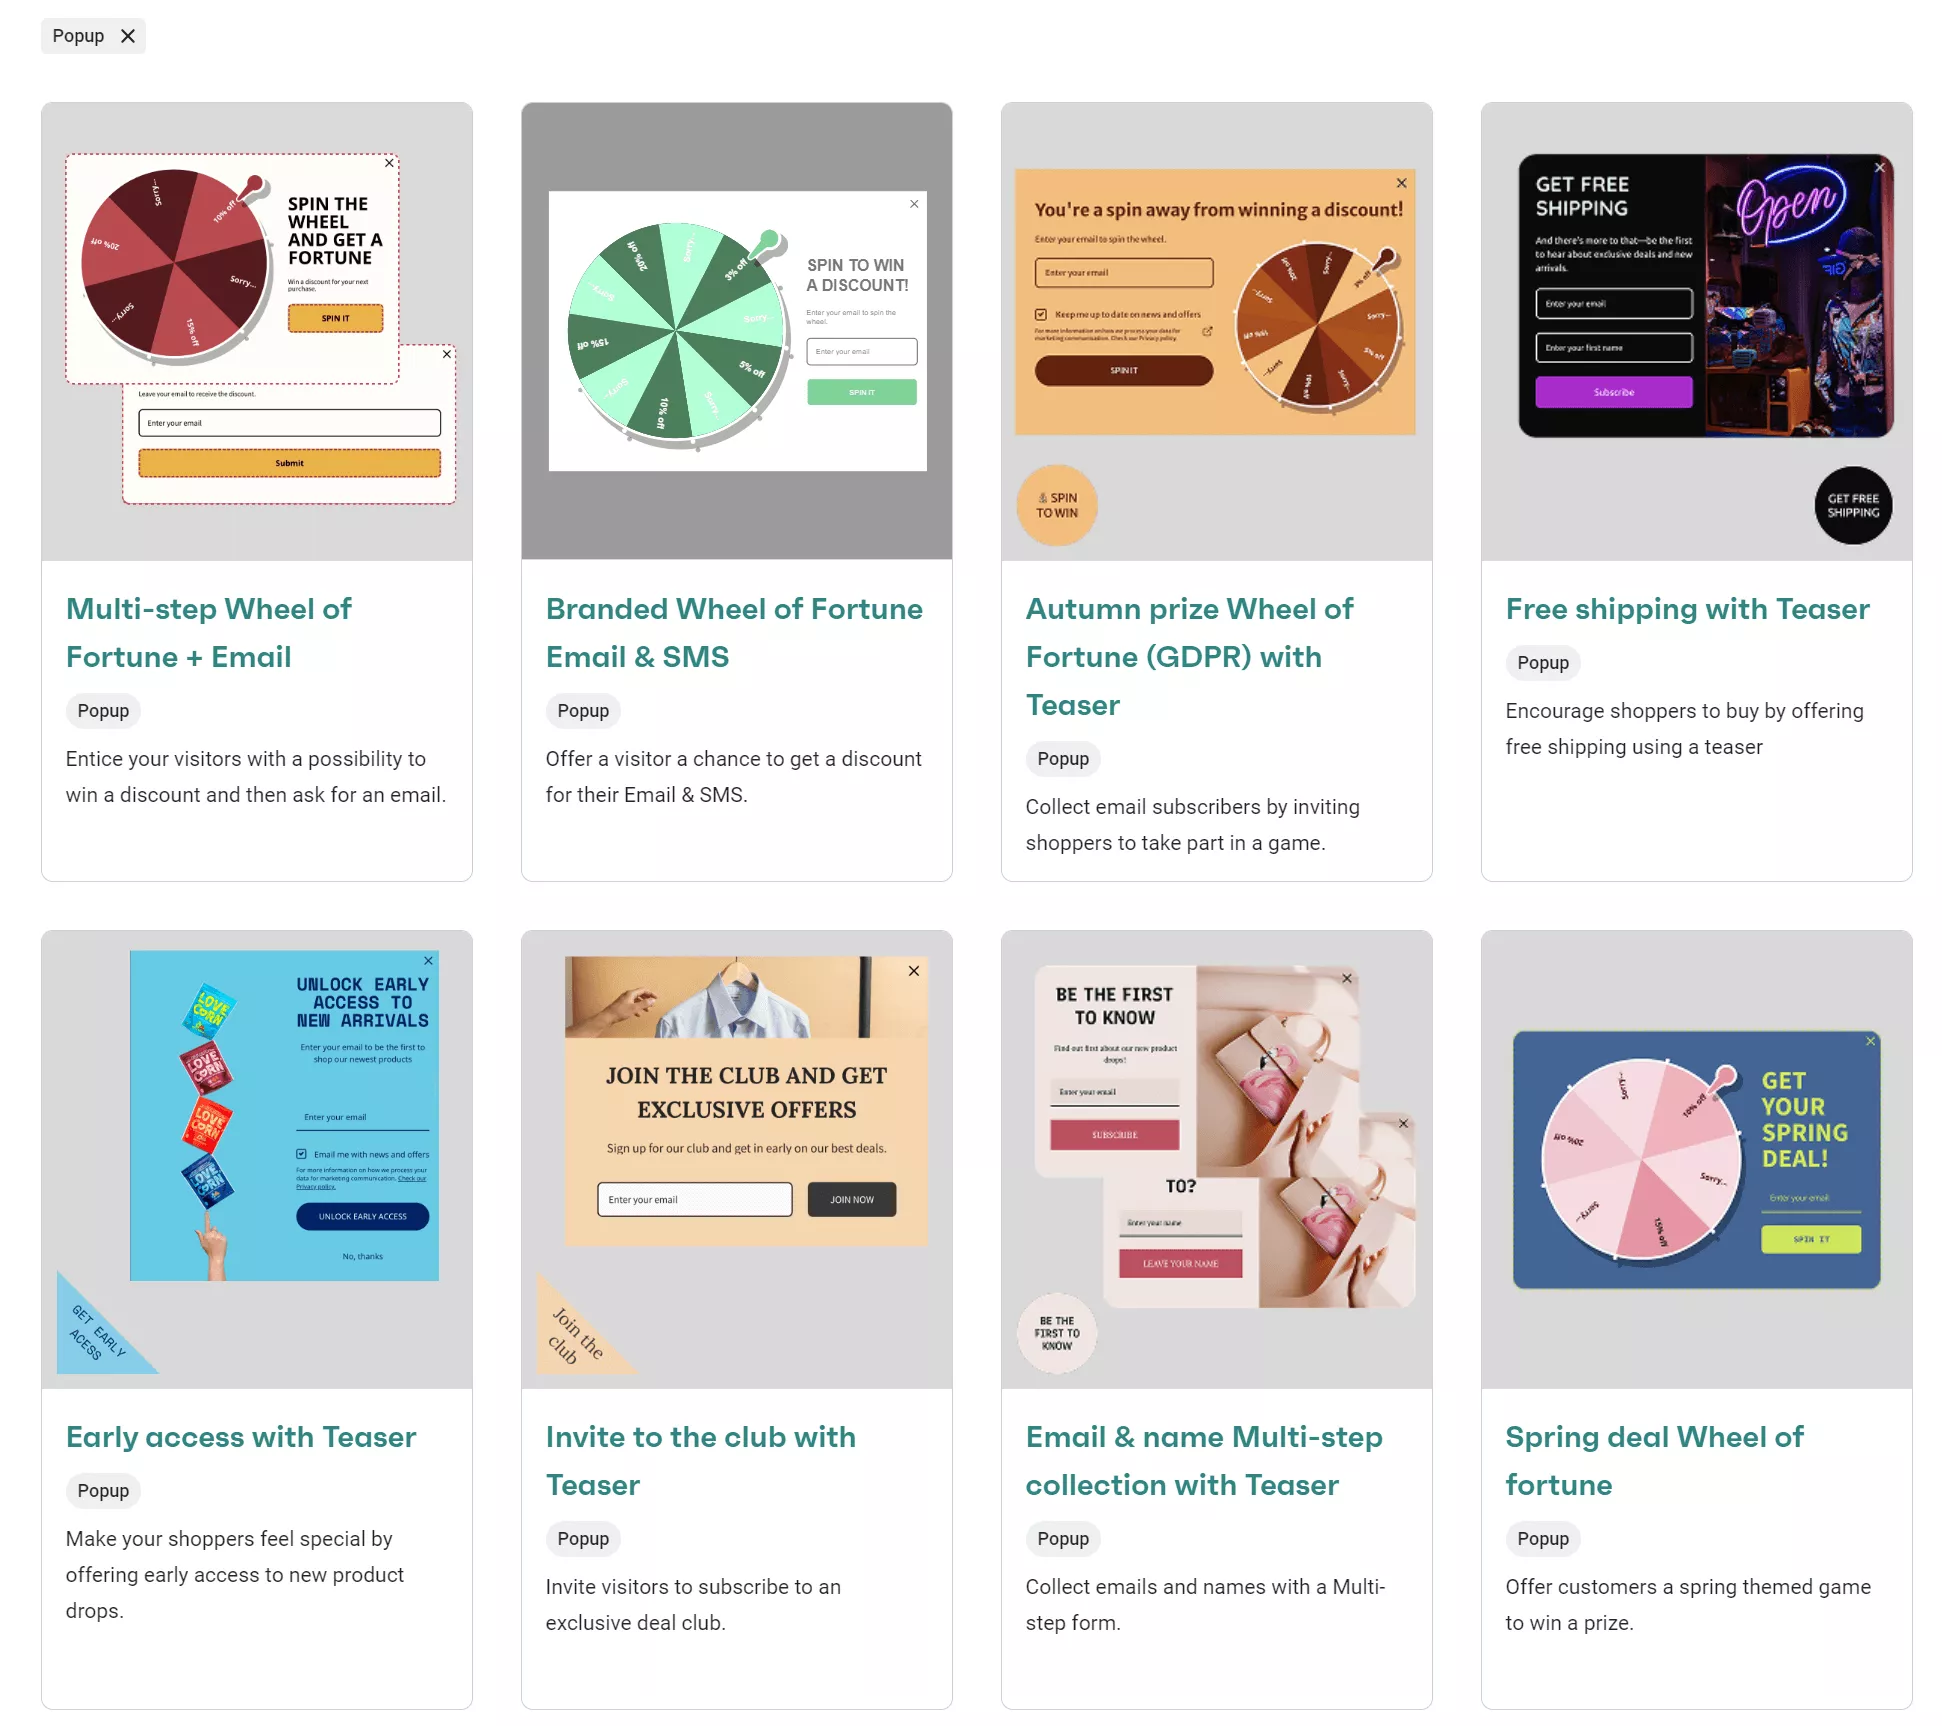
Popular popup types include:
- Wheel of Fortune gamified popups — Visitors spin for discounts and are rewarded for participation, such as in this example:
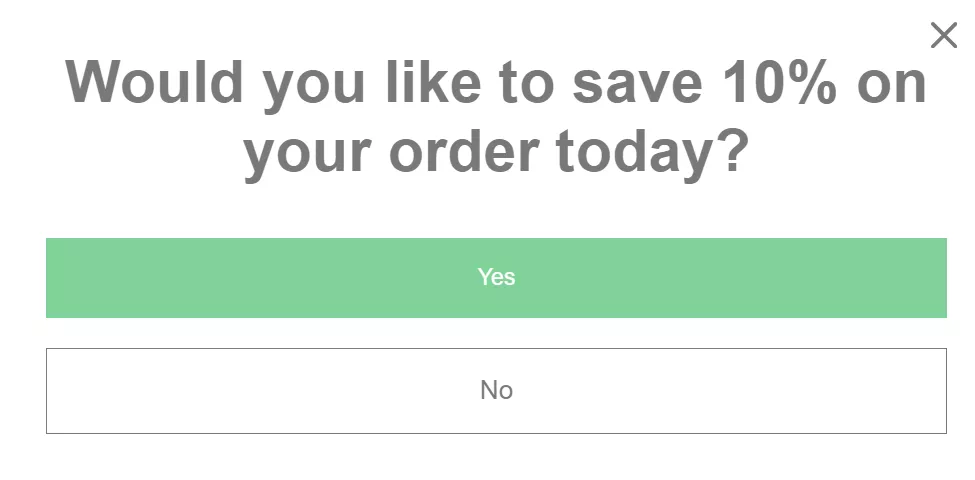
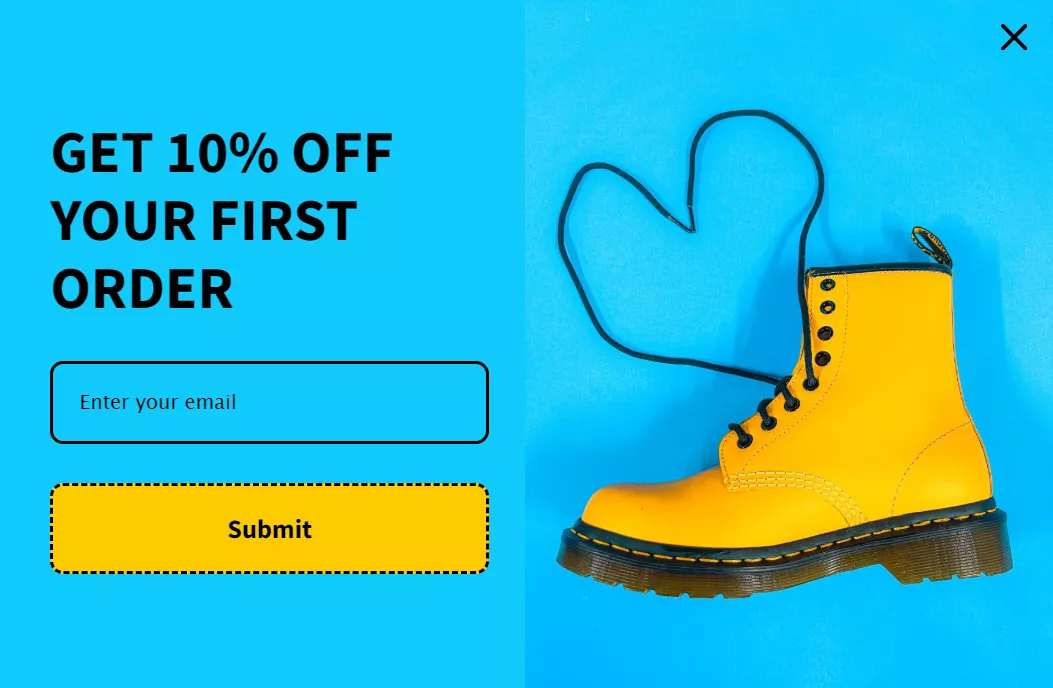
- Multi-step forms — Ask “Save on your purchase” first, then collect emails after the micro-yes, like this:
Step 1
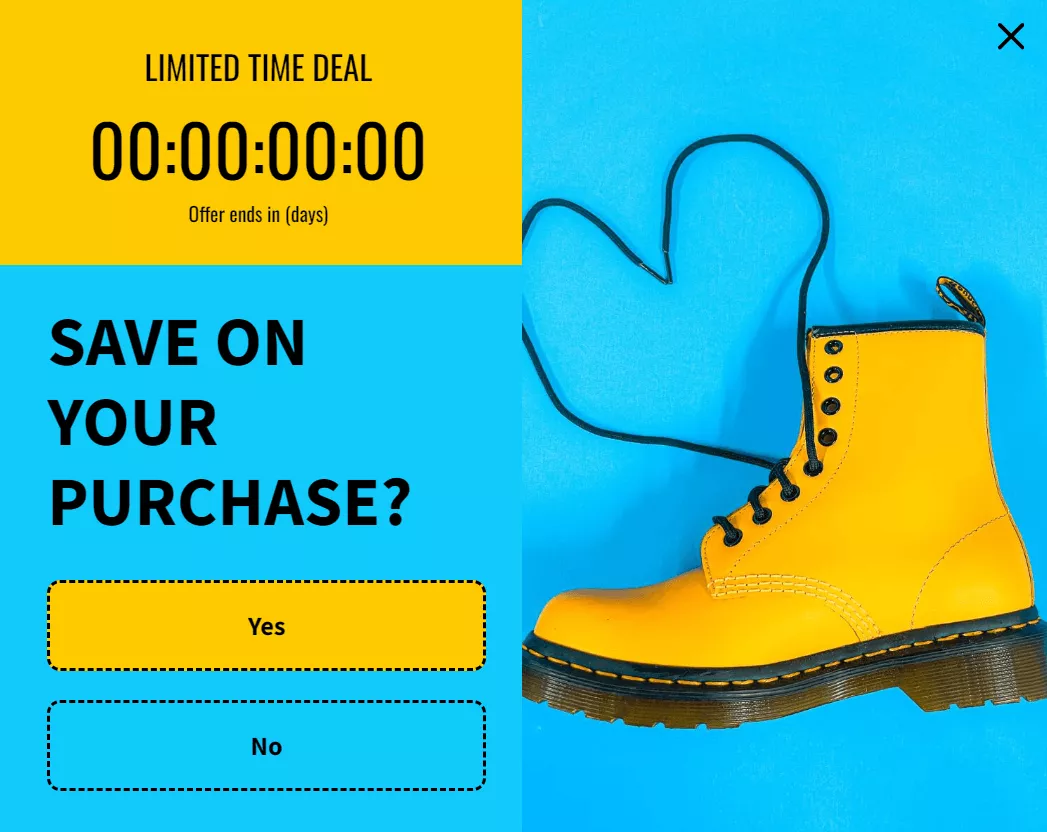
Step 2
- Teaser forms — Subtle tabs at screen edges that expand when clicked
- Birthday collectors — Gather dates for automated gift campaigns year-round
- Preference surveys — Quick questions like “Shop men’s or women’s?” for instant segmentation
Triggering options range from exit-intent (tracking mouse movements toward close buttons) to scroll percentage and time delays. You control when popups appear — after 30 seconds browsing, halfway down product pages, or when carts hit $50.
Omnisend’s Shopify certification brings one-click installation and automatic discount code generation — no duplicate codes on coupon sites, no manual imports.
Form submissions flow directly into email workflows, triggering a welcome series based on which popup visitors completed.
Here’s how to add popups on Shopify with Omnisend:
Note: If you’d rather watch a video than read our tutorial, here’s our walkthrough guide:

1. Access the form builder
Navigate to Forms > Create form > Style > Popup in your Omnisend dashboard.
Pick a template from the Forms library — you’ll see options for Shopify newsletter popups for signups, promotional offers, gamification wheels, and seasonal designs:
Here’s a screenshot of Omnisend’s template library:
Clicking a template opens the Form Builder interface.
2. Customize the design layout
Click Theme settings to control your popup’s appearance. You can find Theme settings in the top right sidebar below the Enable form button:
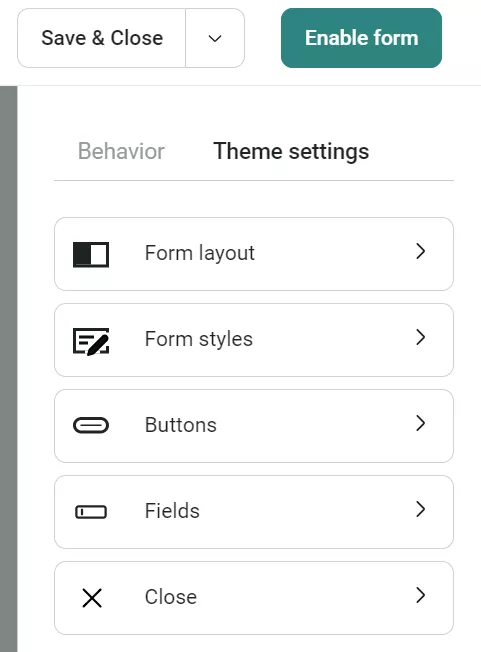
Under Form layout, set the form width (300–1000px default range), choose image placement (left, right, top, or background), and adjust padding.
The Fields section lets you customize input shapes, while Buttons controls global button styling — border styles, corner rounding, and colors.
3. Build your form content
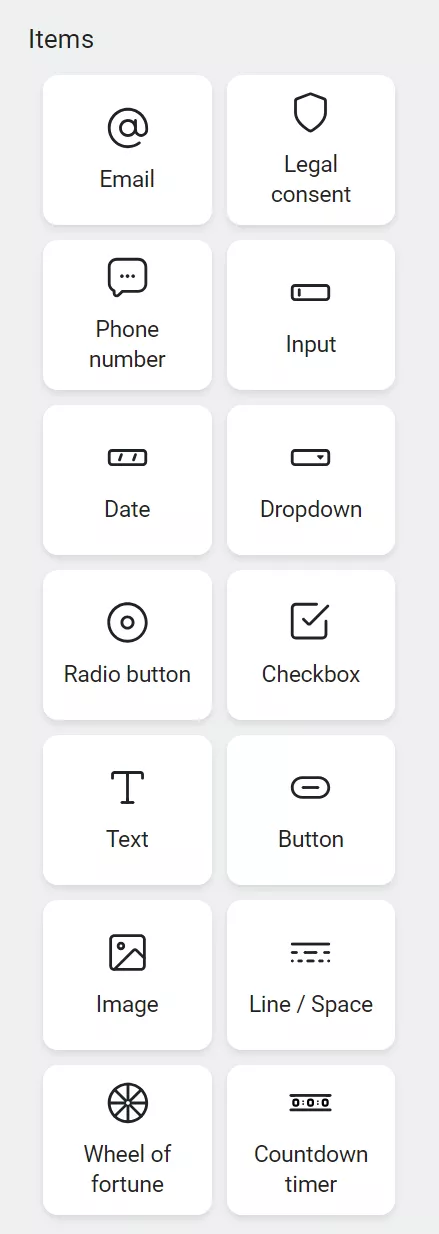
Drag items from the left sidebar onto your form. Available blocks include:
- Email field — Add placeholder text, make required, customize error messages
- Phone field — Select default country, shows as flag + country code
- Legal block — Required for GDPR/TCPA compliance with privacy policy links
- Images — JPG, PNG, or GIF formats under 2000px dimensions
- Dropdown — Collect gender, country, or custom properties
Here’s an image showing all available Items:
Click any block to access its settings — adjust text, styling, and field requirements.
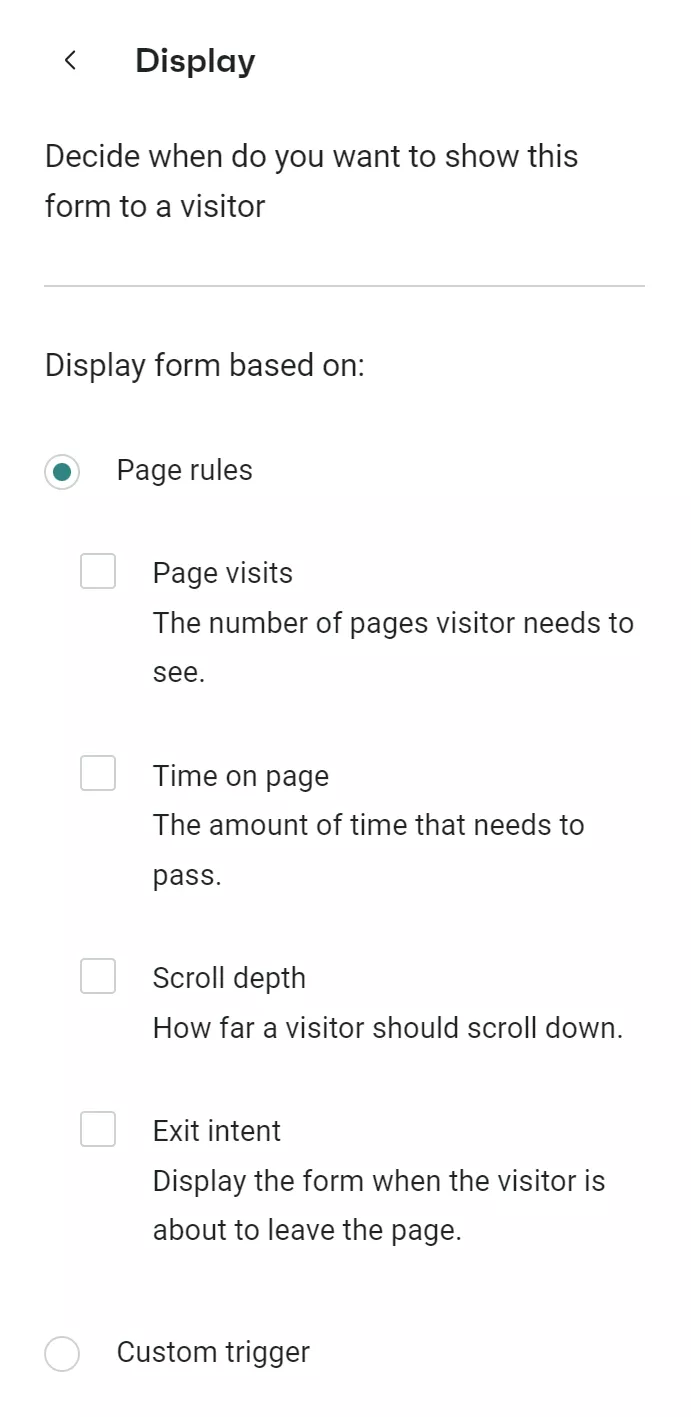
4. Configure display triggers
Open the Behavior tab, located next to Theme settings, to set display rules:
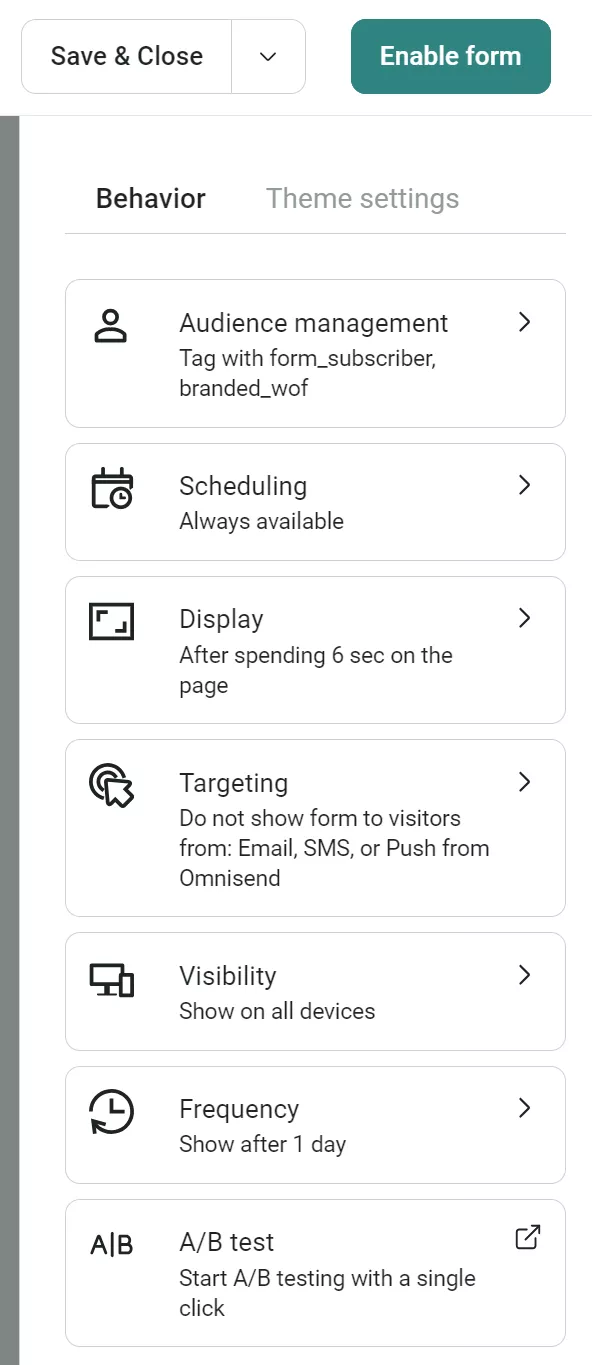
- Page visits — Set the number of pages viewed before the popup appears
- Time on page — Delay in seconds before showing
- Scroll depth — Percentage of page scrolled
- Exit intent — Triggers on rapid upward scrolling (works on all devices)
Multiple rules connect with OR logic — the popup shows when any single condition is met.
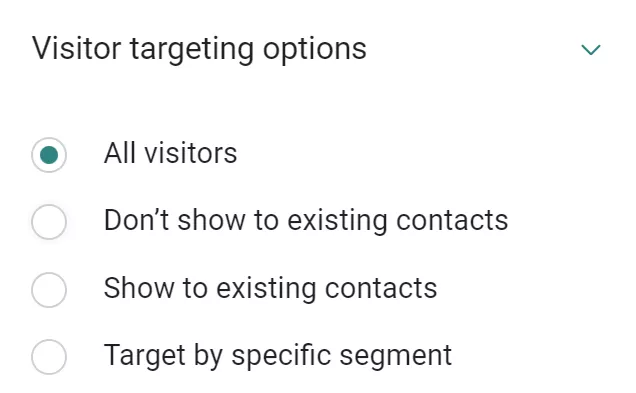
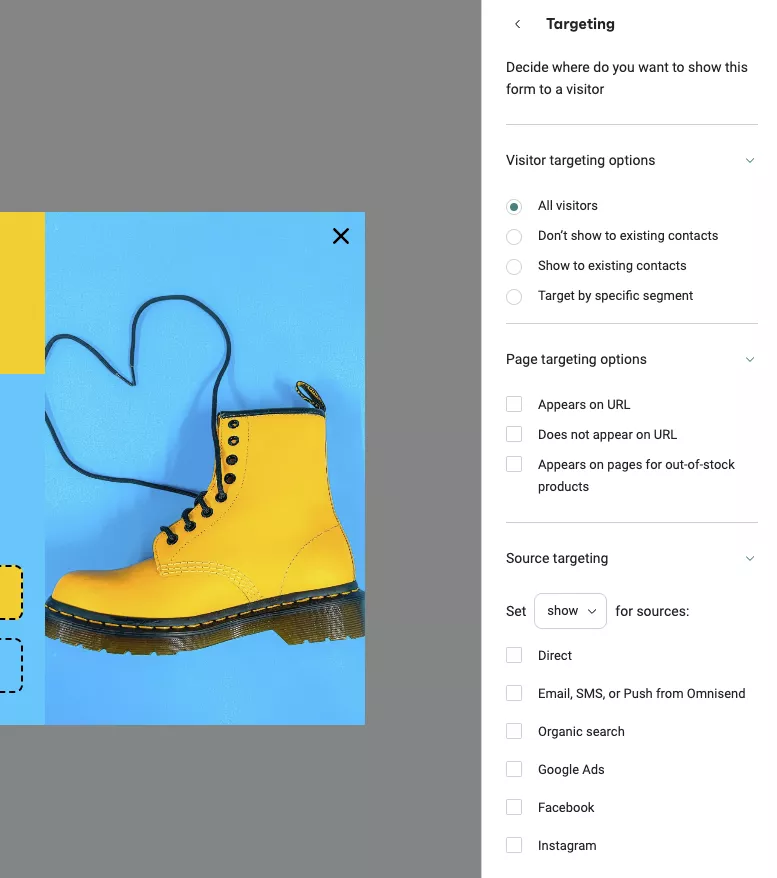
5. Target specific audiences
The Targeting section in the Behavior tab controls who sees your popup and where it appears:
Visitor targeting options:
- All visitors — Show to everyone
- Don’t show to existing contacts — Target new visitors only
- Show to existing contacts — Display exclusive offers to subscribers
- Target by specific segment — Include or exclude custom segments
Page targeting options:
- Appears on URL — Display on specific pages or UTM parameters
- Does not appear on URL — Exclude certain pages
- Appears on out-of-stock product pages — Special trigger for inventory
Note: Page targeting uses AND logic, meaning all URL conditions must match for the popup to display.
6. Set reappearance frequency
In Frequency settings, choose intervals:
- Seconds
- Minutes
- Hours
- Days
If disabled, the form always appears to visitors. Enable frequency limits to avoid overwhelming store visitors and reducing the quality of your user experience.
7. Create success messages
Click Success in the bottom menu. Edit the success message like the main form — add text, images, buttons, or promotional content. Here’s an example:
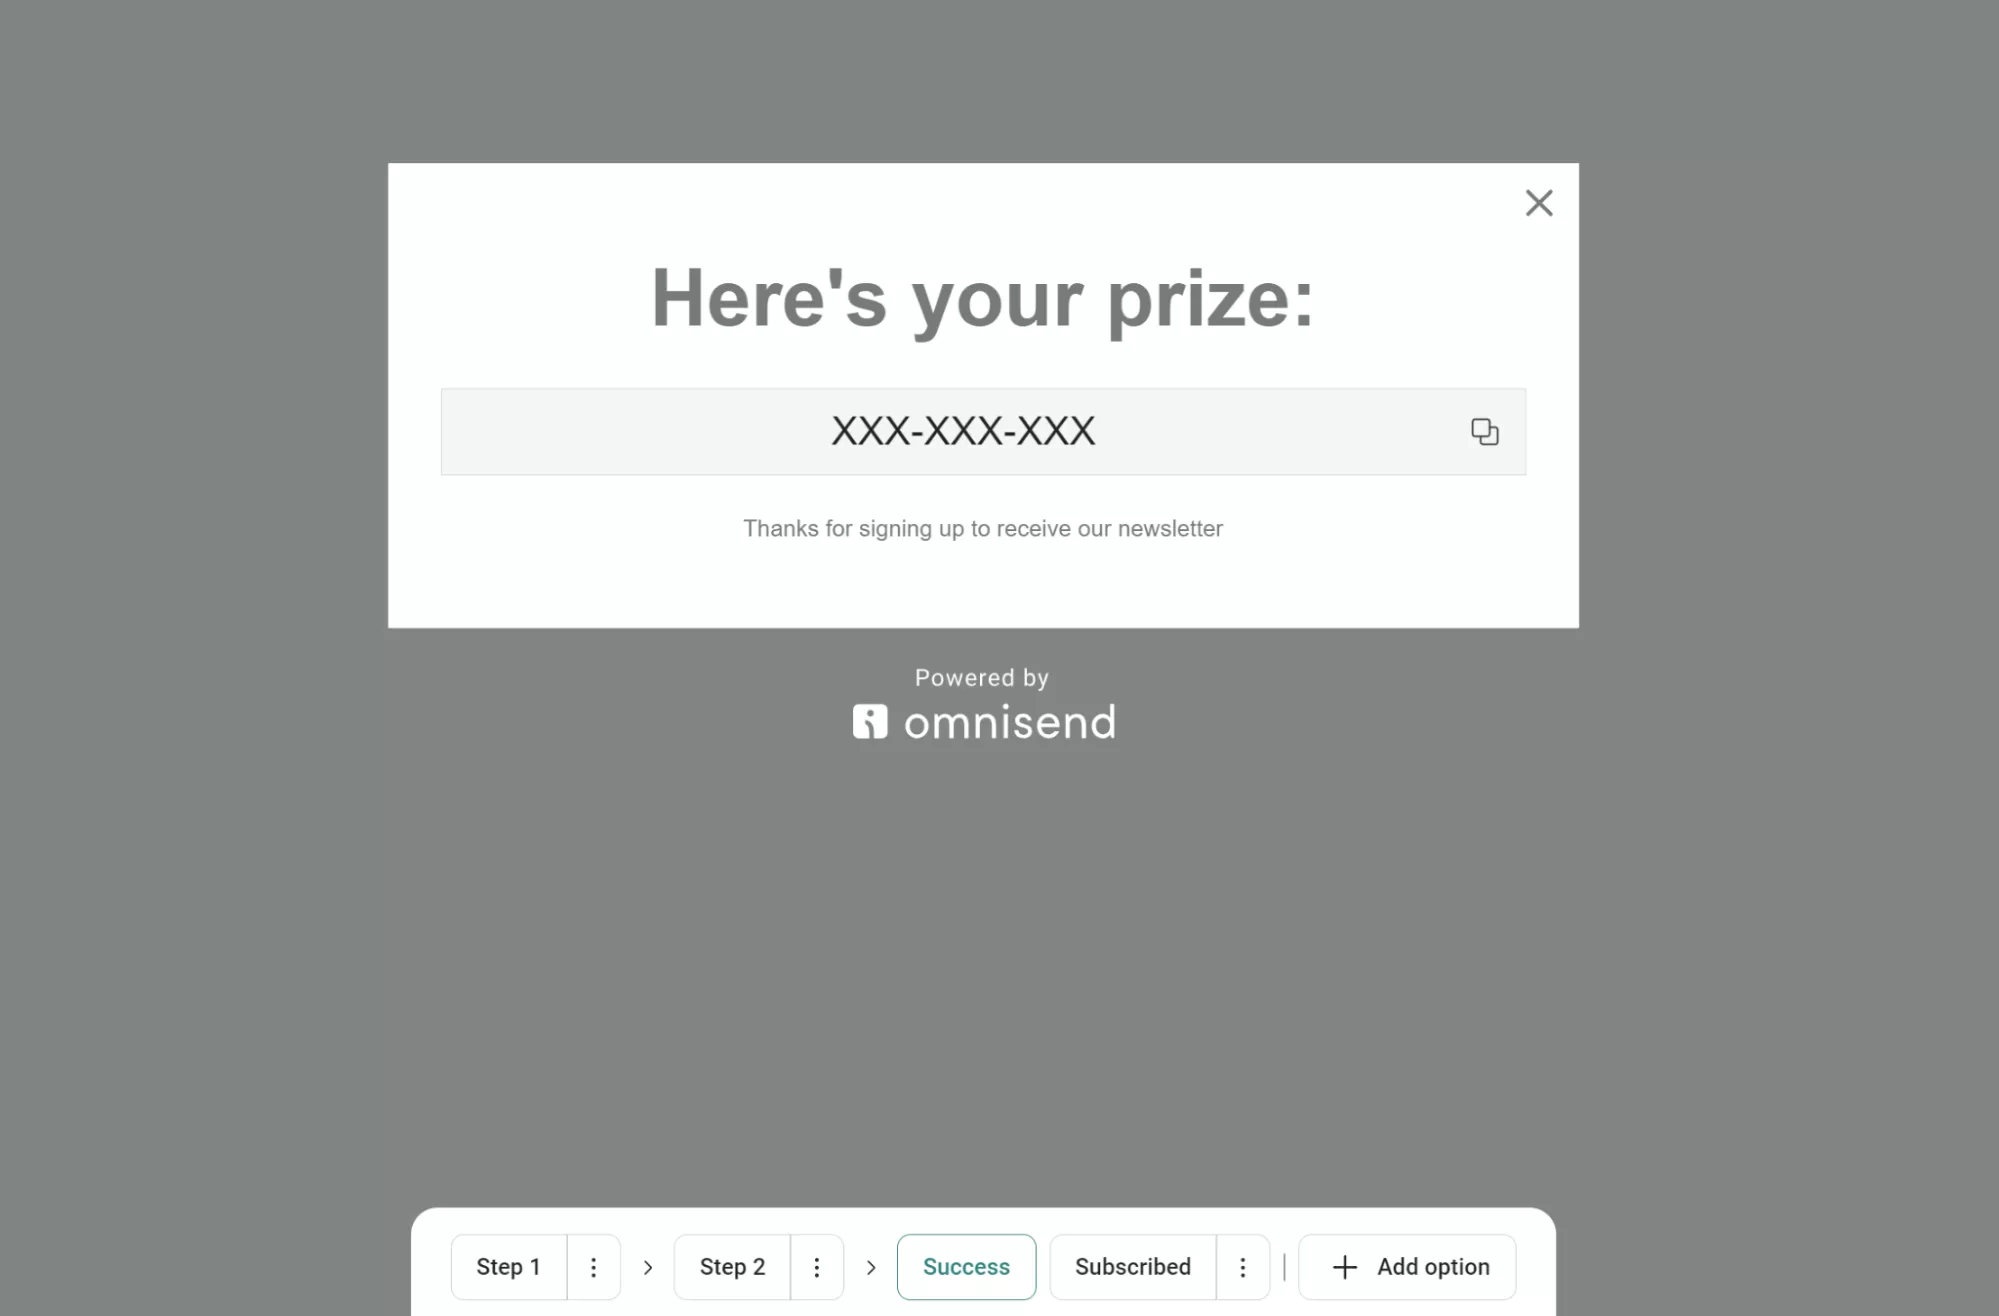
Use the Subscribed section to create a separate message for returning subscribers who are already on your list. For instance:

8. Enable A/B testing (optional)
Toggle A/B test in Behavior settings to experiment with different popup versions. Clicking A/B test will load this page:
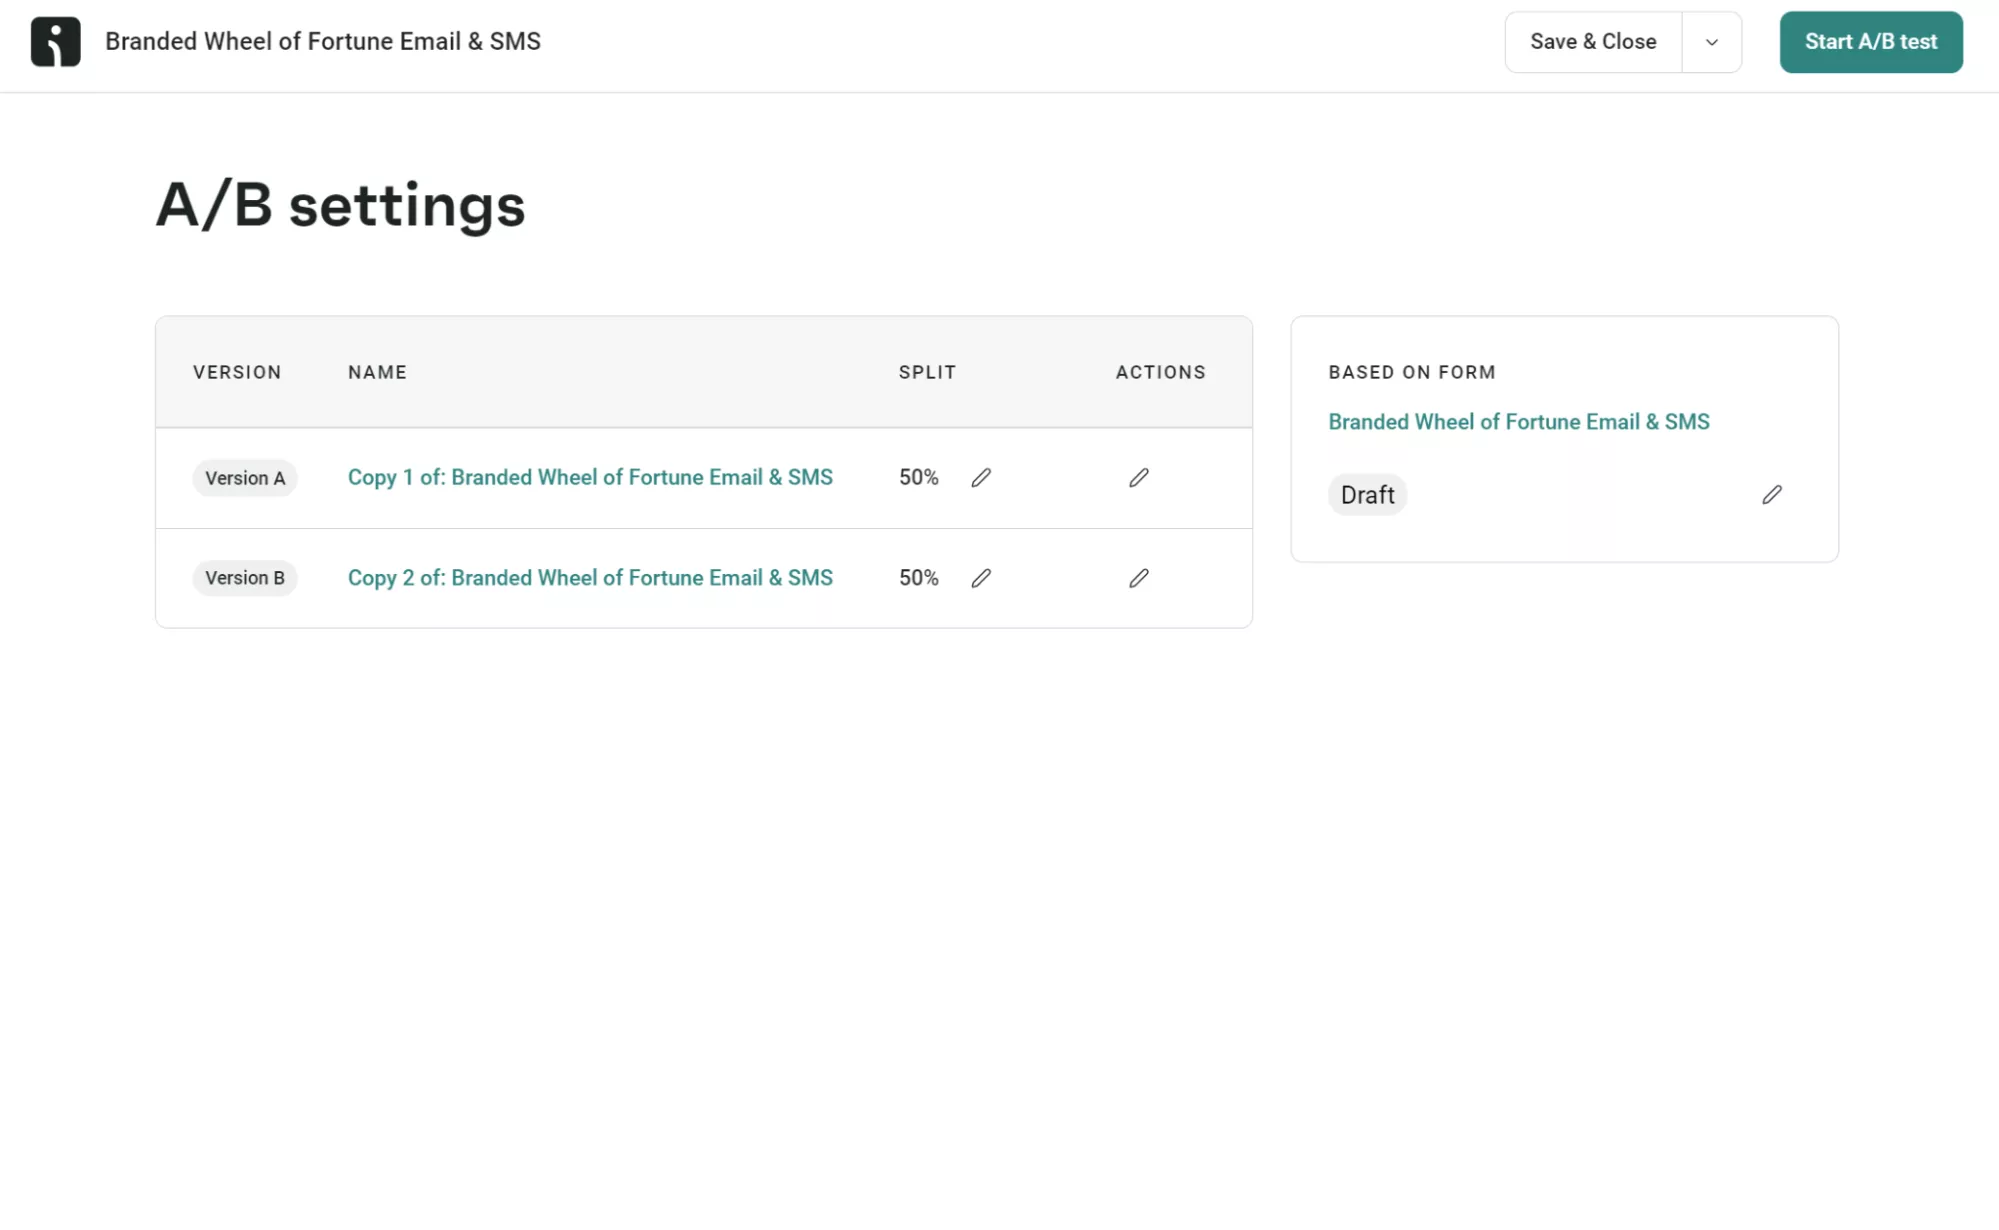
It’s best practice to test variations of content, timing, or design to optimize performance.
9. Preview and activate
Use Undo/Redo buttons (unlimited steps until page reload) to refine your design. Click Enable to make the popup live immediately or Save & Close to save as a draft — access saved forms through the Forms dashboard to monitor performance metrics:
Pro tip
While these instructions show Omnisend’s interface, most Shopify popup apps follow the same workflow — install the app, browse templates, customize design in a visual editor, configure display rules, then publish.
The buttons and menu names change between apps like Privy or OptiMonk, but you’ll find similar template libraries, drag-and-drop builders, and behavior settings in each tool.
Method 2: Adding popups with Shopify’s native Forms app
Shopify offers built-in popup features via the Forms app and the Forms theme app embed. After adding these to your theme, you can create and enable popups.
The benefit of using Shopify Forms is that it’s completely free, with no external accounts or APIs necessary. Additionally, you don’t need to leave your Shopify admin panel to create popups.
Follow these step-by-step instructions to use Shopify’s native popups:
1. Install the Forms app and enable popup display
First, let’s access Shopify Forms:
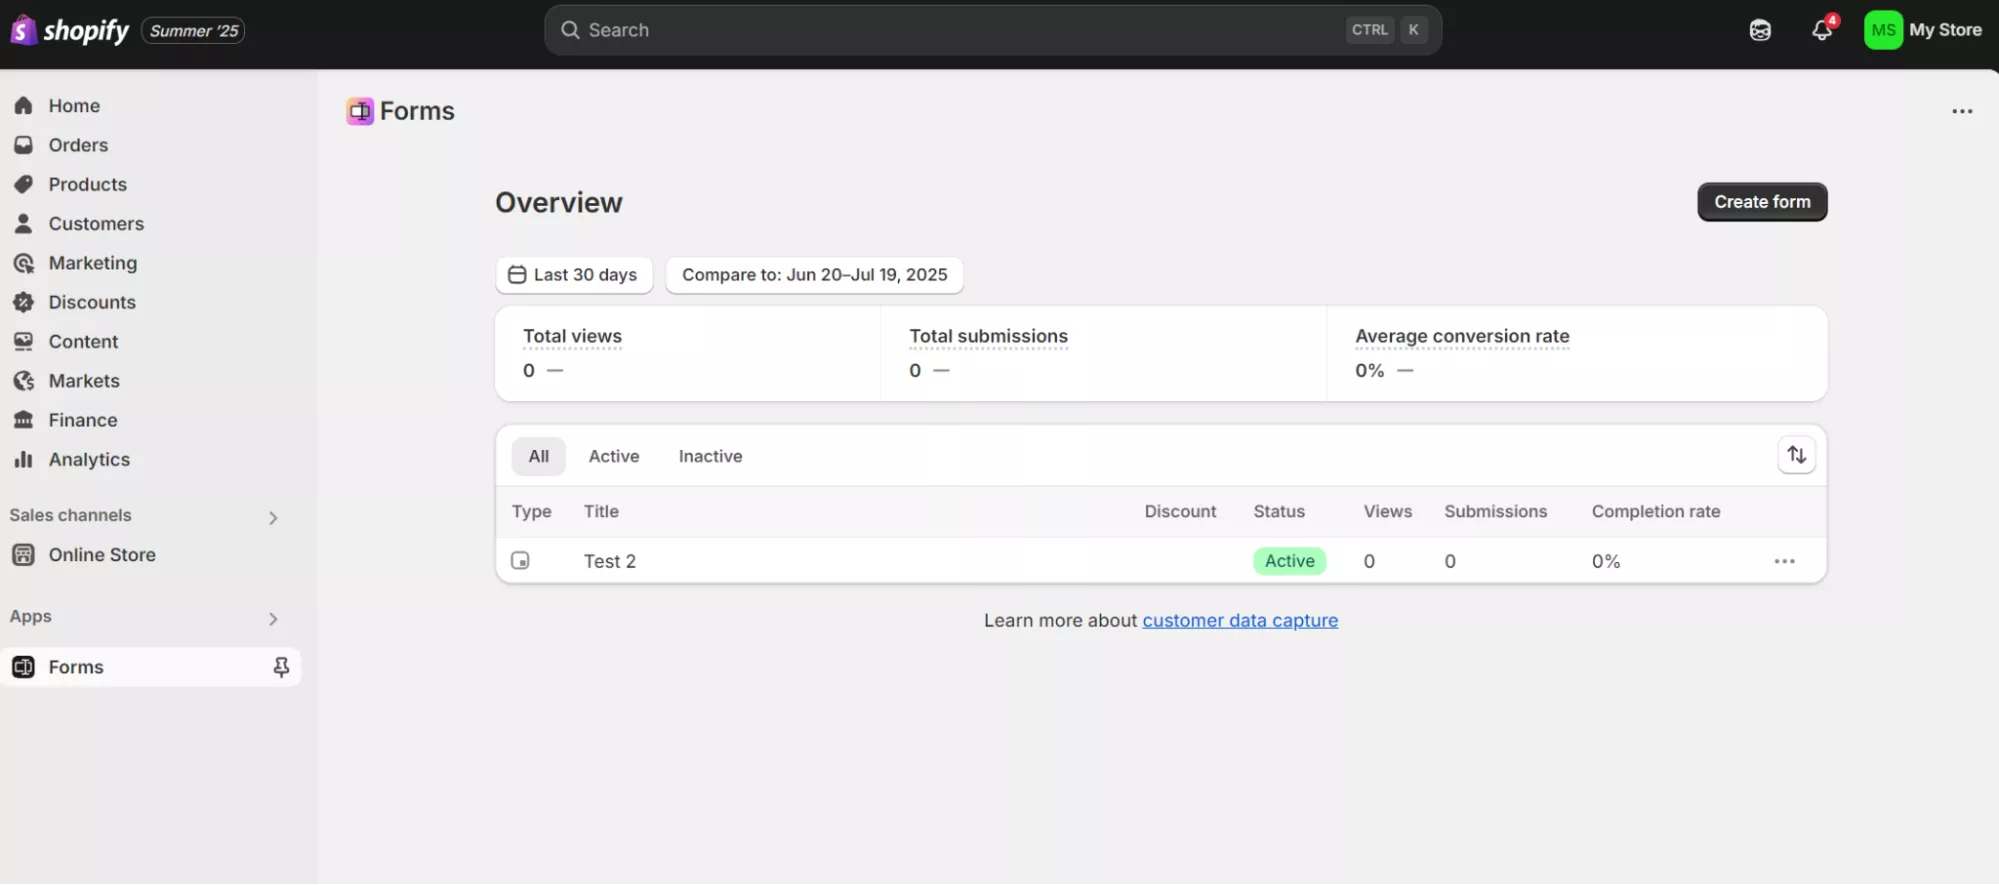
- From your Shopify admin, go to Settings > Apps
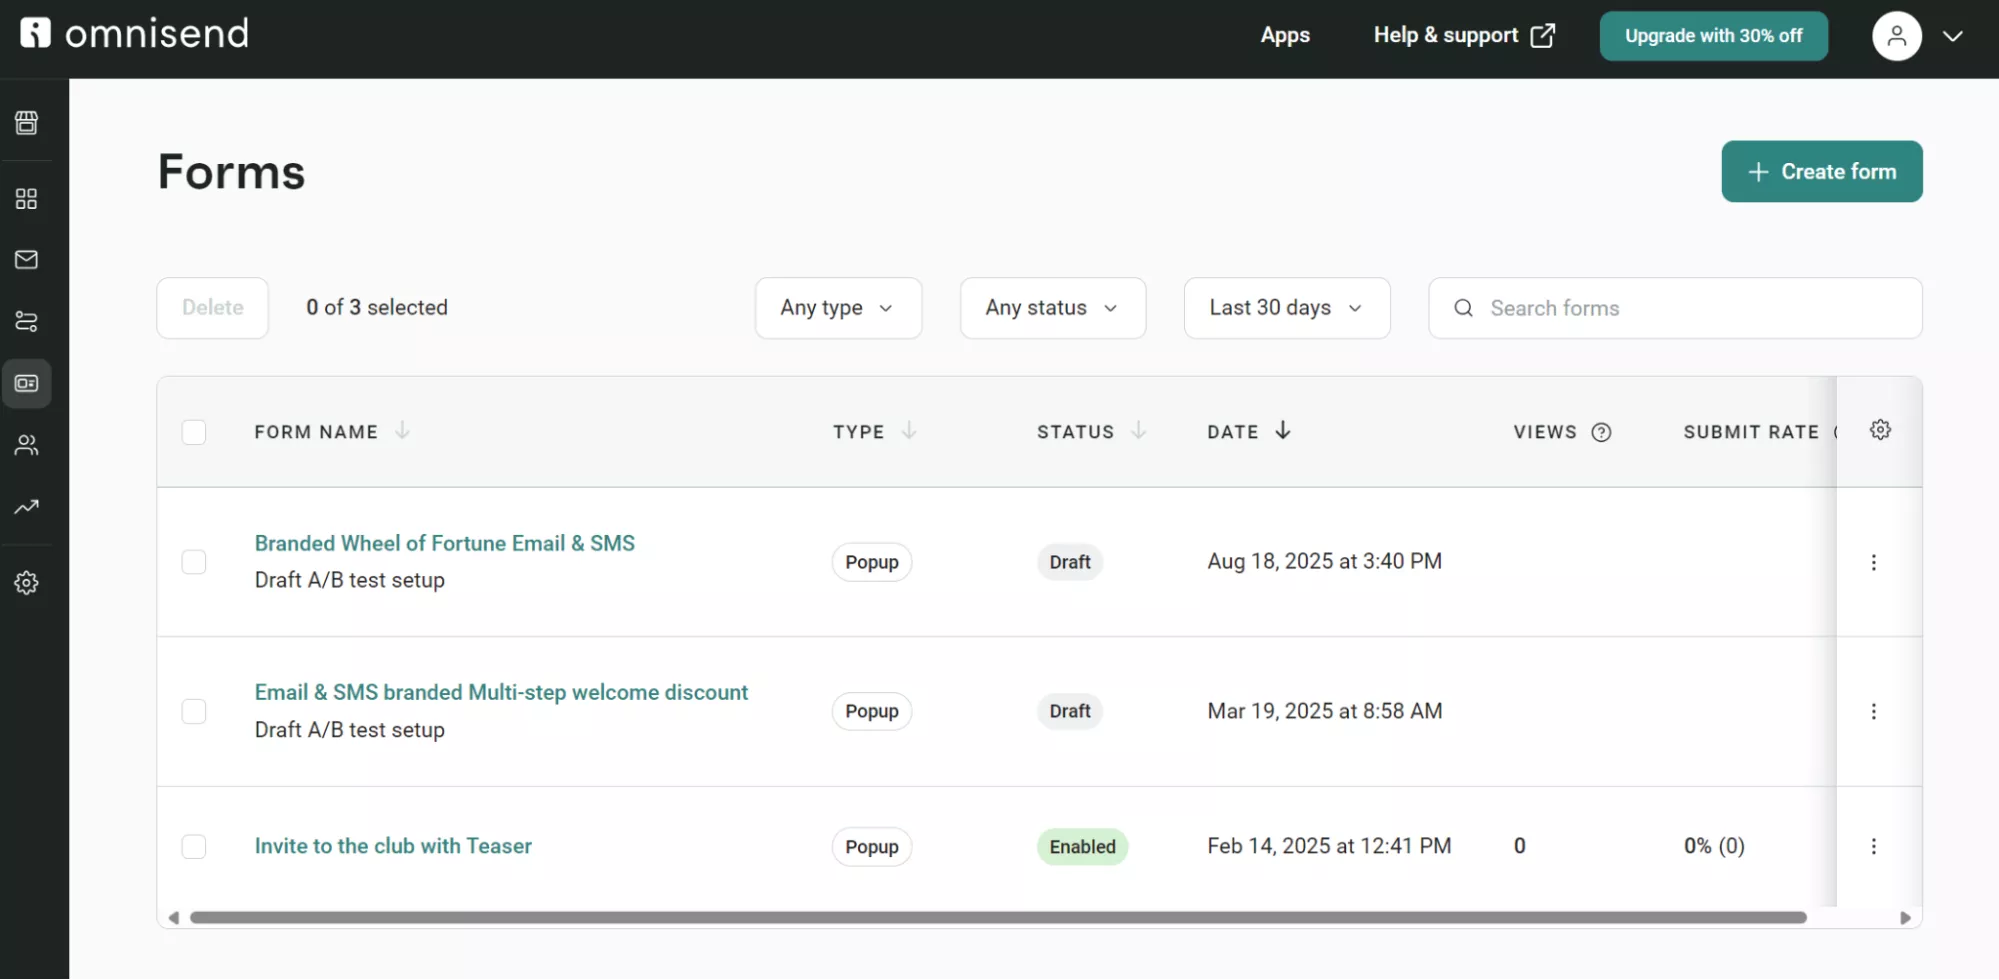
- Click Forms to open the Forms dashboard:
- Familiarize yourself with the Forms dashboard — it lists your forms, provides a status, and displays analytics, such as views and submissions
Next, enable popup display on your store:
- Navigate to Online Store > Themes:
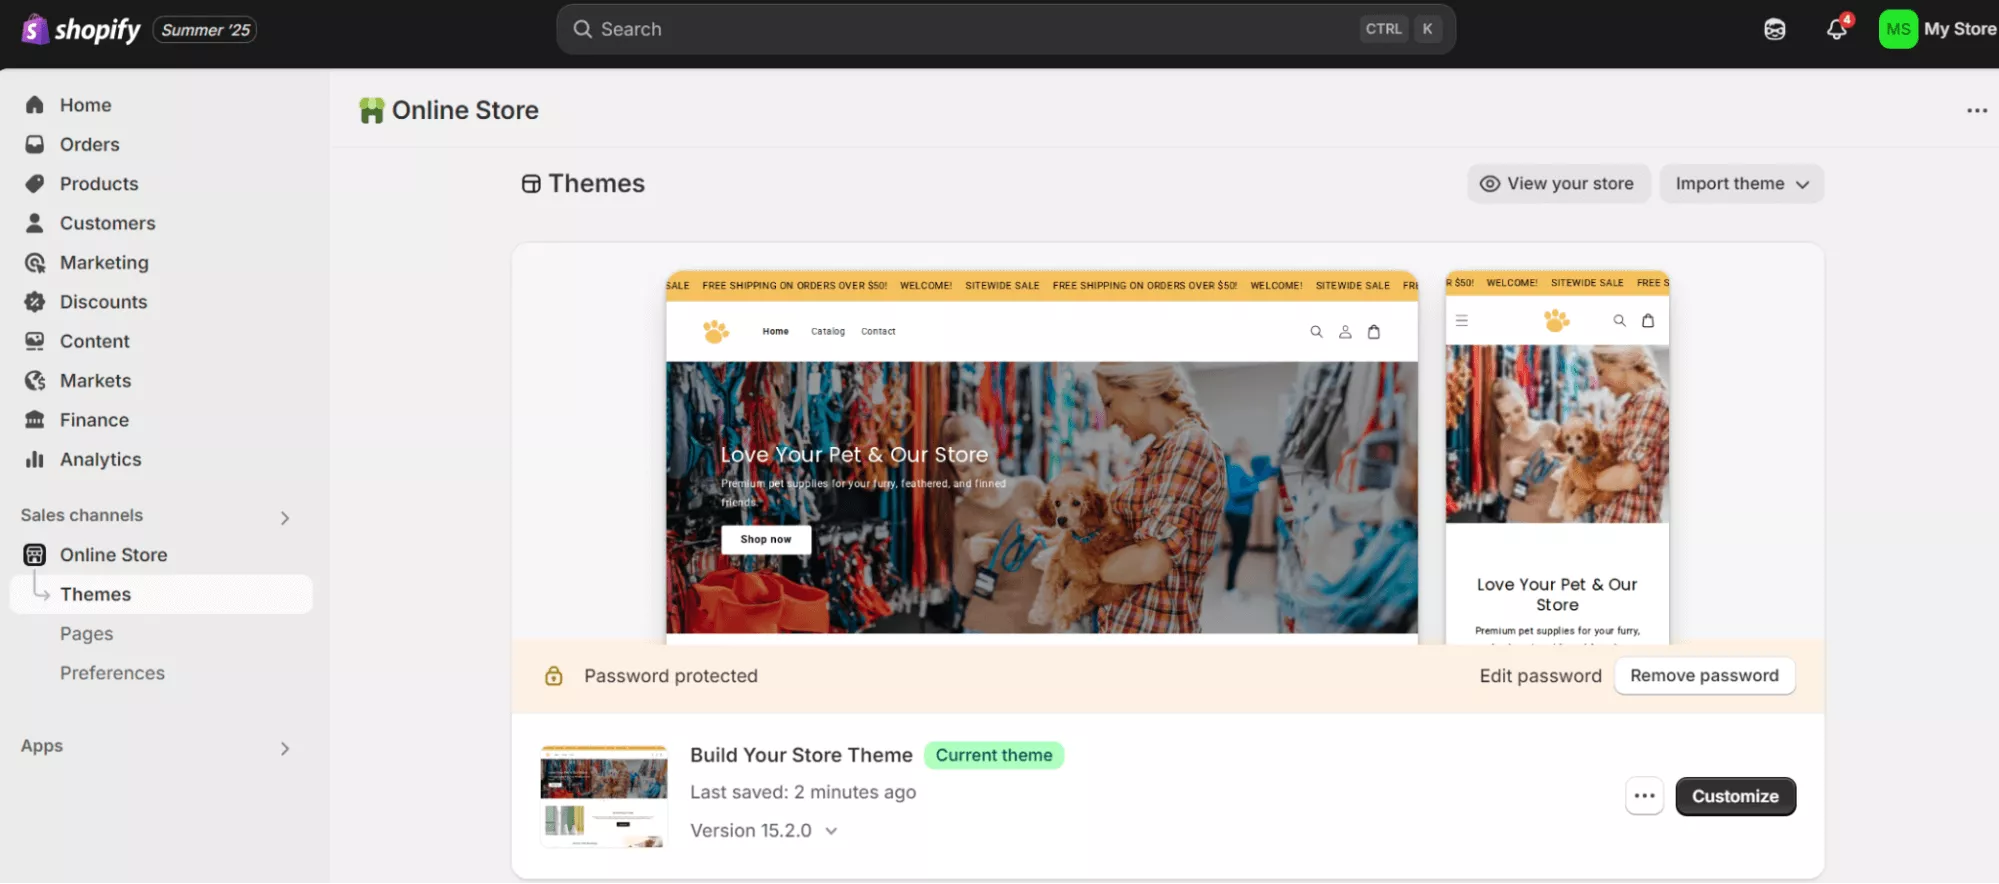
- Find your active theme and click Customize
- Click the App embeds icon in the theme editor sidebar:
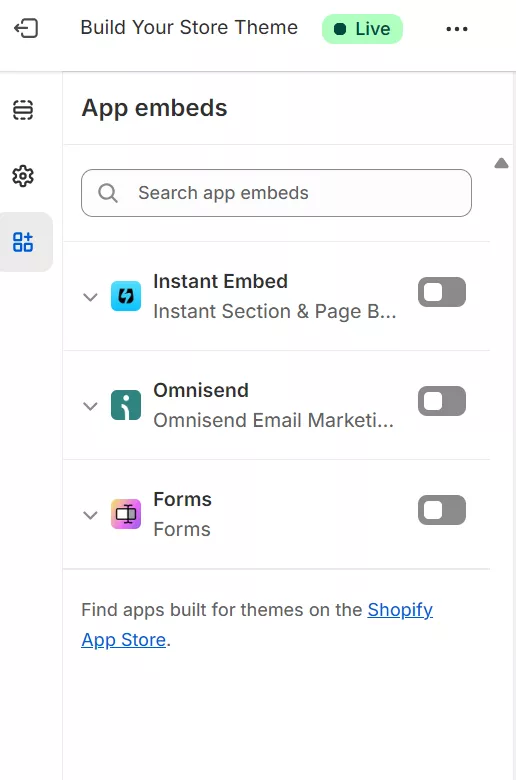
- Toggle Forms to activate it
- Click Save
Without activating the Forms theme app embed, your popups won’t display even after creation.
2. Create your popup form
From the Forms app:
- Click Create form
- Select Popup form (not Inline form):
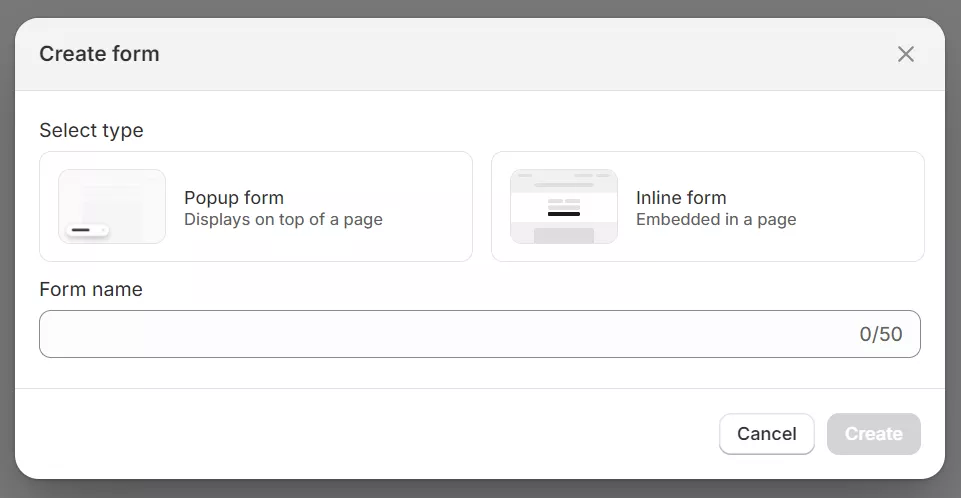
- Enter a form name (e.g., “Newsletter Signup” or “10% Off Welcome”)
- Click Create
Note: Your form opens in the editor with Active status by default — it will display immediately based on your settings.
3. Configure form display mode
You will now see this dashboard:
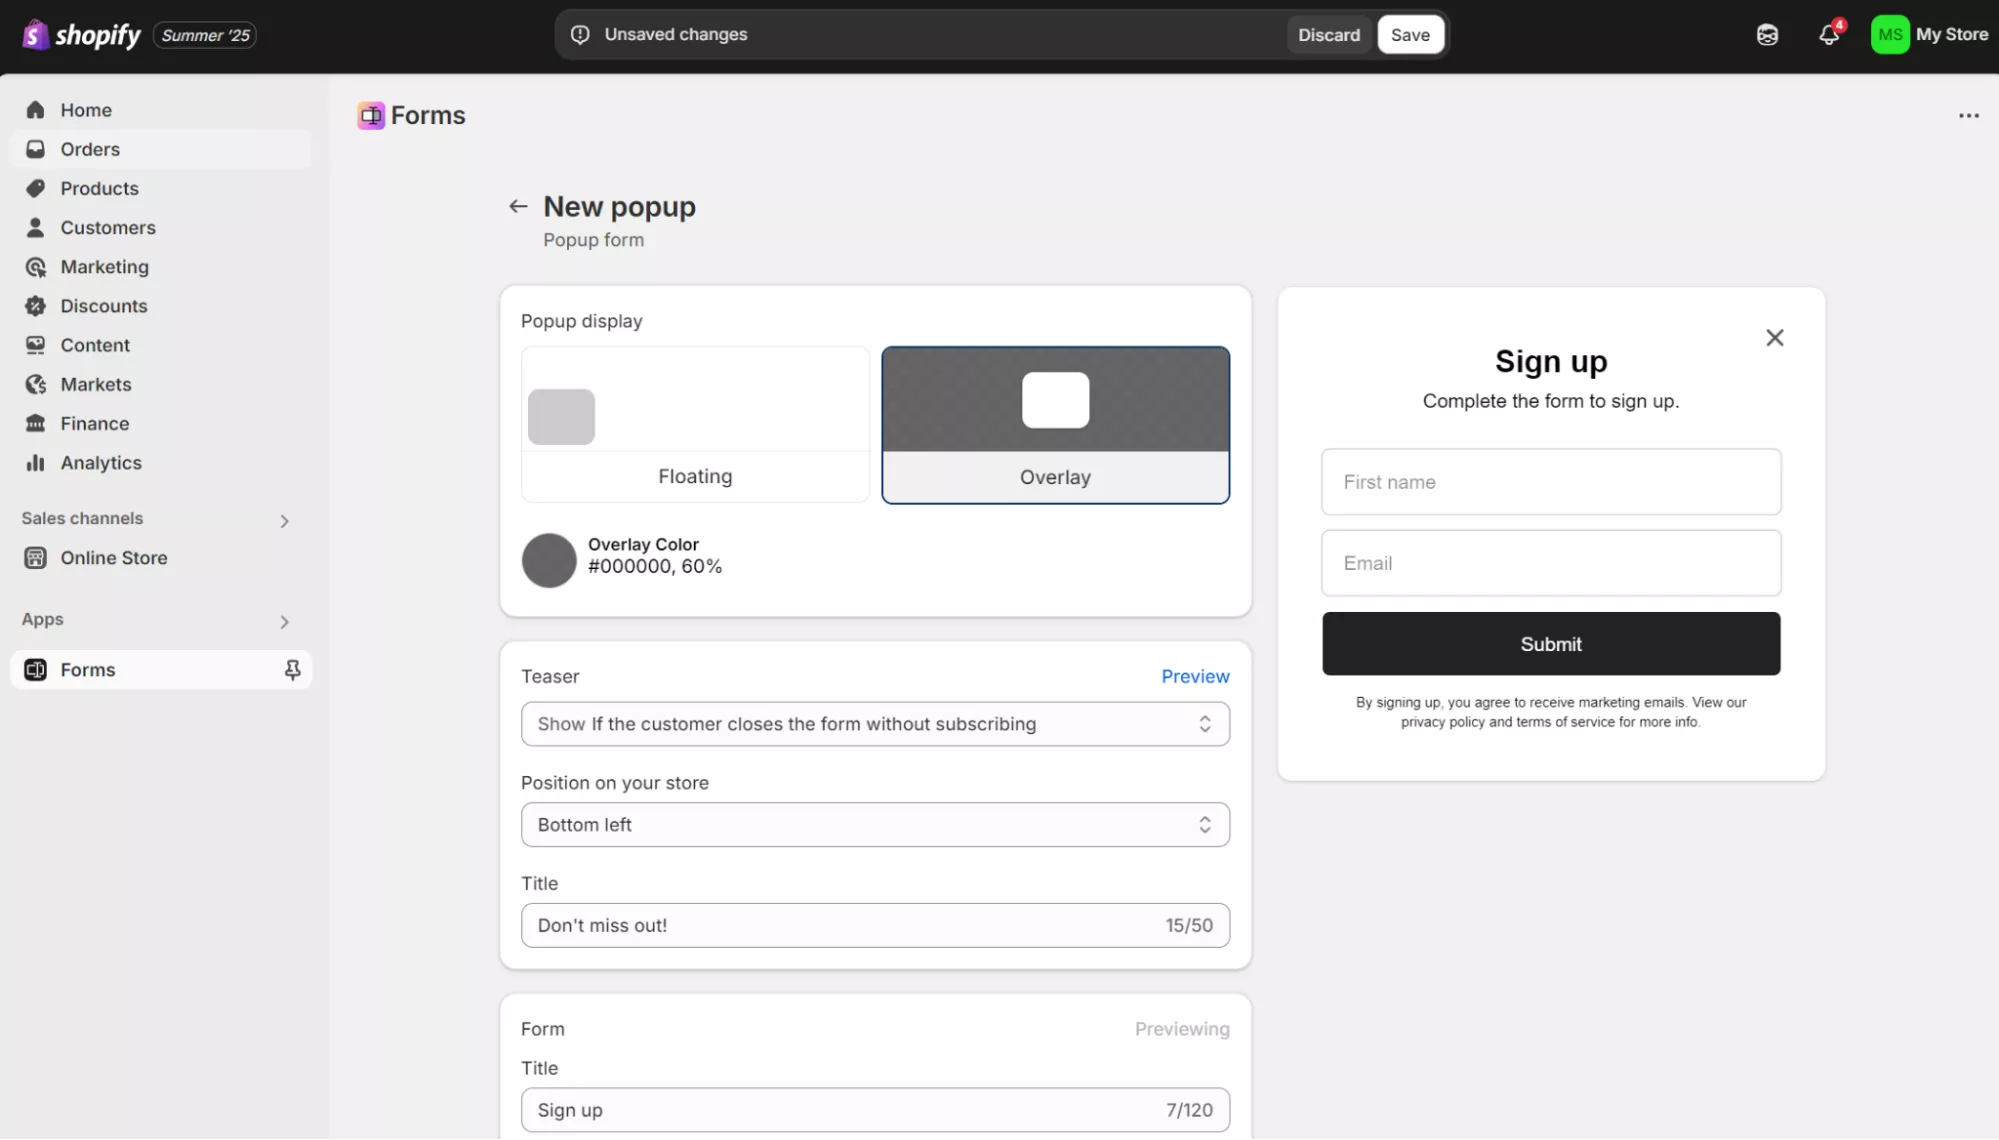
Choose between two display options:
- Floating — Form appears as a corner popup with an optional teaser
- Overlay — Form displays centered with a darkened background
For floating forms, select the position (bottom-left, bottom-right, etc.). Overlay forms always appear centered.
4. Design your popup appearance
The Styling box provides multiple settings for form customization, as shown below:

Additionally, you can edit your popup image and teaser.
Styling settings:
- Colors — Set background, text, field, button, and error message colors
- Form fields — Choose white or transparent backgrounds
- Typography — Select fonts for title and body text from available options
Image settings (optional):
- Background image — Full popup background with opacity control
- Image left/right — Side placement beside form fields
- Scale options — Control how images fit within the popup
Teaser settings (floating forms only):
- Show options — Display before form, after close, or never
- Position — Corner placement with optional rotation
- Title — Short text to attract clicks
5. Set display triggers and targeting
Shopify Forms lets you choose on which devices and pages to show your popup, plus set triggers to display on different page views:
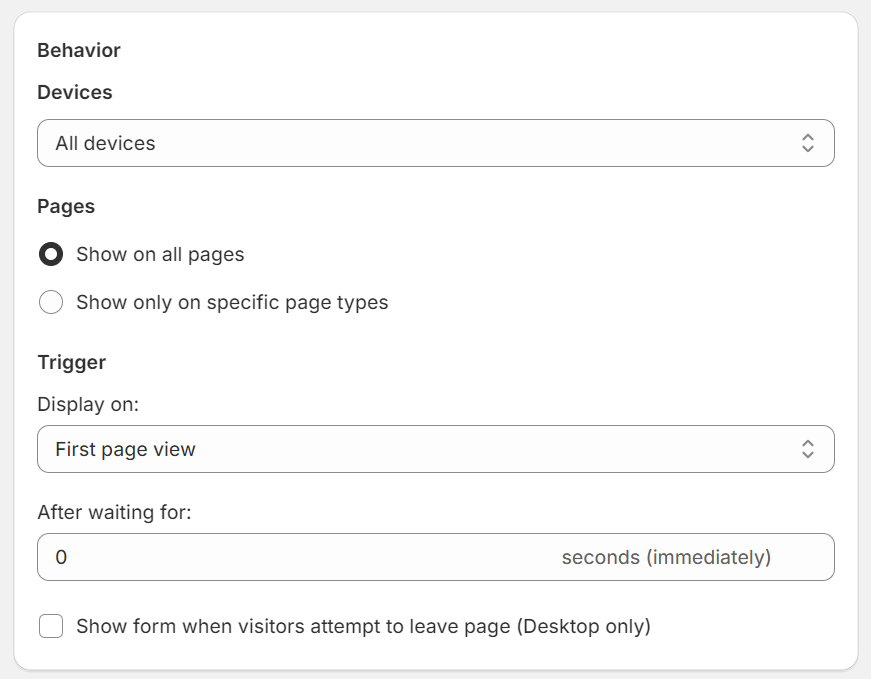
Trigger options:
- Page view count — Show on 1st, 2nd, or 3rd page view
- Time delay — Immediately or after specified seconds
- Exit intent — When the cursor moves toward the address bar (desktop only)
Visibility settings:
- Devices — All devices, desktop only, or mobile only
- Pages — All pages or specific types (product, collection, etc.)
Note: Shopify Forms cannot target specific URLs or exclude certain pages, like checkout.
6. Add form fields
Use the editor to customize fields:
- Email field (required by default)
- Additional fields like name, phone, or custom questions
- Privacy consent checkboxes for compliance
- Success message after submission
To create announcement popups without email collection, remove all form fields and add only text/images with a button.
7. Save and monitor
Click Save to activate your popup:

New forms are automatically set to Active status and begin displaying based on your configured rules. Monitor performance in the Forms app dashboard — you can view submission counts and manage multiple forms from one location.
Pro tip
While Shopify Forms handles basic popup needs, you’ll hit limitations quickly. No A/B testing means guessing what converts best. No behavioral targeting means showing the same offer to everyone.
If you need features like cart value triggers, customer segment targeting, or integration with SMS marketing, consider upgrading to a specialized app.
Method 3: Manual code addition
While Omnisend and Shopify Forms are the best ways to easily add popups to your store, you can do it manually with code.
This option is more advanced and requires coding knowledge. You should back up your theme files before making any edits or changes.
Use manual code when you need unique popup behaviors that apps can’t provide — custom animations, specific JavaScript triggers, integration with proprietary systems, or complete control over popup timing and styling.
Creating a popup form in HTML
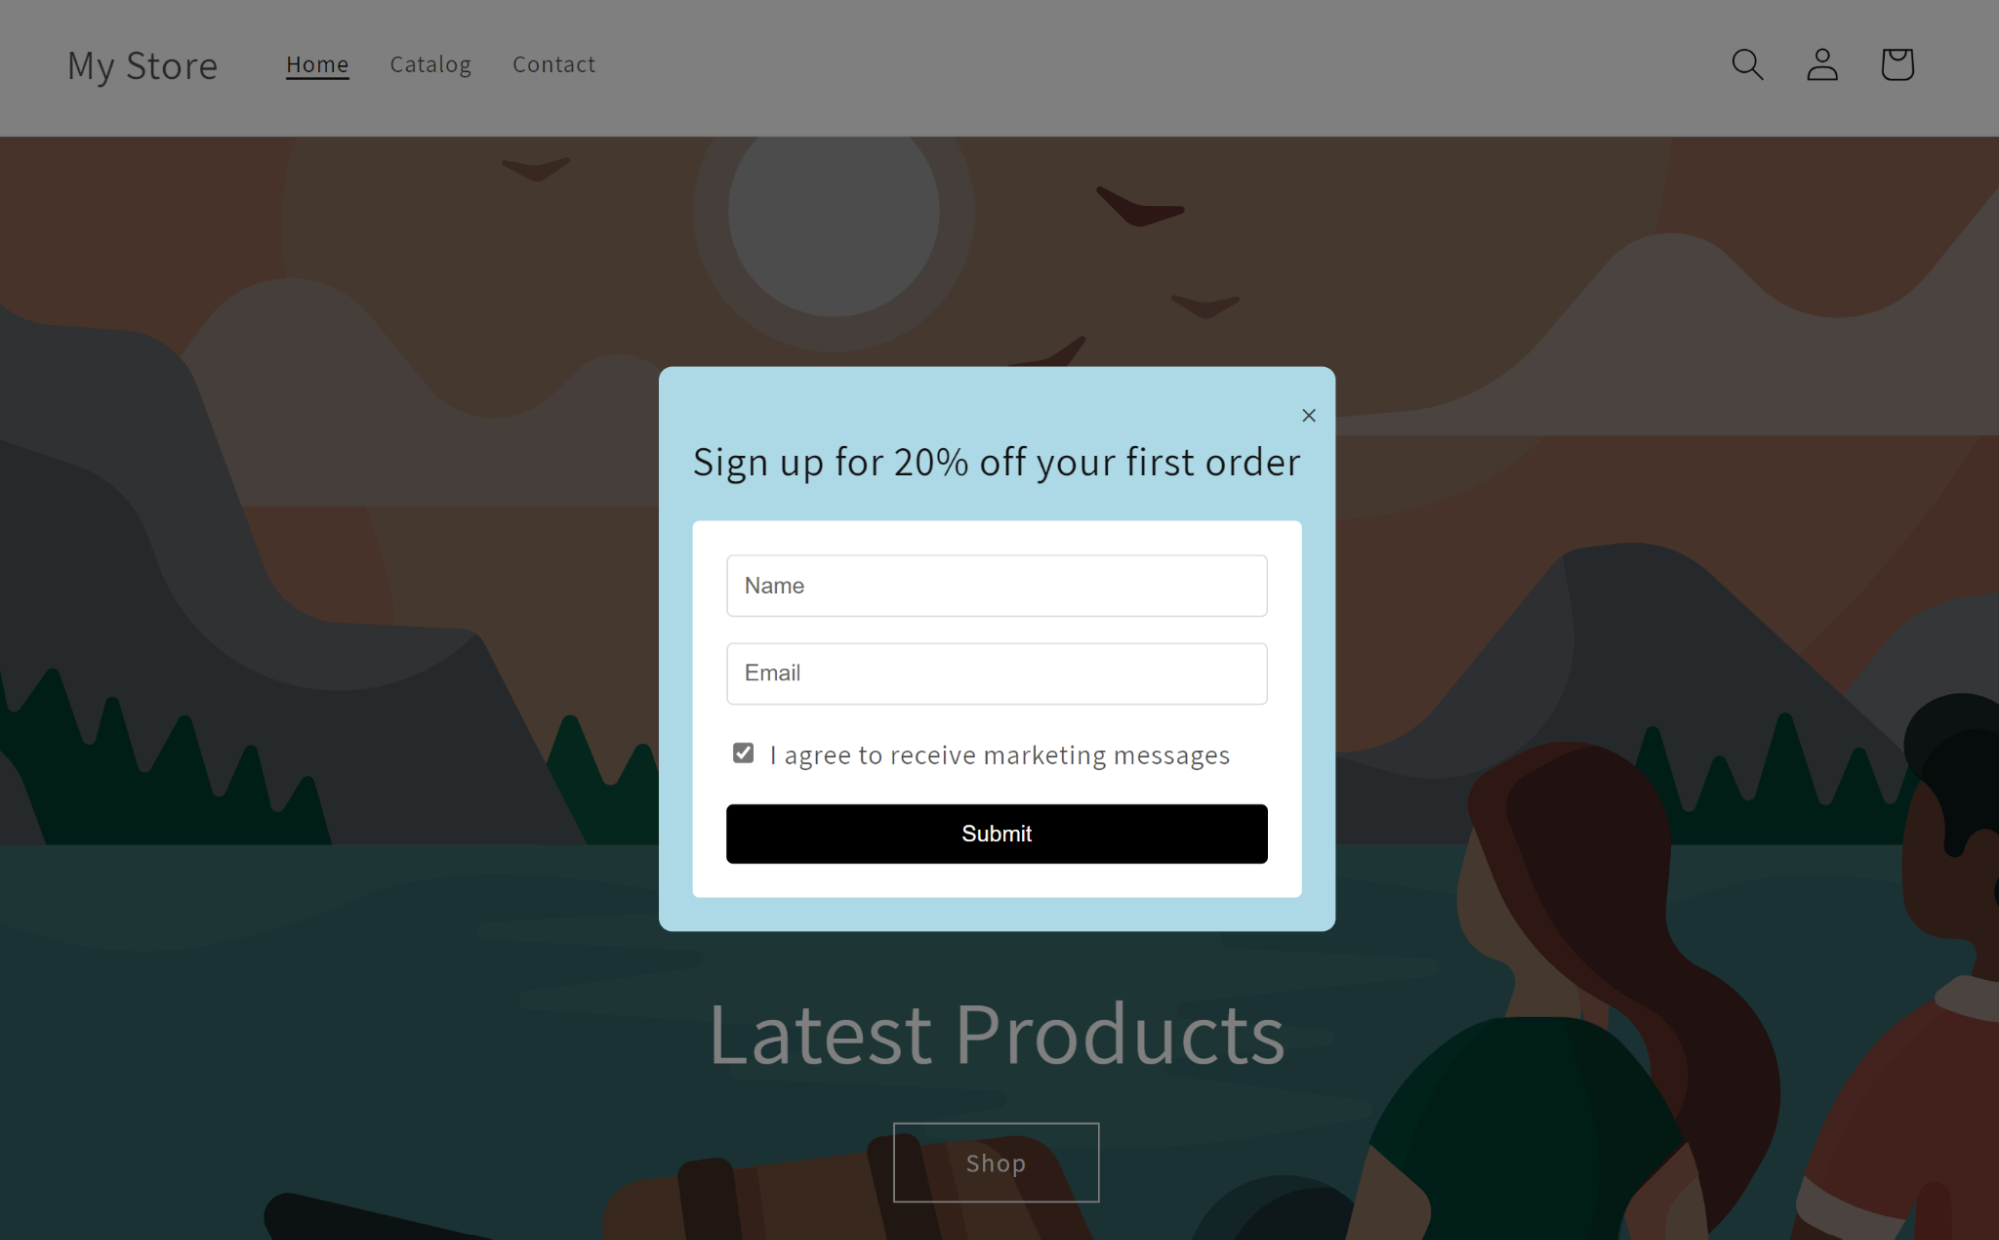
HTML is the simplest way to add a custom popup to your Shopify store. The form below was created by us and tested with the W3Schools HTML tool:
There’s a lot going on with this form to make it look the way it does. Here’s the code (feel free to grab it and reuse it):
{% schema %}
{
“name”: “Custom Popup”,
“settings”: []
}
{% endschema %}
Sign up for 20% off your first order