
Key Takeaways
- Use video-to-video AI to turn basic clips into styled, high-quality videos fast, so you stand out without a big budget or team.
- Follow a simple workflow—upload an MP4 or MOV, add a clear prompt, pick a style, then render short, well-lit footage for best results.
- Repurpose old videos into fresh stories that feel more engaging and accessible for your audience, saving time and effort.
- Experiment with bold styles like anime, cinematic, or cyberpunk to unlock eye-catching results that spark attention and shares.
Imagine if you could take bare and redundant everyday videos and turn them into beautiful film clips, cool animated shorts, and creative and engaging videos—even if you don’t have any editing skills.
You can do this with AI Video to Video Generator. Whether you are a content creator, marketer, educator, or just curious about new technologies, you can use AI Video to Video Generator. This guide, which includes steps to achieve mastery with AI Video to Video Generator and accomplish beautiful videos quickly, will guide you through.
Are you ready? Let’s go!
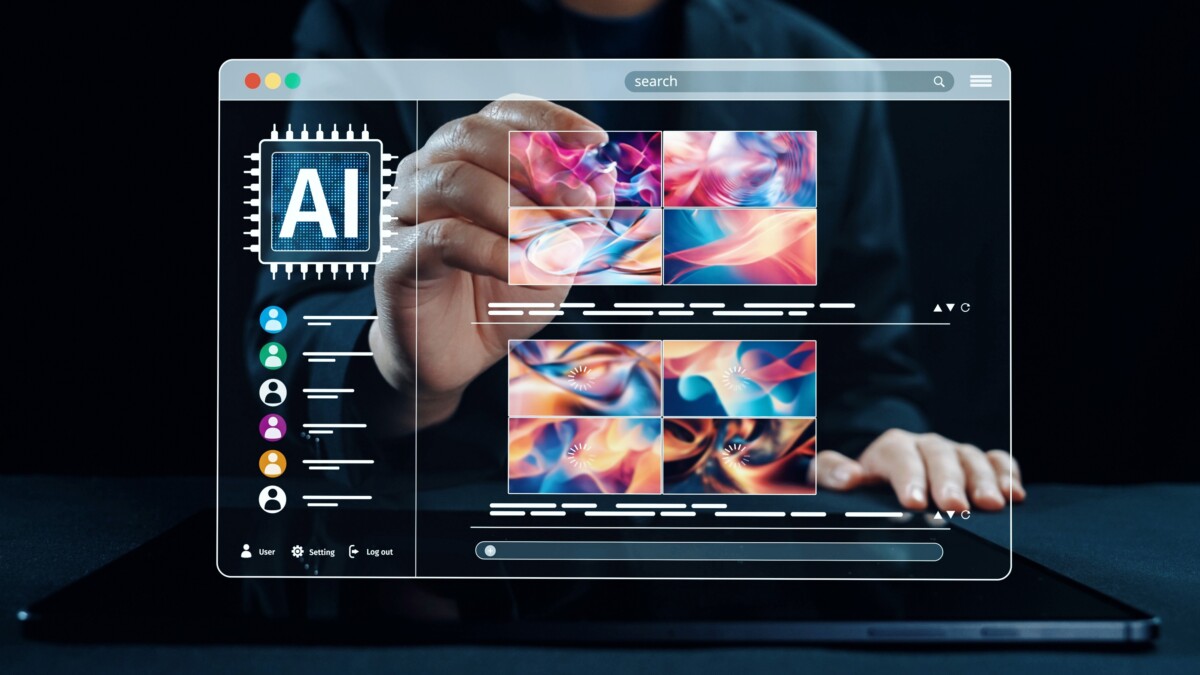
What is Video-to-Video AI Generator?
Video-to-video AI generators are powerful AI applications that can remaster your original videos into different styles, resolutions, or artistic effects. These tools work by utilizing deep learning models trained on vast datasets of images or videos, allowing them to reimagine your footage in a specific style, such as anime, cartoons, multi camera views, cinematic styles, or futuristic cyberpunk effects.
These platforms will allow you to easily create unique videos with a couple clicks, removing the hours you would spend tweaking and editing videos in complicated software packages. Most platforms are also browser-based, which allows easy accessibility and usability for the user with little to no experience with video editing.
Why use Video to Video AI Generator?
There are a number of reasons why people enjoy using these AI-enhanced video generators:
- Time Saving: AI does the editing for you, eliminating an entire time-consuming, manual task, that of editing and correcting frame by frame.
- Creative Freedom: You can quickly and easily convert average videos into high-quality masterpieces with your personal touch.
- Cost Effective: You won’t have to hire a professional video editor or subscribe to expensive software, saving you both time and money.
- No Tech Skills Required: Simple, drag-and-drop interface makes it easy for anyone even with little to no knowledge of video editing or content creation to create your very own videos.
- Content Re-purposing: Revive previous videos by applying new visual effects or quality upgrades.
Whether you are a solo creator on TikTok, a startup launching a product, or an educator teaching a class with rich visual stories, these AI-powered video generators can enhance your creative process and experiences.
Video-to-Video AI Generator Quick Start and Operation Guide
Curious about transforming regular videos into amazing works just using AI? Whether through Viddo AI or Pika Labs, these leading video-to-video generators use roughly the same workflow, so you’ll create in just a few steps. We’ll show you how to use them step by step so you can get your creative ideas into the world in a snap!
Step 1: Go to the website that supports video to video conversion
For example, go to https://viddo.ai/ and find the video-to-video page.
Step 2: Upload the video you want to edit
Most AI video-to-video platforms allow you to upload in common formats like MP4 or MOV, and you’ll want to select the videos carefully to get the best results.
Helpful tips to help generate the best results:
- Try to keep your shots stable and with good lighting when filming so that the AI can more easily “see” the details.
- Try to avoid filming in situations that have busy backgrounds or fast action, as these are more likely to create less desirable results.
- Short videos will render opportunities for results more quickly, for example under a minute videos will also usually render for less processing cost.
Step 3: Input AI prompts
This is the part of the entire creative process where you will use the most creativity. By entering text outlines into the platform, you can communicate your thoughts and visual ideas to the AI, to create the ideal video.
At this point, how detailed and how clearly you formulate your prompts will dictate the video’s final quality. You might consider:
- Describing the style: For instance, you could request an animated, cyberpunk, cartoon, or cinematic visual style.
- Stressing details: A bit of context describing scenes, actions, or colors will help the AI better and more accurately interpret your intention.
- Controlling duration and pace: Making prompts around video duration and image pacing will ensure that the video flows naturally.
Once you enter your prompts in, the AI will recreate a video in line with your instructions. You will be able to preview the result and adjust or edit the video accordingly until you are satisfied.
Step 4: Adjust style settings
Most platforms will offer some advanced settings before generating the final video, which will allow you to carefully adjust the details to make sure the final effect is more in line with your expectations.
The adjustable features usually consist of:
- Style Strength: Determines how much the AI applies stylistic alterations to the original video.
- Frame Rate: Improves smoothness, or preserves natural movement.
- Resolution: You can select either Standard (720p), HD (1080p), or UHD (4K).
- Loop & Trim: You adjust the start and end points of your video, and/or loop a short clip for easy sharing on social media.
- Audio: You can choose to keep the original sound on, mute it, and/or incorporate AI-generated background music.
In case you are not sure how to modify it you should simply use the default setting first, and then use it and adjust it to your choice as you become familiar with it.
Note: Some platforms will have Seed options. Using the same seed value allows you to keep the style and appearance of the characters in the video as consistent as possible, which is very effective for creating series or maintaining visual coherence.
Step 5: Generate and preview the video
Next, click the button “Generate” to start the AI working on your video.
This process could take from just a minute to 20 minutes or more, depending on your platform and the size of your video. Some tools will queue rendering, while others will render your video in real time.
Most tools would do this by providing you with a preview or lower resolution results of your video for you to check your results. When you are exporting the final high-resolution file, make sure you have checked the preview for the style and effect you were expecting.
Step 6: Download and distribute your new video
When rendering is complete, you will be able to download the video to your local computer.
You can then conveniently share or publish it to your favorite sites such as:
- TikTok, YouTube Shorts, or Instagram Reels
- A personal portfolio or creative project
- A presentation or online learning course
- A product demonstration or marketing ad
By utilizing these sites, you can share your creative work with more and more people, generating more value for your AI video production.
Limitations to note
Like any type of technology, AI video generators have their limitations:
Style effects may not be perfect: some styles may cause non-realistic distortions to faces or objects.
- Limitations in free version: Free versions will often be comprised of watermarks or an output resolution that is not full quality.
- Rendering times: rendering may take longer in processes of larger or higher resolution videos.
- Limited control: users are limited in control over details of the video process compared to manual editing.
- Privacy: whenever uploading sensitive content on cloud-based services, be cautious of data security/privacy issues.
Conclusion
Thanks to Video to Video AI Generator, you can easily convert a simple video into a high-quality video in a couple of clicks, even without any prior editing experience. If your passion is to increase exposure on social media, express your creativity, or just see what magic AI could work with your simple video, this is the way to go.
Go ahead and try a simple video, experiment with some styles and visual effects and see how far you and AI can stretch your creativity. No technical skills are needed, and in just a few clicks you can quickly produce professional quality videos, simply making it easier and more fun to create than before.
Frequently Asked Questions
How can video-to-video AI improve ROI for my Shopify store?
Video-to-video AI lets you turn basic product clips into high-quality, styled videos in minutes, which can lift engagement and conversion. The article highlights time savings, no need for pro editors, and browser-based tools that cut costs while speeding output. Use short, well-lit clips and clear prompts to ship more tests faster, then double down on the variants that convert.
What are the best first steps to implement video-to-video AI on a small team?
Start with a simple workflow: upload an MP4 or MOV, write a clear prompt, choose a style, and render short clips. The guide stresses keeping footage steady and well lit, and avoiding busy backgrounds for cleaner results. Run A/B tests on 15–30 second product demos and lifestyle shots to find a winning look before scaling.
Can I repurpose older product videos without reshooting?
Yes, the article notes you can “revive previous videos” by applying new visual styles or quality upgrades. Take old unboxings or how-tos and restyle them into cinematic, anime, or clean modern looks. This stretches your content budget and gives you fresh ads and PDP assets fast.
Do I need editing skills or expensive software to get good results?
No, most tools are browser-based with drag-and-drop interfaces, and they remove hours of manual editing. The guide positions this as cost effective for creators without pro skills or software subscriptions. You still need clear prompts and decent source footage to keep outputs on brand.
What styles work best for ecommerce product videos?
The article mentions anime, cartoons, multi-camera looks, cinematic, and cyberpunk effects; for Shopify, start with clean cinematic or subtle stylization for trust. Use bolder styles for top-of-funnel ads to grab attention, then switch to polished, product-first looks on PDPs and email. Keep brand consistency in color and mood across variants.
How do I write prompts that produce on-brand videos?
Tie each prompt to your product and visual goal: “clean cinematic lighting, soft shadows, neutral background; highlight texture of knit sweater; 24fps look.” The guide stresses that clarity and detail in prompts drive better results. Include do’s and don’ts like “avoid busy backgrounds, keep natural skin tones.”
What are the main limitations I should plan around?
Fast action and busy backgrounds reduce quality, and longer videos cost more time and compute to render. The article recommends short clips (under a minute) for speed and lower processing cost. Plan storyboards with stable shots and simple scenes to keep outputs crisp.
Where in the funnel should I deploy AI-styled videos first?
Use bold styles for awareness on TikTok and paid social to earn the scroll, as the article notes these tools create unique looks quickly. For consideration and conversion, apply subtle upgrades that enhance clarity and detail in product features. Repurpose the same source clip into multiple variants for each stage.
How can I maintain brand trust while using heavy stylization?
Match the style to your brand’s visual language and keep footage steady, well lit, and product-forward, as the guide advises. Pair stylized hero shots with close-ups that show true color, texture, and fit. Always test a control vs. stylized variant to protect conversion.
What practical workflow should a Shopify team follow weekly?
Batch-shoot steady, well-lit 15–30 second clips for 3–5 products, then upload and render 3 style variants per clip. Use clear prompts, export, and run quick ad tests on TikTok or Meta while adding the best performer to your PDP. The article’s tips on short, clean footage and browser-based tools make this fast and repeatable.