
Quick Decision Framework
- Who This Is For: Shopify merchants, designers, agencies, and freelancers who want total creative control over their storefront without giving up Shopify’s backend power – specifically anyone who has hit the design ceiling of standard Shopify themes or the ecommerce ceiling of Webflow’s native store.
- Skip If: You are pre-launch, running a simple catalog with no growth ambitions, or unwilling to manage three separate subscriptions. Come back when design differentiation or ecommerce scalability is actively limiting your business.
- Key Benefit: Understand exactly how a Webflow and Shopify integration works in practice so you can make a confident build or hold decision before committing time and budget to a headless setup.
- What You’ll Need: An active Shopify store, a Webflow account, and access to a connection tool like Shopyflow. Familiarity with Webflow’s CMS and basic comfort with custom attributes will speed up your setup significantly.
- Time to Complete: 8 to 10 minutes to read; 4 to 8 hours to complete a first working integration if you decide to proceed.
The brands that win on design and commerce in 2026 are not choosing between a beautiful storefront and a powerful backend. They are running both.
What You’ll Learn
- Why Shopify’s design limitations and Webflow’s ecommerce limitations each create real business problems that the other platform solves.
- How headless commerce works in plain language and why no-code tools have made it accessible without a developer.
- What the four-phase integration workflow actually looks like, from CMS sync to checkout and analytics tracking.
- Which types of businesses benefit most from this setup and which should wait.
- How the three options – Shopify alone, Webflow alone, and both together – compare across the features that matter most for growing stores.
Building an online store often forces you into an unfair trade-off. Pick Shopify, and you get rock-solid ecommerce features like payments, inventory tracking, and order management. But your store ends up looking like every other Shopify site, boxed into rigid templates.
Pick Webflow, and you get total design freedom to craft a store that truly reflects your brand. But the moment you need customer accounts, subscriptions, or multi-currency support, you hit a wall.
More and more brands have stopped choosing sides. They use Webflow and Shopify together, pairing Webflow’s visual design power with Shopify’s backend muscle. The result? A store that looks exactly how you want it to and runs on the most trusted ecommerce engine in the world.
We’ll break down why this Webflow Shopify combo works, how the integration actually functions, and who benefits most from this kind of setup.
Why Shopify Alone Isn’t Enough for Design-Focused Brands
Every brand that sells online knows Shopify. It handles payments, shipping, taxes, inventory, and checkout better than almost anything else out there. With thousands of apps in its ecosystem, you can add just about any feature you need. Over 4.8 million stores run on it, and for good reason.
But Shopify has a weak spot that design-focused brands feel right away: creative control.
Shopify themes give you a starting point, but they box you in fast. Want to build a fully custom product page with unique scroll effects, layered sections, and brand-specific layouts? You’ll need to learn Shopify’s Liquid templating language or hire a developer who knows it. For designers and agencies used to working visually, that slows everything down.
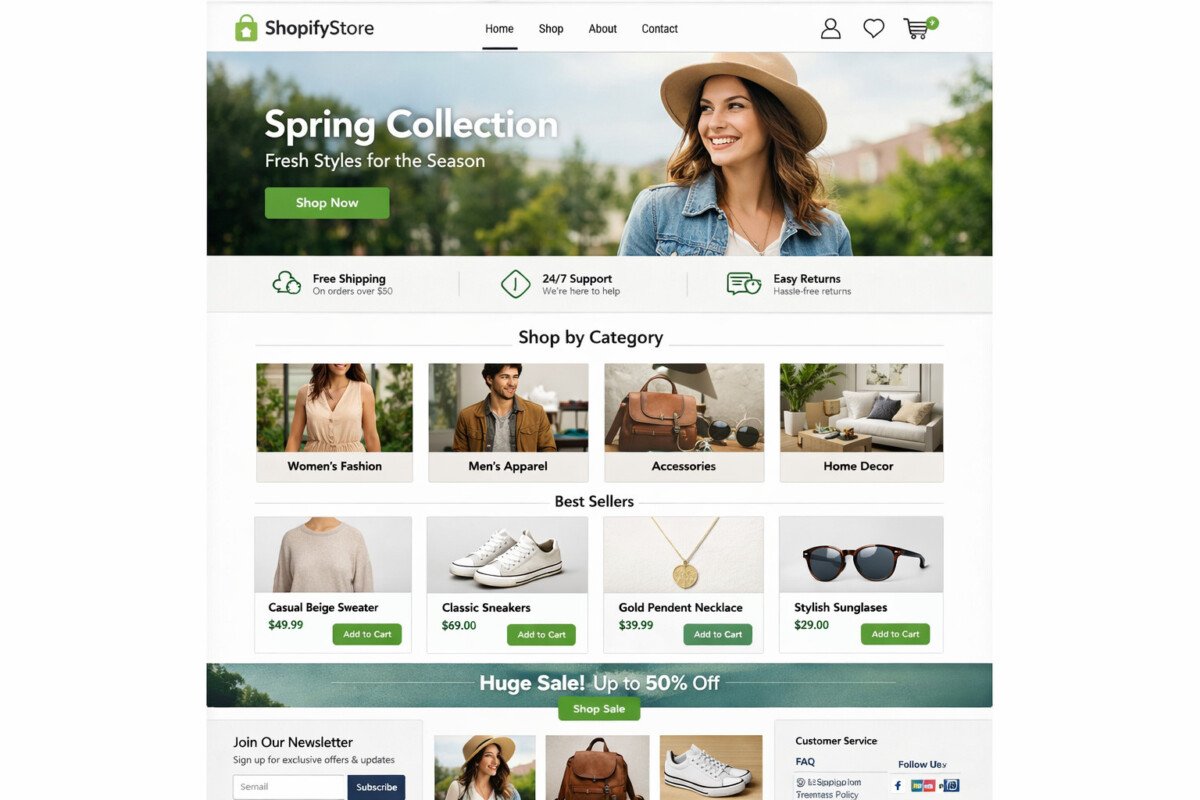
Most Shopify stores end up looking similar. Same grid layouts. Same product card styles. Same header and footer structure. If your brand competes on aesthetics, storytelling, or experience, those design limits can stop you from standing out.
That doesn’t mean Shopify is the wrong choice. It means Shopify alone might not be enough.
Why Webflow Alone Isn’t Enough for Serious Ecommerce

Webflow gives designers something Shopify can’t: complete visual control. You can build any layout you want, add custom animations, and design every page from scratch without writing code. For portfolios and content-heavy brands, Webflow is hard to beat.
But when you try to run a real online store on Webflow’s built-in ecommerce, problems show up fast.
Webflow’s ecommerce plans cap you at 3,000 items on the Plus plan and 15,000 on Advanced. That sounds like enough on paper, but the Webflow Designer starts slowing down well before you hit those numbers. Webflow did launch customer accounts and added basic multi-currency and subscription features recently. But they stay far behind what Shopify offers. There’s no swap, pause, or skip options for subscriptions. No deep loyalty program integration. No advanced discount logic. For anything beyond a simple setup, you feel the gaps quickly.
If you sell a small catalog with straightforward needs, Webflow ecommerce does the job. But once your store grows and your customers expect more, you run into limits everywhere.
Giving up Webflow’s design freedom feels wrong though, and you don’t have to.
The Best of Both Worlds: Using Webflow as Your Shopify Storefront
The Shopify vs Webflow debate usually ends with someone picking a side. But Shopify wins at running a store and Webflow wins at designing one. Why not use both?
That’s exactly what headless commerce lets you do. The idea is simple. You separate the frontend (what your customers see and interact with) from the backend (where you manage orders, payments, and inventory). Webflow becomes your storefront. Shopify becomes your engine. If you want to go deeper on the architecture behind this approach, the unauthorized guide to headless commerce on Shopify covers the full spectrum of options including Hydrogen builds, agency-led setups, and FEaaS platforms.
Your customers browse, shop, and add to cart on a Webflow site that looks and feels exactly the way you designed it. When they’re ready to pay, Shopify takes over with its secure, PCI-compliant checkout. Behind the scenes, Shopify keeps handling inventory, shipping, taxes, and order tracking like it always does.
A few years ago, setting this up required custom development and serious technical know-how. That’s not the case anymore. Tools like Shopyflow now handle the Webflow to Shopify connection without code. You install the app on both platforms, link your accounts, and your Shopify products sync directly into Webflow’s CMS. The sync runs in real time, so if a product sells out on Shopify, it shows as out of stock on your Webflow site automatically. No APIs to configure. No developers needed. You will work with custom attributes in Webflow, but that’s a far cry from writing actual code.
Designers, agencies, and store owners can now get full creative control without giving up Shopify’s power on the backend.
What This Integration Actually Looks Like in Practice
Setting up a Webflow Shopify integration used to require a developer. Today, it follows a clear workflow with four phases. Here’s how the headless build actually works in practice.
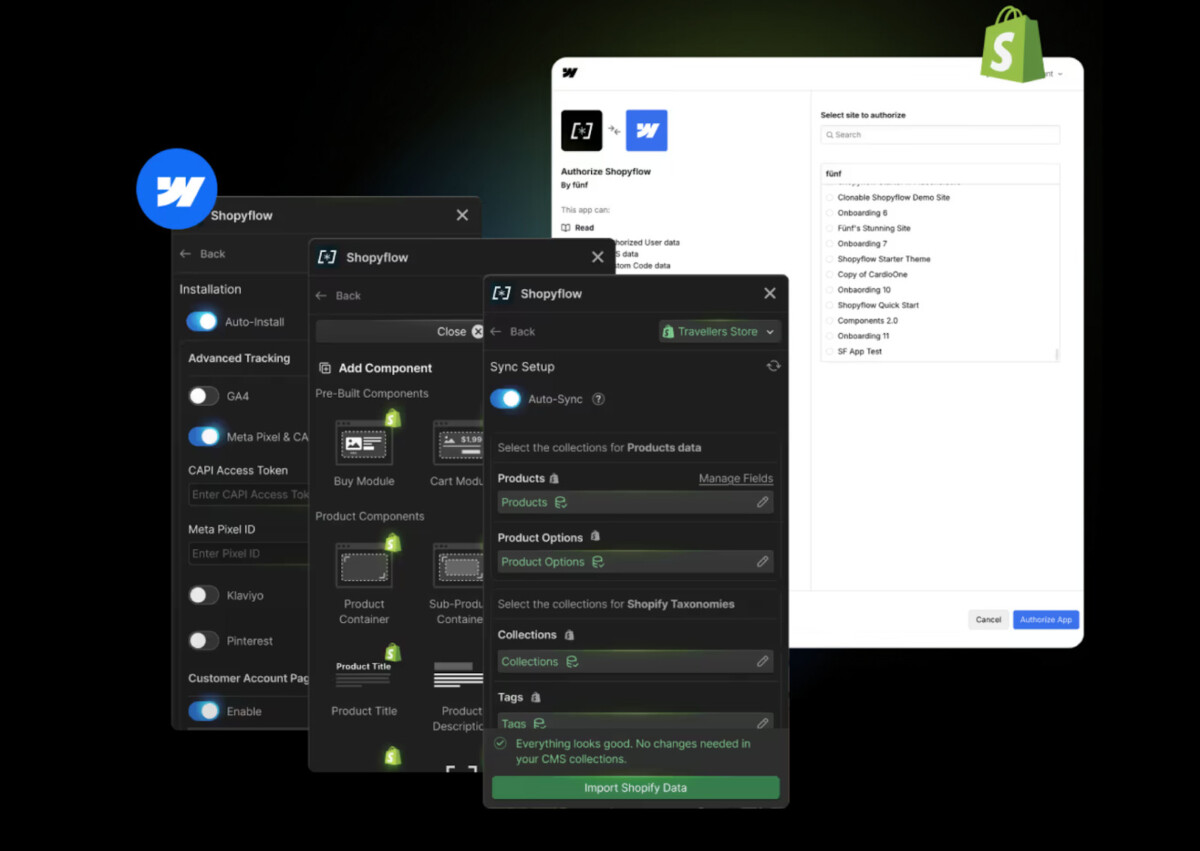
Phase 1: The Data Sync
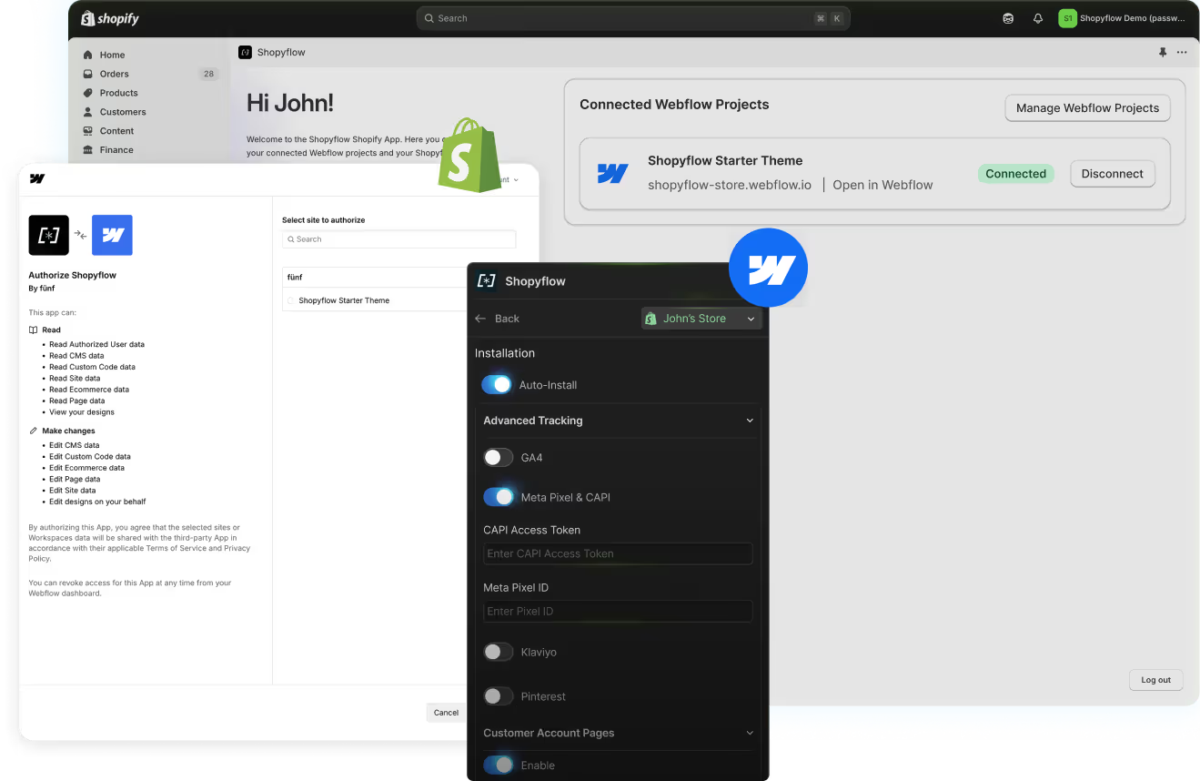
Everything starts by installing the app on your Shopify store and the companion app in Webflow. Once connected, you don’t move products over by hand. Instead, you set up a CMS mapping.
You tell the system which Shopify fields go where in Webflow. Product title goes into the Name field. Price goes into a text field. And so on. Shopyflow then handles the sync automatically. Every variant, image, and inventory level shows up in Webflow. If a product sells out on Shopify, the add-to-cart button on your Webflow site disables itself in real time.
Phase 2: Building with Custom Attributes
This is where the setup gets interesting. You don’t write Javascript. Instead, you use custom attributes, which are small text snippets you attach to Webflow elements.
Want a button to work as an add to cart button? You add an attribute like sf-add-to-cart. Want a text block to display the price? Add sf-show-price. That’s it.
This tells Webflow what Shopify data to pull into each design element. You get total design freedom because you’re not stuck using a pre-styled widget. You can turn a plain div block or even a complex animation into a working buy button.
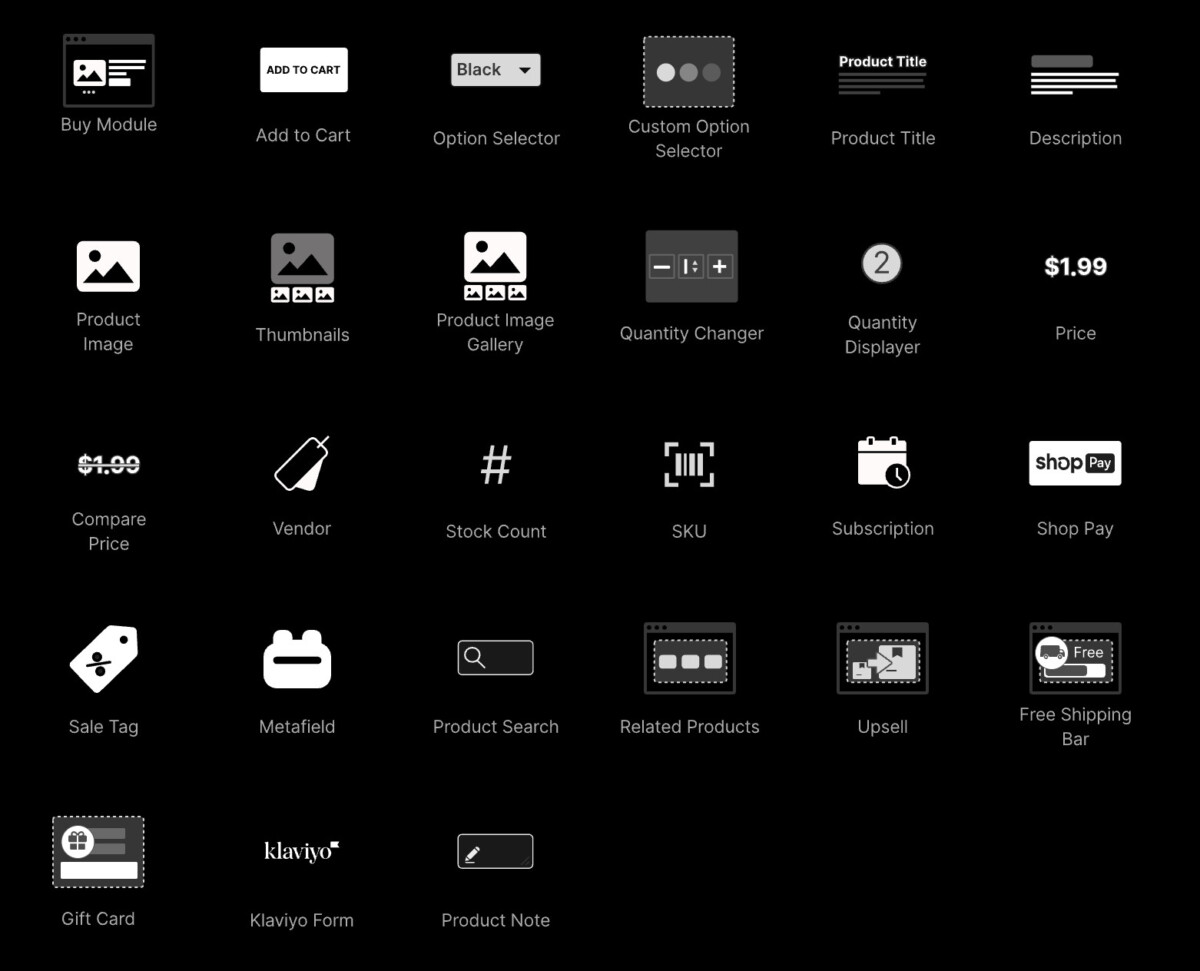
Phase 3: Using the Component Library
You don’t have to start from scratch either. The integration comes with a library of pre-built headless components. These are structural pieces like a cart pop-up that slides in from the side and stays updated as users browse. Option selectors for sizes and colors. Search and filter tools that let customers sort by price or category without reloading the page.
You copy these into Webflow, paste them into your project, and style them to match your brand using the Webflow Style Panel.
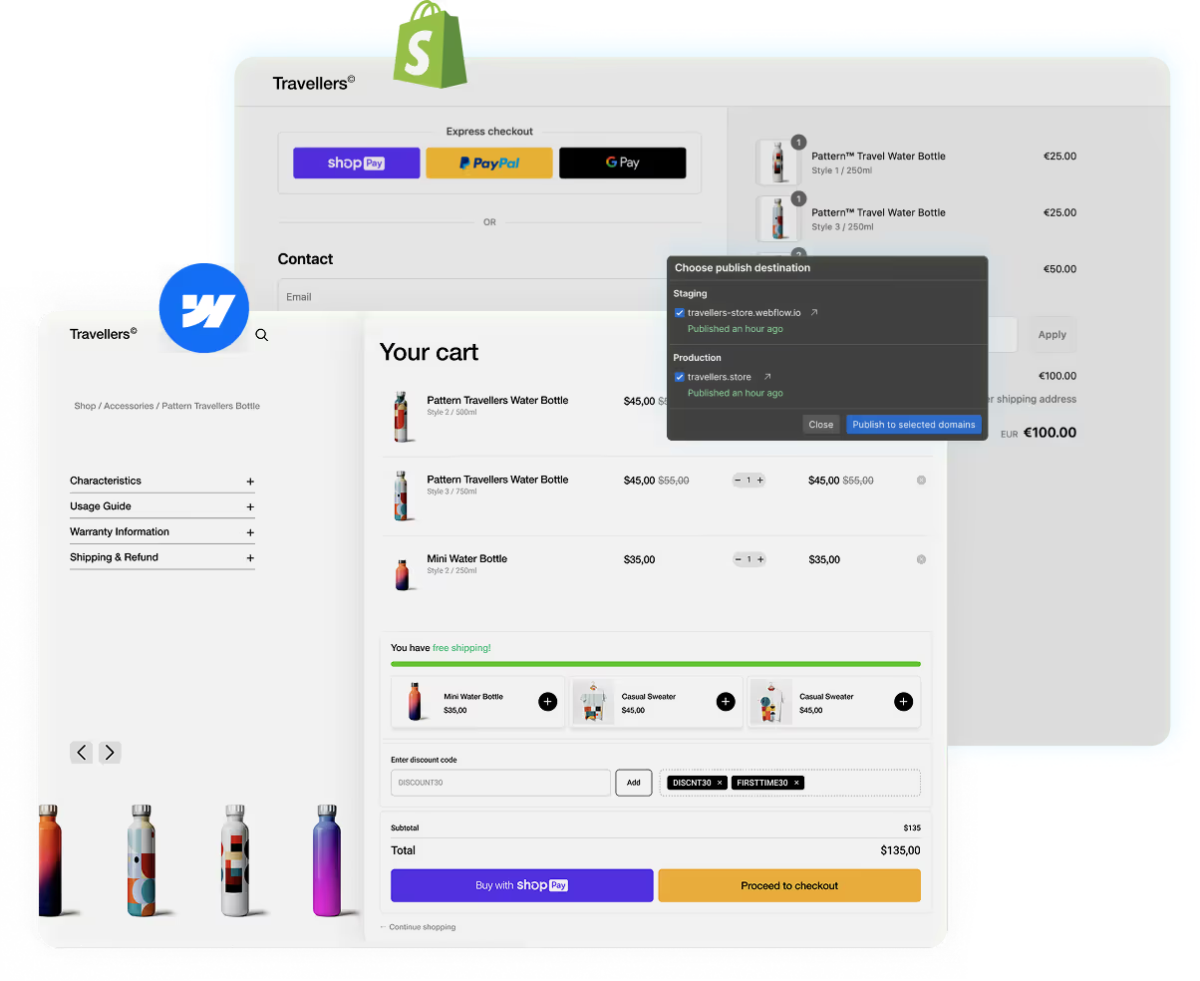
Phase 4: Checkout and Payments
The biggest worry with hybrid stores is the jump to checkout. In this setup, that jump feels invisible. Your customer browses and shops on your Webflow site, adds items to a custom-designed cart, and only hits Shopify’s checkout when they click the checkout button.
Because you’re using Shopify’s native checkout, your store supports Shop Pay, Apple Pay, and Google Pay out of the box. These one-tap payment options can increase conversion rates by up to 50% compared to standard guest checkouts. If you want to understand the full range of friction points that kill checkout performance, the guide on 7 checkout frictions killing Shopify conversion walks through exactly what to fix and in what order. After the order goes through, the customer lands back on your Webflow thank-you page.
Built-in Analytics Tracking
Tracking is usually the most painful part of headless commerce. Normally, you’d have to manually code add to cart events, set up cross-domain tracking between your storefront and checkout, and wire up each platform individually. With this setup, tracking comes baked in. The app sends data to GA4, Meta Pixel and Conversions API, Shopify Analytics, Klaviyo, TikTok, Pinterest, Reddit, and Google Merchant Center, all out of the box. It follows the entire customer journey from viewing a product on Webflow to completing a purchase on Shopify, so your marketing data stays accurate even across domains. And because Meta CAPI sends conversion data server-side, your attribution doesn’t break when browsers block cookies.
It also integrates with review platforms like Judge.me, Okendo, and Junip, so your social proof works just like it would on a native Shopify theme without any custom development.
Who Benefits Most from a Webflow-Shopify Setup?
This setup isn’t for everyone. But for certain people, it solves problems that neither platform can fix on its own.
Designers and Agencies
If you build stores for clients, you know the frustration. Shopify gives you a solid backend but forces you into themes and Liquid code when a client wants something custom. With a Webflow and Shopify setup, you design freely in Webflow and let Shopify do what it does best behind the scenes. You deliver a store that looks nothing like a template, and your client still gets the full Shopify dashboard for managing orders, inventory, and fulfillment. For agencies looking to scale creative output across multiple clients without the overhead of in-house design teams, the model behind scaling ecommerce creative operations with design as a service pairs well with this kind of headless workflow.
Growing DTC Brands
Maybe you launched on Webflow’s native ecommerce and it worked great at first. But now your product catalog has grown. Customers are asking for accounts, subscriptions, and localized pricing. You don’t want to rebuild your entire site on Shopify and lose the custom design you spent months perfecting. This integration lets you keep your Webflow frontend and simply plug Shopify in underneath. You scale your store without starting over.
Freelancers
Headless commerce used to mean hiring backend developers, setting up APIs, and managing complex infrastructure. That priced out most freelancers. Now, with no-code tools handling the connection, a single freelancer can offer clients a premium headless store. You don’t need a dev team. You need Webflow skills and a Shopify account. That’s a strong service to add to your lineup.
How the Three Options Stack Up
Before you decide which route to take, here’s a side-by-side look at what each option gives you and where it falls short.
| Feature | Shopify Alone | Webflow Alone | Webflow + Shopify |
|---|---|---|---|
| Design Freedom | Limited to themes | Full visual control | Full visual control |
| Product Limits | Unlimited | 3,000 to 15,000 | Up to 20,000 |
| Customer Accounts | Full | Basic | Full with order history |
| Subscriptions | Advanced | Very limited | Advanced (pause, skip, swap) |
| Multi-Currency | Built-in | Basic | Automatic localized pricing |
| Checkout | Shopify secure checkout | Webflow native | Shopify checkout (Shop Pay, Apple Pay, Google Pay) |
| Analytics Tracking | Requires apps | Manual setup | Requires apps |
| Monthly Cost | One subscription | One subscription | Three subscriptions |
The combined option does cost more since you’re paying for Webflow, Shopify, and a Shopify integration tool together. And there’s a learning curve with CMS mapping and custom attributes that takes a few hours to get past. But for brands that refuse to compromise on design or ecommerce functionality, the trade-off is worth it. If you want a broader framework for prioritizing which store improvements deliver the fastest revenue impact, the 25 small Shopify conversion rate fixes that add up is a useful companion checklist once your storefront is live.
Conclusion
Shopify runs a great store. Webflow builds a great-looking one. Neither does both on its own.
Combining them gives you a store that matches your brand exactly while running on the strongest ecommerce backend available. Your designers stay happy. Your customers get a smooth buying experience. And your business gets room to grow without hitting platform limits every few months.
The tools to connect these two platforms exist today and they don’t require a developer or a line of code. If your current setup is holding you back on either the design side or the ecommerce side, a Webflow and Shopify integration might be the move that fixes both.
Frequently Asked Questions
What is the Webflow and Shopify integration and how does it work?
The Webflow and Shopify integration is a headless commerce setup where Webflow serves as your customer-facing storefront and Shopify handles all backend operations including payments, inventory, and order management. A connection tool like Shopyflow syncs your Shopify product catalog directly into Webflow’s CMS in real time. You design your store entirely in Webflow using custom attributes to link design elements to live Shopify data, and customers check out through Shopify’s native, PCI-compliant checkout. The result is full visual control on the frontend with the full power of Shopify’s ecommerce infrastructure running underneath.
Do I need a developer to set up a Webflow Shopify integration?
No. Tools like Shopyflow have made this setup accessible without custom development. You install the app on both Shopify and Webflow, connect your accounts, map your product fields, and use custom attributes in Webflow to wire up buttons, prices, and cart functionality. There is a learning curve with CMS mapping and custom attributes, but it does not require writing code. Most designers and Webflow-comfortable freelancers can complete a first working integration in four to eight hours. If you need more complex logic or custom checkout extensions, developer involvement may help, but it is not a requirement to get started.
What are the main limitations of using Webflow alone for ecommerce?
Webflow’s native ecommerce caps product catalogs at 3,000 items on the Plus plan and 15,000 on Advanced, and the Webflow Designer can slow down well before those limits are reached. Subscription features are very limited, with no native support for skip, swap, or pause options. Customer account functionality is basic compared to Shopify, and multi-currency support is minimal. Advanced discount logic and deep integrations with loyalty platforms are also absent. For small catalogs with simple needs, Webflow ecommerce works fine. But growing DTC brands consistently run into these ceilings as their customer expectations increase.
How does checkout work when Webflow is the storefront and Shopify is the backend?
Customers browse and add items to cart entirely within your Webflow site. When they click checkout, they are transferred to Shopify’s native checkout, which is PCI-compliant and supports Shop Pay, Apple Pay, Google Pay, and all major payment methods. The transition is designed to feel seamless. After completing their purchase, customers are redirected back to a thank-you page on your Webflow site. Because you are using Shopify’s checkout infrastructure, you get the full conversion benefits of accelerated payment options, including the one-tap wallets that research shows can lift checkout conversion by up to 50% compared to standard guest checkout flows.
Who should use a Webflow and Shopify setup versus Shopify alone?
This setup makes the most sense for three groups. Designers and agencies who want to deliver premium custom storefronts without being constrained by Shopify themes or Liquid code. Growing DTC brands that have already built a custom Webflow site and need Shopify’s ecommerce power underneath without rebuilding from scratch. And freelancers who want to offer headless commerce as a service without needing backend development skills. If you are pre-launch, running a simple catalog, or not yet at a stage where design differentiation matters, Shopify alone is the more practical starting point. Add Webflow later when creative control becomes a real competitive need.