

“Automation” is a buzz word every developer stumbles upon every now and then. The idea is simple – get rid of the tedious parts of the process, leaving more time for the actual work. Unfortunately, most of the available CI/CD tools require a completely separate set of DevOps skills to manage. That’s where Buddy kicks in. Thanks to their intuitive GUI setup and predefined actions, automating your deployments is just a few clicks away.
Before you begin, there are a few things you should prepare. Begin by configuring Theme Kit CLI. That will allow the execution of various commands specific to Shopify. All the installation instructions can be found in the Theme Kit documentation.
With this out of the way, you must create a new private app. This can be quickly done from the store’s admin panel. Doing it will give you access to Shopify’s API which will be required later.
The entire process is shown in the video below:
Now it’s time to bootstrap our project. To make things easier, we will use the default Debut theme provided by Shopify.
Now, we need to actually download our theme. For that, we will be using Theme Kit CLI we have installed earlier. Begin by creating a new directory, in which we will store all our project-related files.
After navigating to that directory in the command line, we will have to know the theme’s ID. You can easily list all your themes running the following command:
$ theme get --list -p=[PASSWORD] -s=[SHOP_NAME].myshopify.comRunning this command should return something like this:
Available theme versions:
    [103746207896] Debut
    [103747092632][live] My theme
    [103749681304] My theme - stage
The numbers contained in the brackets are the ID’s we are looking for. This will allow us to download the theme files from Shopify. To do so, run the following command:
$ theme get --themeid=[THEME_ID] -p=[PASSWORD] -s=[SHOP_NAME].myshopify.comOnce the download is complete your folder structure should look something like this:
❯ ls
assets config config.yml layout locales sections snippets templatesBefore we get into actual automation, there is still one thing left to do. Preparing your Git environment. Begin by installing a new repository in your theme’s folder by running the following command:
$ git initNow log in to your Buddy account and create a new project by selecting Buddy as your Git provider:

After setting up your name, you will receive a URL of your repository:

Go back to your console now. We will connect to the newly created Buddy repository with your theme’s directory running the following command:
$ git remote add origin [REPOSITORY_URL]Now, we want to send all the contents of our folder to the Git hosting, to do some commit all the files from that folder by executing the following:
$ git add .
$ git commit -m "first commit"
We still need to create our staging environment. For that create and check out the ‘stage’ branch:
$ git checkout -b stageWith everything ready, it is time to push everything out to Buddy:
$ git push -u origin --allAt this point, the hardest part is basically behind us. Now we can easily create two pipelines in Buddy that will automatically deploy our theme on every push to the repository.
As mentioned before, we will be using two environments. Live will reflect what your customers can see, it will be set to the `master` stage. Stage will serve as our preview environment, in which we will be able to check the changes before sending them out to Live.
Let’s begin by creating our Live pipeline.
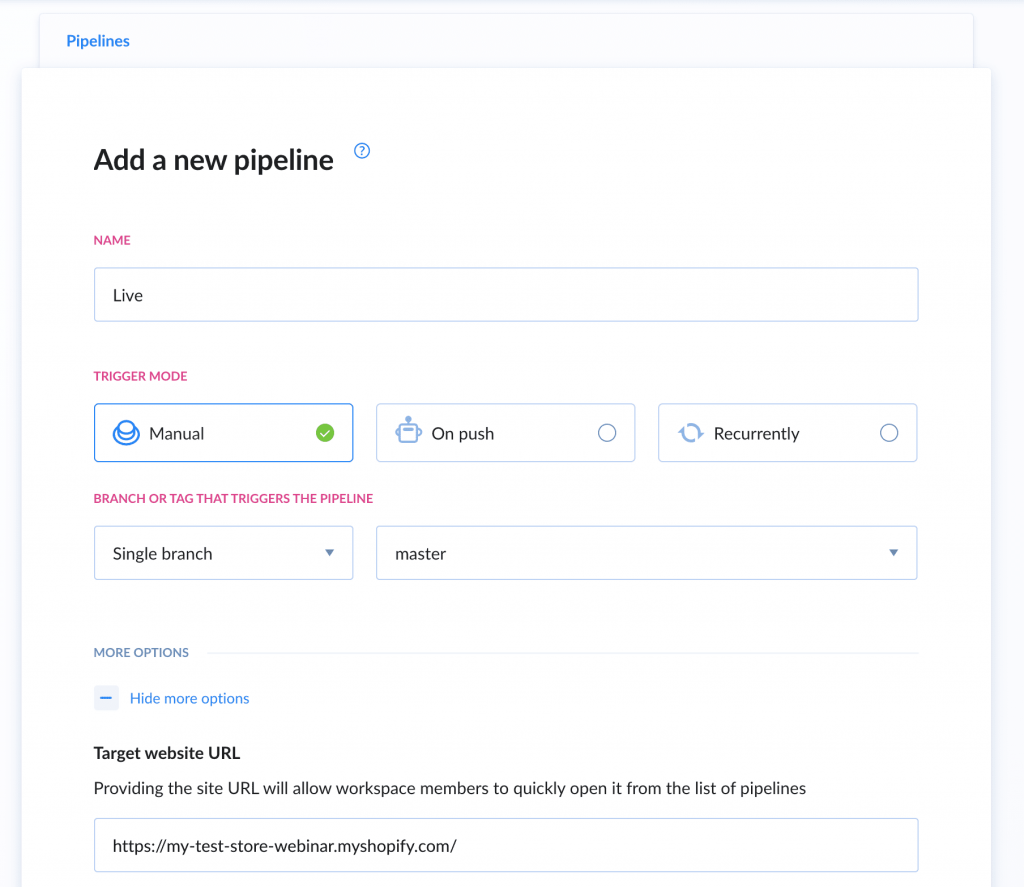
With the pipeline configured, we can now add our Shopify deployment action. You select it from the action list (there are a lot of actions to scroll through, we’d recommend using the search function) and add it to the pipeline.

Your first pipeline is now ready.
Now let’s create a pipeline that we will use to deploy changes to our staging environment. Create a new pipeline, but this time select your ‘stage’ branch and name it accordingly. One other change we will implement here will be setting the trigger mode to ‘On Push’. This will cause the pipeline to execute on every single push made to the repository.

Once again add the Shopify action. This time, however, select your stage theme.
You now have two pipelines that are ready to go. One will update on every change made to the repository, the other will have to be executed manually. It is now time to check how it works in practice. Begin by making some changes to your Shopify theme and pushing them to the stage branch. You will notice, that Buddy begins uploading them immediately.

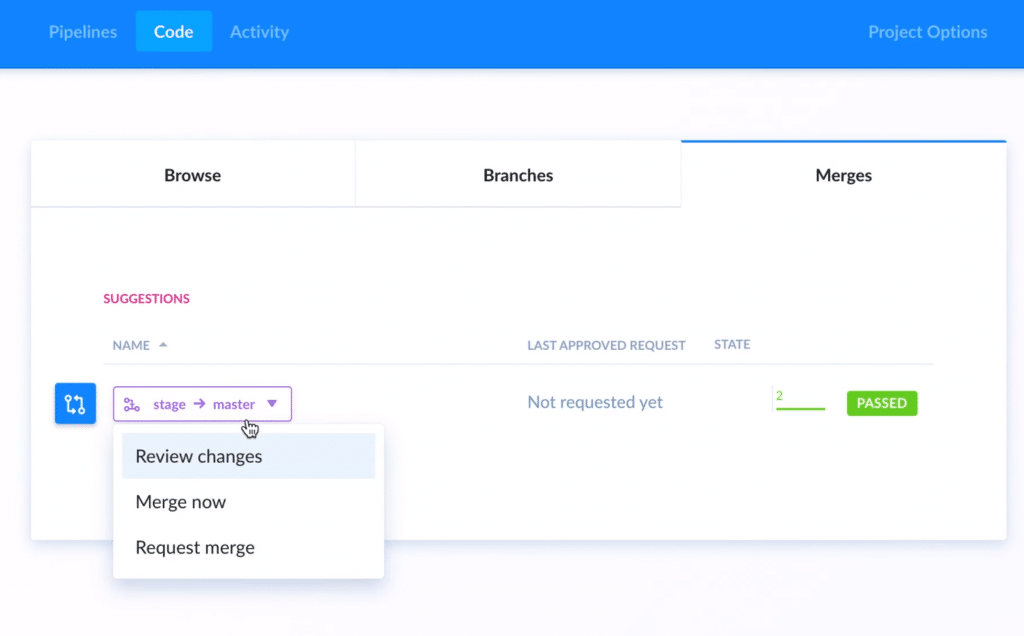
Once the deployment is finished. Check the website. If everything checks out you can merge the stage branch to your master branch and run the production pipeline that will send your theme to the public. Merging branches can be done from the Code tab.
At this point, you have managed to create two pipelines that will serve as your continuous delivery process. You can still expand your pipelines with additional actions that will further improve your workflow. For example, you can add a Slack action to notify your team whenever something goes wrong, check your code for errors using ESlint and PHP Codesniffer, bundle up your files and assets using Gulp, and finally run Visual Tests in the browser.

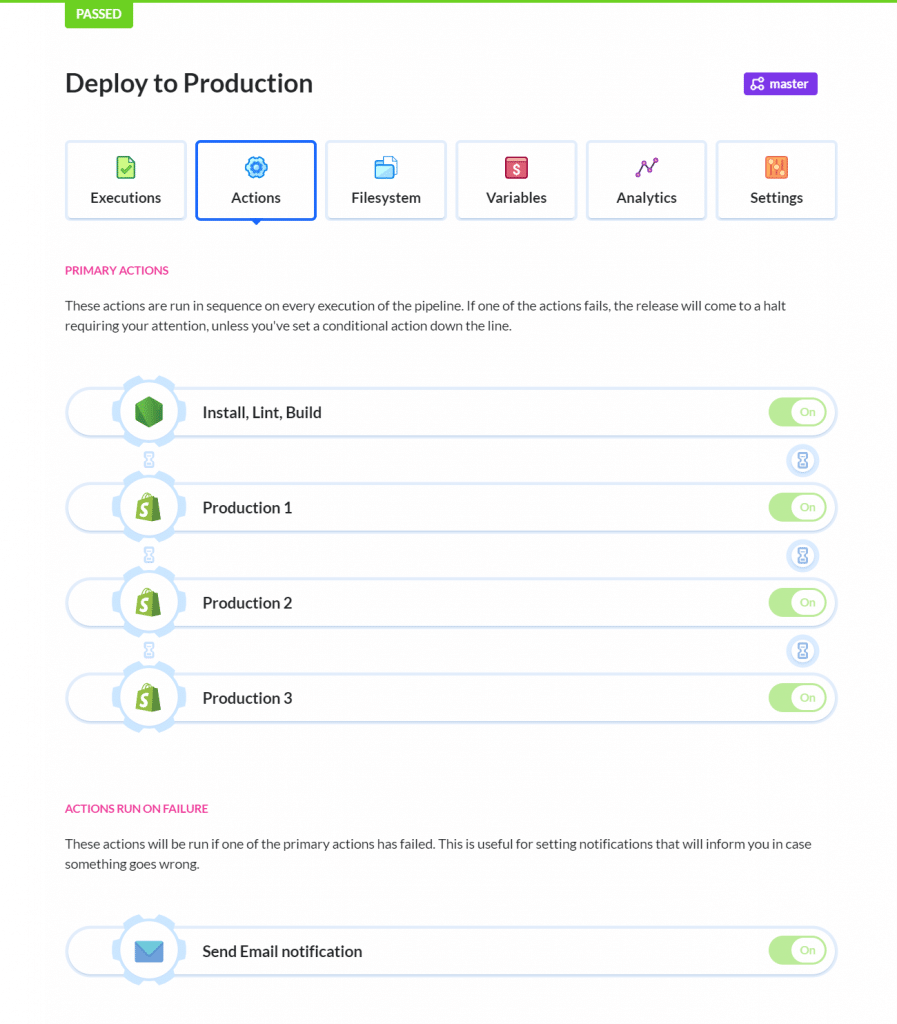
Buddy has been used to deploy Shopify themes by individual stores, as well as entire marketing companies. One of them is Flagship LLC, an e-commerce dedicated company based in Tokyo, Japan. Flagship uses Buddy for managing multiple project’s development, staging and production deployments. Their general workflow is pretty straightforward:
Should anything go wrong, the team is notified via email notification.
Buddy made the deployment process really simple and fast. The UI is super friendly and the devs didn’t need to read any manual or documentation to start using it. – Guillermo Hiroma, Technical Lead at Flagship LLC
Using Buddy, helped Flagship to overcome a few issues they have encountered when using other CI/CD solutions, such as uptime stability, vague error reports, and unintuitive design.
Whether you are a major company or an individual with a single shop, Buddy can greatly enhance your deployment process without the need of hiring a dedicated DevOps or learning YAML configuration. A massive library of predefined action allows for building complex delivery pipelines in a matter of minutes, so if it’s the efficiency you’re after Buddy should become your CI/CD tool of choice.

