
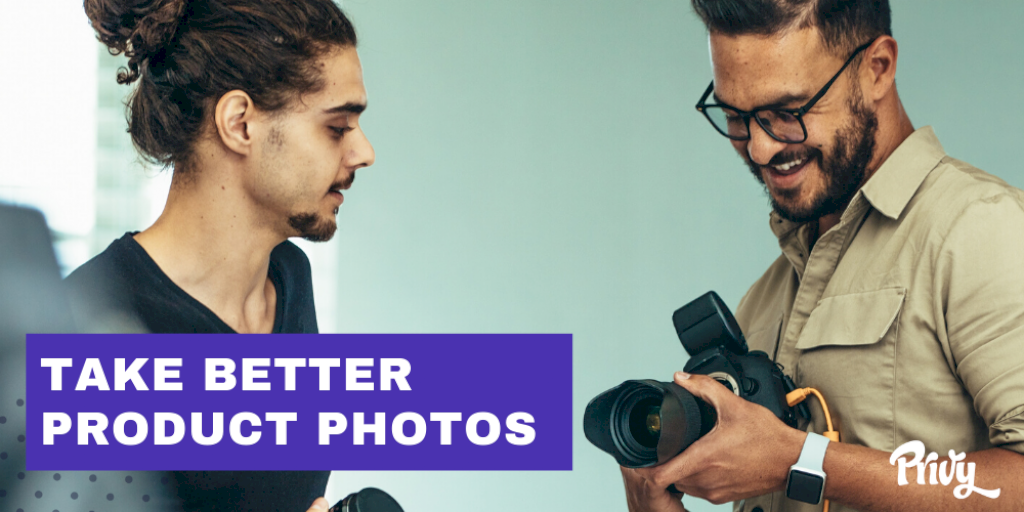
Not long ago, product photography was a pricey headache. Every time retailers needed product shots, they had to pay professionals hundreds or even thousands of dollars.
Today, anyone can create high-quality images right from their phone. It costs almost nothing, but the payoff is huge: more sales.
Just ask Etsy: they found that 90% of their sales were driven by image quality. The trend makes sense. Online shoppers need photos to evaluate products. The higher the photo’s quality, the more confident people will feel in their purchase.
Don’t leave sales on the page with blurry, busy photos. Learn more about the equipment you need and how to use it to take product shots that wow customers.
Today’s camera phones are ideal for beginner photographers. The devices are designed to automatically find the best shot, even when the light is low or your hand is shaking, making it easy to capture a crisp shot.
That doesn’t mean digital cameras are out of the picture. With more features than a smartphone, digital cameras give you more control over your product shots. Just be prepared to do your homework. You can’t take advantage of these cameras unless you’ve learned their intricacies.
Check out the recommended smartphones below if your budget and time are limited. We’ll also cover a few beginner DSLR options for those who want to invest in a professional camera.
You may be wondering whether you can just use your current smartphone.
The answer is probably yes. Check to make sure that your phone’s camera has at least 12 megapixels and an autofocus feature (true for most smartphones on the market after 2017).
If yours doesn’t, it’s time to invest in a new phone. Here are a few smartphone recommendations from TechRadar to consider if you want to take excellent photos:
For more smartphone options, check out TechRadar’s full selection of 2020’s best camera phones.
If you want to go beyond the quality of a smartphone camera, a digital camera — also known as a digital single-lens reflex camera, or DSLR — is the next step. Here are a few entry-level options that Fix the Photo recommends, along with suggested lenses. These DSLRs have more capabilities than a phone camera, but aren’t so advanced that they’re overwhelming for inexperienced photographers.
For more beginner DSLR suggestions, check out this resource from Fix the Photo.
It doesn’t matter how fancy your camera is — if it isn’t stable, you’re probably going to end up with a blurry shot.
The solution is a tripod: a three-legged stand to hold your camera in place when you shoot. It’s especially important to use if you prefer a low ISO — a popular camera setting that reduces graininess (skip to the next paragraph if you don’t want to get technical). A low ISO creates more blur, though, because you have to pair it with a slow shutter speed. Photographers rely on tripods to reduce this blur while still minimizing graininess with a low ISO.
For just $15, you can get one for your smartphone or your DSLR camera.
Product photography isn’t Hollywood photography. You don’t need massive cameras and a crew to take high-quality shots. All it takes is a tripod, your phone or DSLR, and products to shoot! But your images can be even better with lighting and a white background.
What’s the cheapest camera setup? $15 for a tripod. Use your current smartphone as a camera.
Natural lighting is one of life’s great freebies. If the sun’s out and you have a space with windows, you have all of the photography lighting you need.
The one downside is that you lack control: you have to shoot during daylight hours, and even if you do, you may have to contend with clouds or light that’s too harsh.
With artificial lighting, you can always create the shot you want, no matter the weather or time of day. It isn’t necessary, but it does allow you to take consistently well-lit product shots.
The first step of lighting is placement. For natural lighting, that means putting your camera, product, and the window at right angles to each other so that the sun illuminates your product without blinding your camera.
 [Source]
Now, modify the light using these adjustments:
 [Source]
The key to natural lighting is working with the sun. Instead of waiting for a day when the sunlight is just bright or dim enough, you make modifications until the light is right.
Not everyone wants to play the games natural lighting requires. If you want more control over your shoot, opt for artificial light instead.
All you need is a basic two-light setup to illuminate your product from both sides. You can buy these on Amazon for $60.

[Source]
Brand photographer Misha Hettie recommends using one light as your key light. “It’s the one you aim directly at the product,” Hettie says. “All you have to do is set it to one side or the other of the camera.”
The other light is your fill light, which goes on the opposite side of the key light. “It’s really just there to pick up where the fill light leaves off, so turn down the intensity or move it further away from the subject,” Hettie says.
If your product has fine edges, like a fur jacket or gemstone jewelry, you may also want to use a third backlight. It’s placed behind and above the product to highlight its surface details. You can buy a three-light setup on Amazon for $85.
Here’s what the artificial lighting setup looks like:

[Source]
To learn more about artificial lighting, check out this resource from Clipping Path India.
What’s the cheapest lighting setup? $0 with natural lighting.
There’s a reason why most product photos have a white backdrop: white reflects light back onto the product, so its details are clear. A white background is also easy to retouch in the editing process because it’s a solid color.
To set up a backdrop, you’ll need a “sweep” — something that you can hang white paper from. The sweep you use depends on your product’s size. For small to medium-sized products, you can use a chair or table as your sweep. Large products require a stand-mounted sweep, where the product is placed on the floor.
Shoot small products — no more than a foot or two wide — on a chair sweep. The setup is simple: just fasten white paper to the back of a chair with spring clamps.

[Source]
A table sweep for medium-sized products is similar. Tape white paper to the wall, let it drape onto the table, and place your product on top.
 [Source]
If you’re using natural lighting, keep in mind that you’ll need a wall close to a window for your table sweep to work.
The beauty of chair and table sweeps is their simplicity. You can create them in minutes with supplies and furniture you already have at the office.
For products that are several feet wide and tall, you’ll need a stand-mounted sweep. The easiest but most expensive option is one that is pre-built. This $145 set from B&H comes with the stand, a roll of paper, and a travel bag.

[Source]
If you’re shooting products in multiple locations, you’ll save yourself a lot of headaches with this on-the-go backdrop.
If you are planning on shooting in one location and have a small budget, make a DIY backdrop for large products. The New York Institute of Photography suggests hanging a roll of white paper with twine and a hook that can hold at least five pounds and taping the ends of the paper to the floor.

[Source]
Just keep in mind that you need a white wall for this backdrop to work. Otherwise, your wall’s color may appear through the white paper.
It doesn’t take much to create a white backdrop, and that initial investment lasts for years. Even the shortest rolls of white paper are long, around 20 to 30 feet, and you can reuse the paper for multiple shoots.
What’s the cheapest backdrop setup? $40. A standard roll of white background paper costs $30. Hanging tools—tape, clamps, nails, twine—should cost $10 or less.
The camera, lighting, and backdrop suggestions so far will help you get a decent shot, but your photo probably won’t be perfect. Don’t sweat it! There’s free, easy-to-use editing software available for retouching your photo.
If you’re looking for a basic online photo editor, Fotor is the way to go.

The tool allows you to make a number of simple adjustments to your product photo, like changing its brightness and saturation. Don’t want to handle any effects? Fotor has a one-tap enhance button that automatically retouches your photo in a click.
As you get more comfortable with photo editing, you may want to try a tool that has more advanced capabilities.
GIMP is much more technically advanced than Fotor. Beyond basic editing features, GIMP has Photoshop-level capabilities, such as brushes and layers. Bonus: It’s an open-source tool, so developers are constantly updating it.
 [Source]
A powerful editing software, GIMP requires some getting used to. Get started with these tutorials.
The original Pixlr is widely considered to be one of the best free online editing tools. Its design is similar to Photoshop, and it offers a number of advanced features — customizable brushes, layers, masks, and more.
Unfortunately, though, Pixlr runs on Flash, which Adobe is eventually phasing out. There is a new version of Pixlr—PixlrX—that runs on HTML, but it’s missing the original tool’s advanced features.

On the plus side, PixlrX still has the same user-friendly design and handles basic editing needs. And if you love the old Pixlr, you can still use it in the short-term, while Flash is still around.
Yes, Photoshop costs $10 per month, but we can’t talk about photo editing without mentioning this tool. It’s arguably the most widely used photo-editing software.
 [Source]
Photoshop carries a strong reputation because of its powerful features. Digital Camera World says, “Its support for selections, masks and layers is unmatched.”
Sure, the software is pretty complex, but the company does a good job of guiding new users through the basic features with fly-out animations. It’s definitely not a must-have for product photography, but if you’re looking for the best editing tool out there, Photoshop delivers.
A Canva photo book is a customizable and user-friendly tool for creating personalized photo albums and memory books. With Canva’s intuitive design platform, users can easily select from a variety of templates, layouts, backgrounds, and design elements to showcase their photos in a visually appealing and professional manner.
The Canva photo book allows users to upload their own images or choose from Canva’s extensive library of stock photos to complement their personal collection. Users can add text captions, embellishments, stickers, and other decorative elements to enhance their photo book’s visual appeal and storytelling.
With its drag-and-drop interface and flexible editing features, Canva enables users to effortlessly arrange and edit photos, resize elements, adjust colors, and apply filters to achieve the desired look and feel for their photo book.
Whether it’s a family vacation album, a wedding scrapbook, a baby’s first year memory book, or any other special occasion, Canva’s photo book creator offers a versatile and creative platform for preserving cherished memories and sharing them with loved ones in a beautifully designed format.

Colorcinch makes photo editing a breeze with its powerful background changer tool. Simply upload your image, use its intuitive background remover, and save your masterpiece as a PNG file. The possibilities are endless as you seamlessly blend your subject with the background of your choice, whether it’s the original image or something entirely new.
Transform your images further using the color replacer tool to redefine hues, employ the text editor for captions, and resize or crop effortlessly.
With Colorcinch, you can transform your visuals and create stunning compositions in just a few clicks.
What’s the cheapest editing setup? $0 with one of the free editing tools.
Today, it costs less to set up your own ecommerce photography studio than to hire a professional photographer. And for that small investment, you have a much better shot at attracting customers. Every shopper wants to see a clear, detailed product shot so they know what to expect if they decide to buy it.
Take your photography seriously. Use this guide to get the bare-bones equipment you need to take stunning product shots. Once you’re comfortable with this basic setup, experiment with other types of product photography, like 360 pictures and videos. Shoppers love visuals — more is never too much. Just make sure that the photos you provide are of the highest quality possible.
This article was originally published by our friends at Privy.
Also read: An example of the Gear a Wedding Photographer uses.

