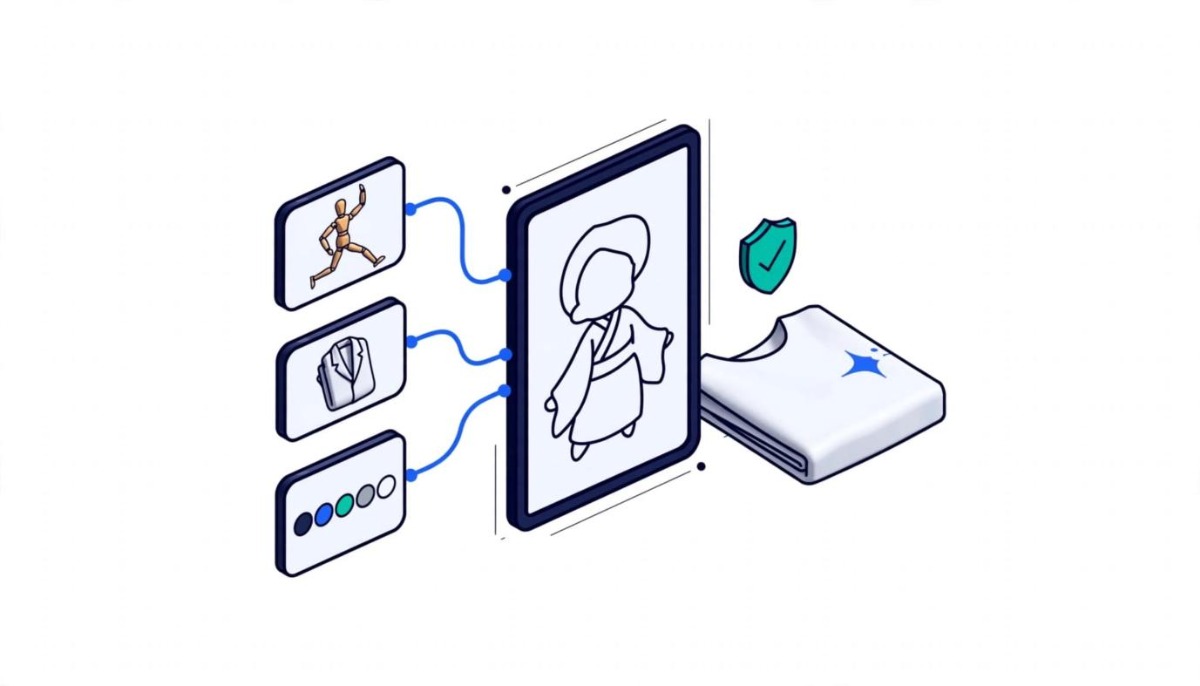
AI image references produce original anime art when each reference supplies one element, such as a pose, outfit, or lighting, and your prompt defines the character. PixAI’s Reference Pro supports that workflow, but selling the result still depends on your rights to every reference and model license.
Changing the outfit on someone else’s character does not make it yours, and stacking more references does not make it yours either. A design is yours to sell only when the character comes from you, you have rights to every reference, the models you used allow commercial work, and nothing in the final image belongs to someone else.
The fastest way to lose an anime merch listing is not a bad print. It is a character that belongs to a studio. AI image tools made that mistake easier to make: upload a screenshot of a famous character, ask for a new jacket, and you get a polished image that is still someone else’s intellectual property, now sitting on a hoodie with your store name on the receipt.
Reference based generation, used properly, solves the opposite problem. It lets you pull a pose from one image, an outfit idea from another, and a lighting mood from a third, then direct the model toward a character nobody has drawn before. PixAI built Reference Pro specifically for this kind of multi image, plain language editing in anime styles, which makes it one of the most direct ways to do the work without learning illustration software.
This guide walks through how to choose references, combine them, prompt them, and refine the result, then covers the part most tutorials skip: what you need to check before the art goes on something you sell. If you are testing your first print on demand designs, the workflow sections matter most. If you are a growing brand considering a mascot, spend extra time on the rights and tool comparison sections at the end.
An AI anime image reference is an existing image you give a generation model so it can borrow specific visual information, such as a character’s look, an outfit, a pose, or a scene’s lighting, while your prompt decides what the new image becomes. The technique is a form of image-to-image generation, and it solves a problem every text prompt eventually hits: some details are faster to show than to describe. Try writing out the exact silhouette of a layered fantasy coat and you will see why.
A reference does not have to be a blueprint for the whole image. It can supply one element you want to carry forward, with the prompt defining everything else. That distinction is the whole game. Take the character design from one image and the pose from another, then write the rest yourself, and you are building from ingredients rather than copying a finished picture. That is a creative distinction, not a legal clearance; the rights questions covered later in this guide still apply to every ingredient you use. Take a finished character from a single image and change only the outfit, and you have produced a variation of someone else’s work. The second approach does not give you an original character, and it is where copyright issues start.
The strongest references carry one clear, prominent detail you want to build on: a distinctive jacket, a dynamic pose, a color palette, a piece of architecture. A clean image where that detail fills the frame gives the model far more to work with than a busy scene where it is buried in the background. Relevance matters as much as quality. An image that shows exactly the sleeve shape you want is more useful than a beautiful illustration that happens to include a sleeve.
One practical test before you upload anything: if you are choosing a reference because it already looks like the finished image you want, you are choosing the wrong reference. Good references look like parts. The finished image should only exist after your prompt and edits have done their work.
Use an image reference when you already have a specific visual element in mind that would take a paragraph to describe and still come out wrong, and use a text-to-image prompt when you are exploring from a blank page. Reference Pro lets you add the image as input and describe in plain language how it should be used. Four situations come up most often.
Developing a character idea. When you have a rough starting point, ideally your own sketch or one of your earlier generations, add it as a reference and use the prompt to change the parts that make the character yours. For example: Give her short black hair, a white jacket, and a determined expression. Each round of edits moves the result further from the starting image and closer to the character you had in mind.
Guiding an outfit or costume. Reference Pro can take the character from one image and the outfit from another. Add both, then state how they combine: Use the outfit from @image2 on the character from @image1. This borrows one specific idea, the costume, while the rest of the design stays under your control.
Exploring a pose or composition. When you know how the character should be positioned but do not want to describe the pose from scratch, let the reference carry it: Use the pose from @image1, but show the character holding a sword and looking toward the camera. Change the setting to a busy fantasy marketplace.
Establishing a setting or visual style. A reference can supply lighting, color, architecture, or mood without dictating the subject: Use the lighting and color palette from @image1, but create a nighttime scene in a futuristic train station with a female anime character waiting on the platform. For merch sellers, this is the most useful of the four, because a consistent palette across a product line is what makes a collection look like a collection.
Reference Pro is PixAI’s multi image editing model: you upload one or more reference images, tag them in a plain language prompt as @image1, @image2, and so on, and the model edits and combines them rather than generating from text alone. The workflow has three steps, and each one has a decision worth slowing down for.
Choose your reference images. Pick images that carry the specific visual information you want, either uploaded from your own files or selected from your PixAI generation history. Then open Reference Pro; the generation panel gives you an area for the reference images and a prompt box for your instructions. Every generation spends credits, and the panel shows the cost and output resolution before you run it. Check both before a long session, because heavy iteration adds up quickly.
Describe the result you want. You do not need to describe every detail the references already show. Focus on how the images should be combined and what the final image should look like. If one reference shows a character and another shows a fantasy outfit, a strong prompt reads: Put the character from @image1 in the outfit from @image2. Give her a confident expression and place her in a medieval castle courtyard at sunset. The references supply the visual information; the prompt supplies intent and new elements.
Generate and compare. Check whether the model picked up the right element from each reference: the right character, outfit, pose, or palette. PixAI’s own guide notes that Reference Pro may still reinterpret small accessories or clothing details, and recommends inspecting important accessories in every output and retrying from the original reference when a specific detail needs to hold. In its own three scene test of one character, the eyepatch, eye color, ears, and plush toy carried through every scene, while hair silhouette, wing placement, and costume details drifted. If the result is close, adjust one instruction at a time and generate again. Changing three things between generations makes it impossible to know which change helped.
If you plan to sell the output, save your references, prompts, and the generation you keep as you go. That record costs nothing to create during the session and is very hard to reconstruct months later if a customer, a marketplace, or a print partner asks where a design came from.
Give every reference exactly one job before you upload it, and name that job in the prompt; multiple references add control only when the model knows which part of each image matters. Without that assignment, the model has to guess, and guesses produce blends of everything rather than the specific combination you wanted.
Decide what each image contributes first. One reference might provide the architecture of a building, another the character you want to place inside it. The prompt then tells Reference Pro how those elements work together: Place the character from @image2 inside the tea house from @image1. Keep her pose and character design, and match the lighting to the interior. The character and the setting each come from one source, and the lighting instruction resolves the most common problem with combined images, a subject that looks pasted onto a background.
The approach becomes more powerful when references contribute details that no single image contains. You can take a hairstyle from one image, a distinctive accessory from another, and a color scheme from a third: Use the hairstyle from @image1, the earrings from @image2, and the blue and gold color scheme from @image3. Create a new anime character wearing a modern fantasy outfit. The result is not tied to any one source. Each reference adds an ingredient, and the prompt turns the ingredients into a single design. This combination pattern keeps you furthest from reproducing any one existing work, but it does not by itself make the output original or commercially usable. If one of those three references is someone else’s copyrighted work, the design carries that problem with it, and the model and LoRA licenses still apply to whatever comes out.
The failure mode to watch for is the one that shows up in stores as well as studios: adding more before the basics work. The same instinct that pushes a growing Shopify store to install a twelfth app pushes a creator to upload a fifth reference when the first two are not landing. More inputs rarely fix an unclear idea. Start with two references, confirm each one is doing its job, and add a third only when you can name the specific problem it solves.
Write the prompt about the image you want to end up with, not about the images you uploaded; the references already carry their visual information, so every word should go toward changes, combinations, and new details. If you are still building the basic skill, it is worth reviewing how to write anime prompts before layering references on top, because a reference amplifies a clear prompt and exposes a vague one.
Describe what you want to create. Start with the result rather than a description of each reference. A useful prompt reads: Create an anime character inspired by the clothing and color palette in the references. Give her short black hair, a silver necklace, and a dark blue jacket. Place her on a train platform at night. The references provide visual cues; the prompt establishes the new elements that turn them into an original image.
Tell PixAI what to take from each reference. When different parts of the references should influence different parts of the result, say so explicitly and connect each borrowed detail to the new image: Use the armor design from @image1 and the hairstyle from @image2. Create a new female knight with a white and blue color scheme, standing on a castle wall. This tells Reference Pro which parts of each image matter and leaves the rest of the design to you.
Do not repeat what the references show. Restating everything visible in your uploads makes the prompt longer without making the intended edit clearer, and it can pull the output back toward the source. Compare two prompts for the same pair of images. The weak version: A girl with long silver hair, purple eyes, a black choker, and a pink hoodie, from the first image, wearing the kimono from the second image. The strong version: Put the character from @image1 in the kimono from @image2, standing under cherry blossoms at dusk, holding a paper lantern. The second prompt spends its words on the scene, the prop, and the light, which are the things that make the image new.
There is one exception worth knowing. When a single character has to stay recognizable across a set of scenes, such as a sticker pack or a product line, naming the handful of identity traits you need preserved (the eyepatch on the left eye, the heart choker) helps the model hold them. That is a short list of must keep details, not a full description of the reference. A useful discipline: after writing a prompt, delete every phrase that describes something already visible in a reference unless it is one of those must keep details. What remains is the actual creative direction, and it is usually shorter and better.
A reliable workflow starts with one strong reference, adds a second only when it solves a specific part of the design, and finishes with small inpainting fixes rather than full regenerations. Building in stages keeps each decision visible and each mistake cheap to undo.
Start with your main reference. Choose the image that provides the most important visual element for the final artwork, add it to Reference Pro, and decide what you want to change. Starting from a reference of an anime swordswoman, you might write: Turn this character into a futuristic bounty hunter. Keep her facial features and hairstyle, but give her a dark tactical jacket, futuristic accessories, and a sci-fi city background. Iterate here until the foundation is right before adding anything else.
Add another reference when needed. Once the main reference is working, add a second image only when it solves a part of the design that is hard to describe: a vehicle, a garment, a weapon, a building. When choosing what that second image should contribute, it helps to think in terms of the other visual elements that make up any picture, such as shape, color, texture, and space, and pick the one your first reference is missing. If the first reference provides the character and the second shows a futuristic motorcycle: Place the character on the motorcycle from @image2. Give the scene a neon-lit city background.
Refine the result. When the overall image works but details do not, switch to PixAI’s inpainting tool to make small, localized changes without regenerating everything. Select the area, describe the replacement, and only that section is redrawn: Change the earrings to small silver hoops. Inpainting is the right tool for hands, accessories, facial details, and small parts of an outfit, which are exactly the details PixAI says Reference Pro can reinterpret.
Prepare the file for its destination. If the design is headed for a physical product, generate the final version at the highest output resolution available to you and check your print provider’s file requirements before you upscale or crop anything. A design that looks sharp on screen can print soft on a large format product, and fixing that after an order ships is far more expensive than checking first.
You can generally sell anime art made with PixAI references when you have rights to every reference you uploaded, every model in the generation permits commercial use, and the output contains no third party characters, logos, or identifiable people; PixAI’s own licensing guidance lists those three checks. The PixAI commercial use and licensing guide, published in September 2026, states that PixAI makes no ownership claim on generated images, and also that a membership does not clear every asset in a picture for commercial work. When models or LoRAs are stacked, the strictest license among them applies.
The fan art line is the one that catches merch sellers. PixAI’s guidance is direct that its not claiming your output does not mean the original rights holder gave up theirs, and that a character LoRA’s author cannot license a character on its owner’s behalf, even when the LoRA page says commercial use is allowed. Selling a recognizable character on a shirt, sticker, or print still requires a license from whoever owns that character, regardless of which tool drew it. The rules that apply to any design apply here too, and the site’s guide on how to avoid copyright infringement on printed merch covers the penalties and the licensed alternatives.
There is a second question most sellers do not ask: can you protect what you made? In Part 2 of its report on copyrightability, released January 29, 2025, the U.S. Copyright Office concluded that prompts alone do not provide sufficient human control to make someone the author of the output, while human creative arrangements or modifications of AI output can be protected. In practical terms, a character produced mostly from prompts may be difficult to stop a competitor from copying. Your own sketches, deliberate edits, and the way you arrange elements into a finished design strengthen your position. This is general information rather than legal advice, and anyone building a brand around a character should talk to an intellectual property attorney.
Stage matters here. If you are testing designs at under $10K a month, keep a simple log of references, prompts, models, and edits for every design you list, with a screenshot of each model’s permission section, since PixAI notes that permission text on a model page can change. If you are selling to an existing fan community, the guide on making and selling your own merch covers presales and community input, which pair well with original characters. If you are a brand above $500K considering a mascot, treat the AI output as a concept draft and budget for human illustration on the final version you intend to register and defend.
PixAI’s Reference Pro is built around anime styles and plain language multi image edits, which makes it a fast fit for anime character work, but two alternatives are worth knowing because they solve different problems. Choosing among them is less about image quality and more about what you need to do with the result.
Midjourney Edit Model. Midjourney’s Edit Model documentation describes a model, compatible with its V8.1 and V8.2 versions, that takes plain language instructions and generates new images from up to four reference images, replacing the earlier Omni Reference and Character Reference features. The same page suggests combining characters into a single reference image when features get mixed up between them, and notes that Edit Model results are not currently compatible with Remix. It covers a broader range of styles than an anime focused tool, which suits creators who want one tool for anime and non anime work. If you are still on V7, Omni Reference places a character or object from one reference image into new images, controlled by an omni weight from 1 to 1,000 with 100 as the default. Midjourney’s external image rules land in the same place as PixAI’s: you need the rights to every image you upload.
Adobe Firefly image-to-image. Firefly’s image-to-image feature transforms a reference by changing style, lighting, mood, or composition, and Adobe states that images from its own Firefly models are designed to be safe for commercial use, with a caveat that partner models inside Firefly carry different terms. It is less specialized for anime character design than PixAI, but training provenance matters more to a brand putting a mascot on packaging than it does to someone testing a sticker design.
For most readers, the decision comes down to stage. At $0 to $50K a month, pick one tool and learn it deeply rather than spreading credits across three; the anime specialization of Reference Pro makes it a reasonable default for this niche. If you are building a full print on demand operation, the AI print on demand guide for Shopify covers how design tools fit alongside fulfillment partners and margins. For more options focused on character creation specifically, see this roundup of AI character generators for digital artists. Above $500K, choose based on licensing clarity first and style second.
An AI anime image reference is an existing image you give an image generation model so it can borrow specific visual information, such as a character’s appearance, an outfit, a pose, a composition, or the lighting of a scene. The reference guides the model while your written prompt decides what the new image actually becomes. The most effective references carry one clear, prominent detail rather than a finished scene. Used this way, references let you build art from several ingredients instead of reproducing a single existing image, which is the better creative approach. It is not a legal shortcut, though. Whether you can sell the result still depends on your rights to each reference, the licenses of the models and LoRAs you used, and whether the final design contains anything a third party owns.
Yes, PixAI’s Reference Pro lets you add multiple reference images and tag each one in your prompt as @image1, @image2, and so on. The key is assigning each image one job: one provides the character, another the outfit, a third the setting or color palette. Then state those jobs in the prompt, for example “Use the outfit from @image2 on the character from @image1.” Start with two references and add a third only when it solves a specific, nameable problem. Uploading more images without clear roles tends to produce blended results that match none of your intentions.
Write the prompt about the result you want rather than describing what the references already show. The model can see your uploads, so repeating their details makes the prompt longer without making your intent clearer. Spend your words on what makes the image new: the setting, the expression, a prop, the lighting, and which element to take from each reference. A quick editing test helps: after drafting, delete every phrase that describes something already visible in a reference, keeping only the few identity traits you need preserved. What remains is your actual creative direction, and it usually produces a cleaner, more controllable result.
You can generally sell PixAI designs when three things are true: you own or have rights to every reference image you uploaded, every model or LoRA used permits commercial use, and the output contains no third party characters, logos, or identifiable people. PixAI’s licensing guidance lists those checks and notes that a paid membership alone does not clear an image for commercial work. Fan art of existing anime characters still requires a license from the rights holder. Keep a record of your references, prompts, and edits for each design, and speak with an intellectual property attorney before building a brand around a character.
Use PixAI’s inpainting tool to select the specific area you want to change, describe the replacement, and regenerate only that section while the rest of the image stays intact. It works best for small, localized fixes such as a hand, an accessory, earrings, a facial feature, or part of an outfit, which are also the details Reference Pro is most likely to reinterpret. Save inpainting for the end of your workflow, once the overall composition is right. If the problem is the whole pose or layout, go back to the reference stage instead, because inpainting cannot fix a structural issue.