
If you’re thinking about “how to add a live chat to my Shopify store,” you’ve come to the right place. In today’s post, I’ll show you how to do that step by step.
But before going into details, let’s learn why you should add a chat button to your online store.
If you’re running an ecommerce business, you know how difficult it is to turn every visitor into a customer and then a repeat one. With a live chat, you can deliver personal touches that help make your job much easier.
Here are the benefits of adding a live chat to your online store:
Sounds great, right?
You might be excited to have one! So, let’s move on to discover the best live chat app for your Shopify store.
Gorgias gives you a powerful live chat widget that you can add to your Shopify store or other ecommerce stores like Magento and BigCommerce. It’s one of the best Shopify live chat apps, with over 400 reviews on the Shopify App Store.
Gorgias live chat features:
About pricing, Gorgias offers you a 7-day free trial with full access to premium features. Its pricing plans are reasonable and affordable than Zendesk Chat, Tidio Chat, and other live chat software.
Bonus: Gorgias is also an ecommerce ticketing system! It offers omnichannel communications, i.e., email, live chat, phone, SMS messaging, and social media.
To follow along in this tutorial, you’ll need a Gorgias chat account. If you haven’t had it, click here to sign up for an account and enjoy a 14-day free trial with full access to all advanced features.
After that, take these steps to install Gorgias on your Shopify store:
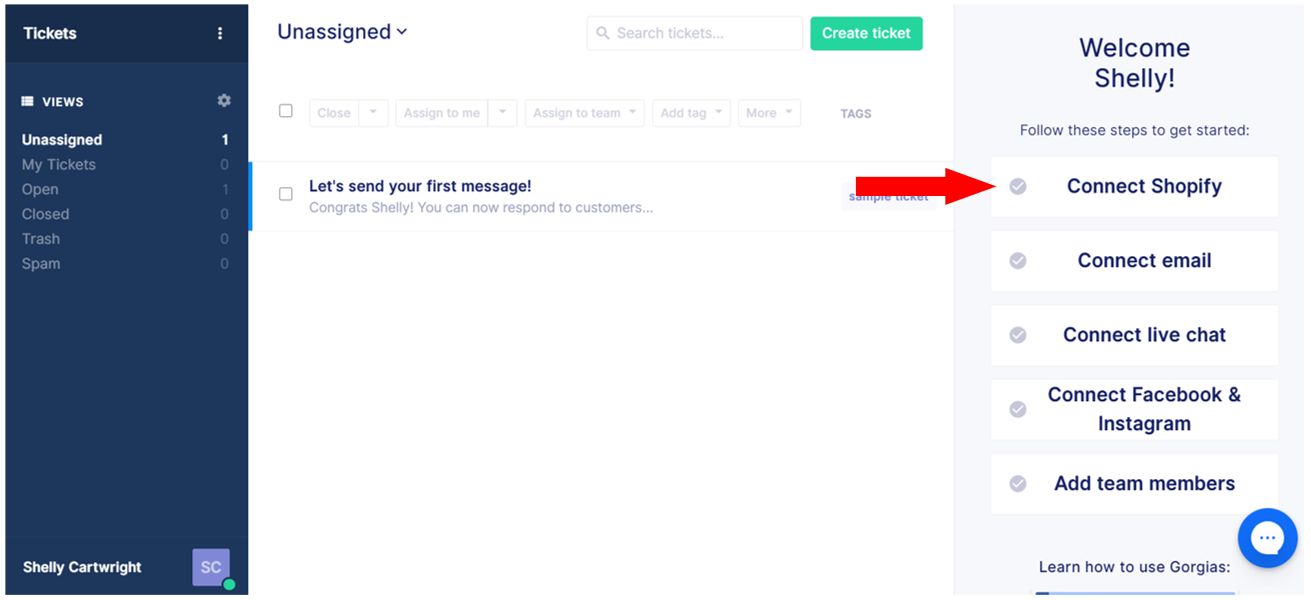
Step 1: Log in to your Gorgias helpdesk.
Then, from the right sidebar, click Connect Shopify to enter the Shopify integration page.
Step 2: In the Shopify integration page, click the Add Shopify button at the top-right corner.
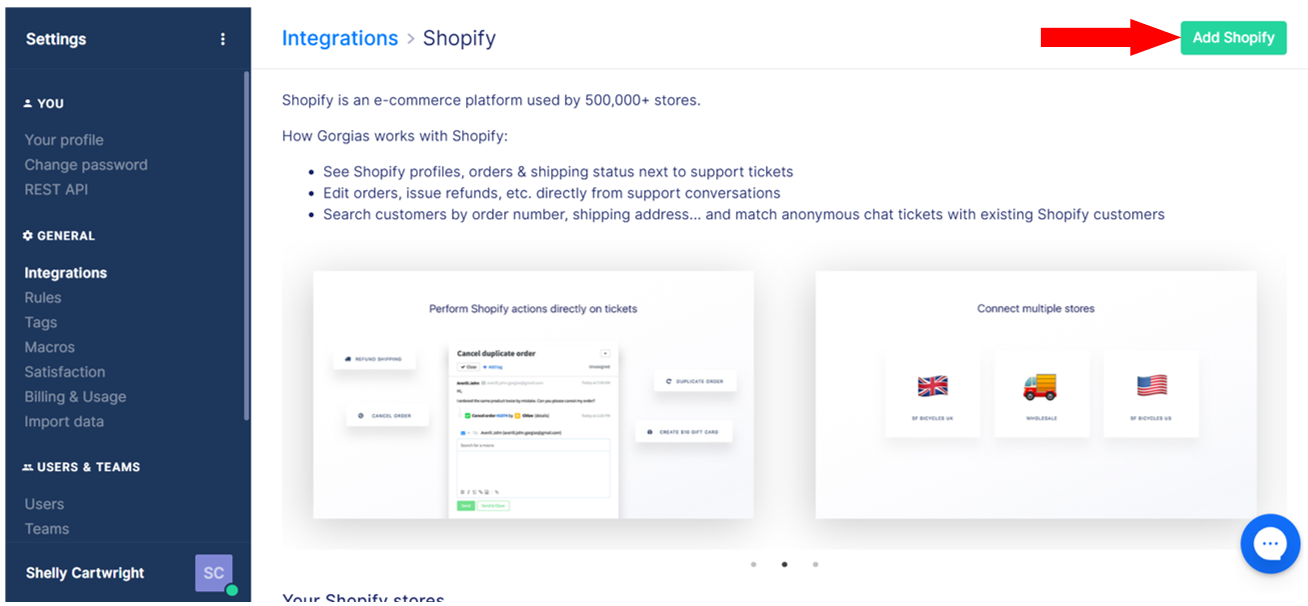
Here’s what you’ll see:
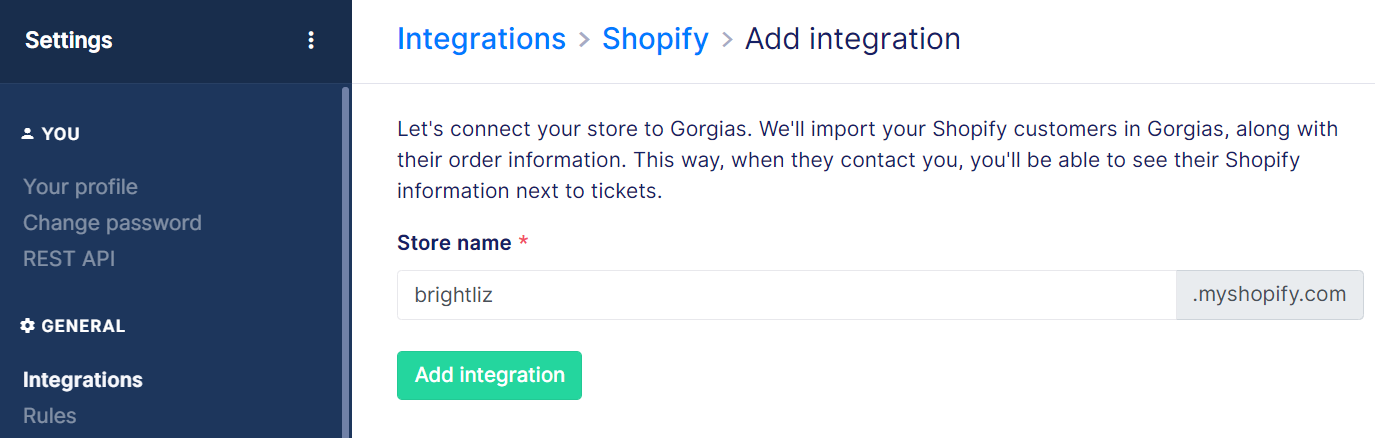
Type your store name in the Store name box. Then, click Add integration, and your Shopify store will be integrated into Gorgias in a second:

Done! You’ve just integrated your Shopify store with Gorgias successfully. Move on to learn how to create your first Gorgias live chat.
Do as follows:
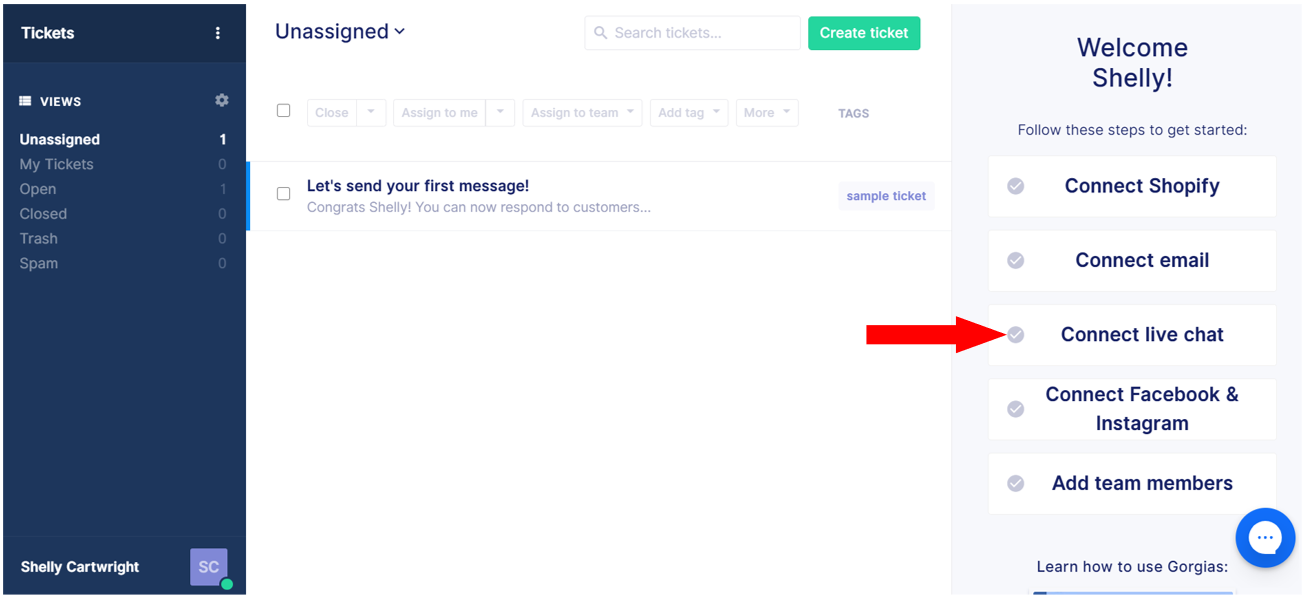
Step 1: Click the Connect live chat option on the right menu of the Tickets view.
You’ll be directed to the Chat integration page as below.
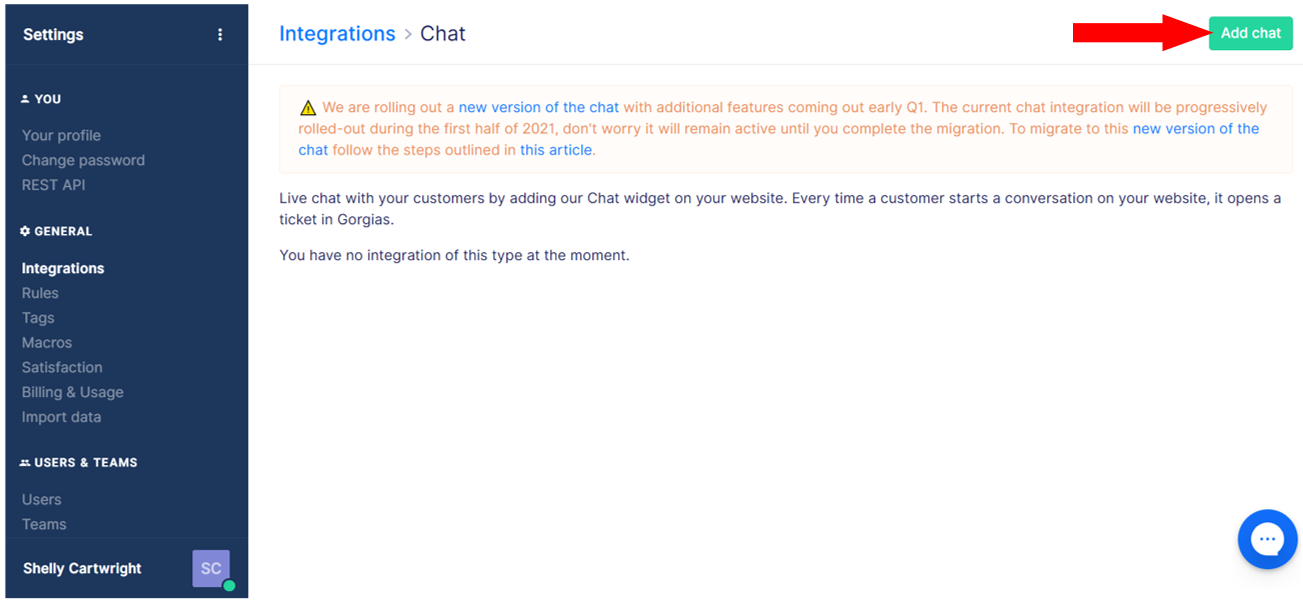
Step 2: Click Add chat to open the New chat integration page.
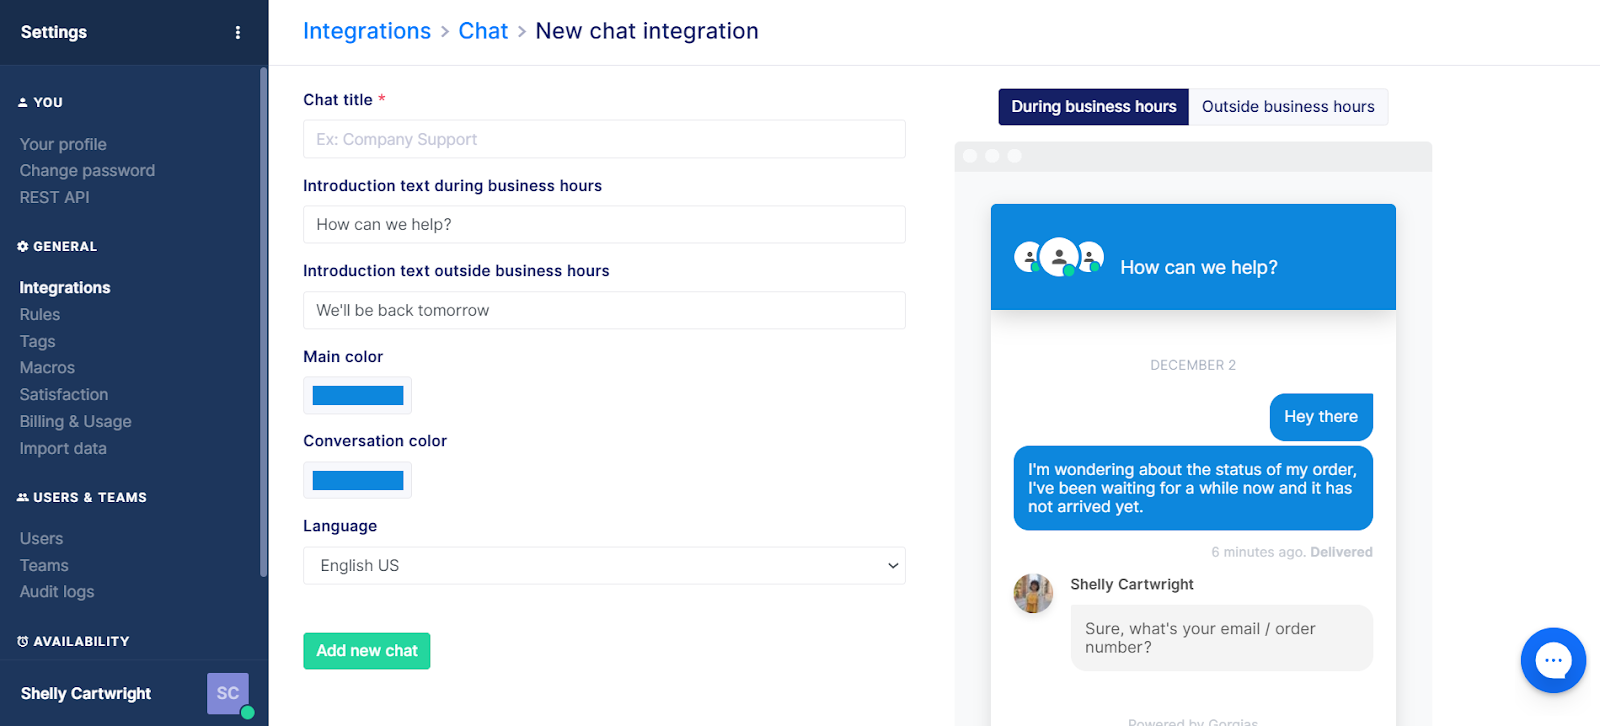
On this page, you can add a chat title, edit introduction text during and outside business hours, change colors and language of the chat window.
When you’re done with customization, click Add new chat.

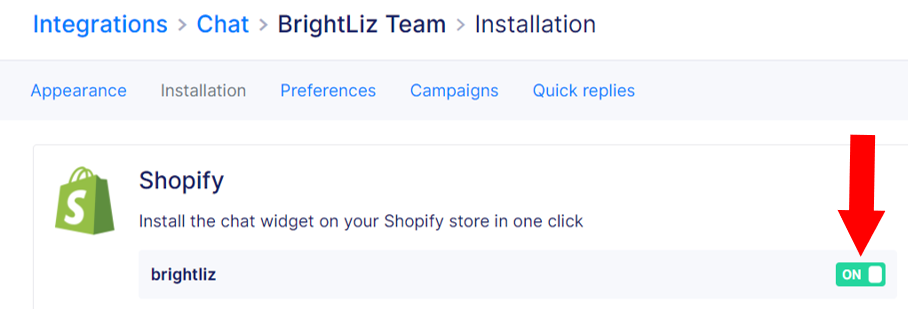
At this point, you already have a real-time chat box. Now you need to add it to your Shopify store.
To add a live chat to your Shopify store, just switch the button on the right side of your Shopify store name from OFF to ON.
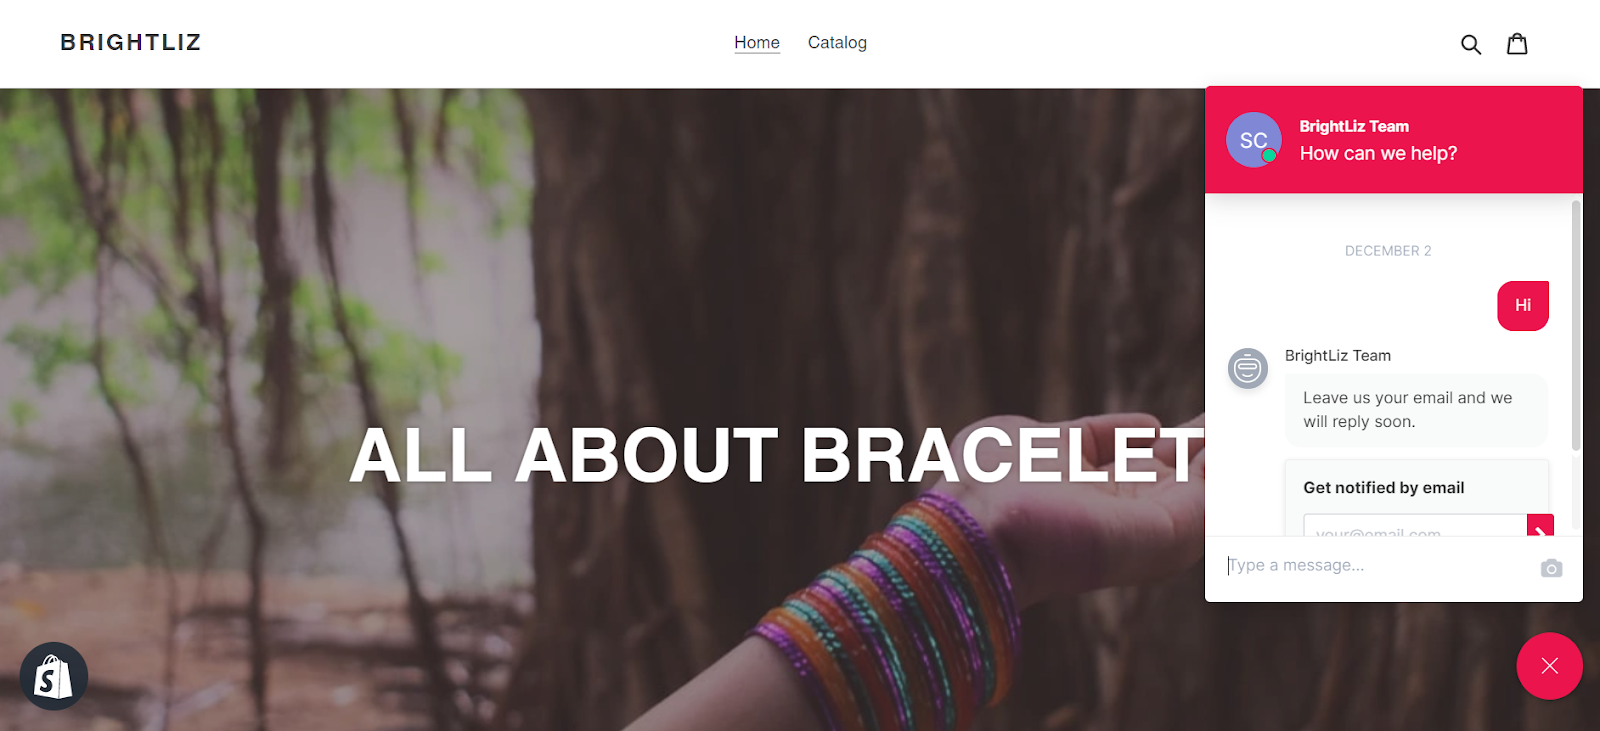
Then, go to your Shopify store to see how Gorgias live chat appears:
To further customize your live chat widget, check out these tutorials:
Note: If your store isn’t on Shopify, you can copy the JavaScript code and paste it on your website above the
Create a Gorgias account right now and follow this guide to add a live chat to your Shopify store. Your customers are waiting to talk with you.
In case you have any questions, don’t hesitate to contact our fantastic customer support team. We’re more than happy to help you.
Lavender is a content writer passionate about SaaS and e-commerce industries. She’s obsessed with research, writing, and reading to publish high-value content for online store owners.

