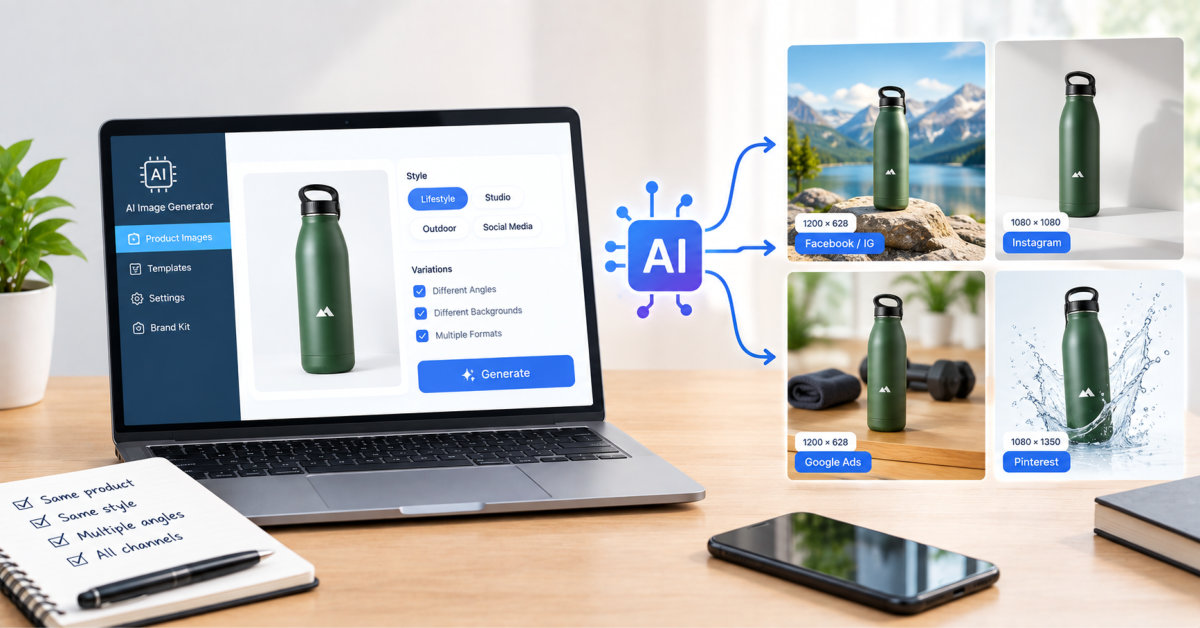
Your campaign needs a square ad, a vertical composition, and a wide banner. You have one approved product photo. After several attempts at AI ecommerce ad images, the backgrounds look polished, but the mug has changed color and its lid looks different in each frame. You now have three products to review instead of one campaign to launch.
Consistency starts with deciding what the generator may change. Keep product facts fixed, give the campaign a short visual guide, and review each variation against the original photograph before preparing placement files.
The hypothetical example throughout this article is an unbranded ceramic travel mug: a straight cylindrical body, matte sage-green finish, flat charcoal silicone lid with one oval drinking opening, and no handle. Assume a merchant has an accurate, approved reference photo. The example prompts are illustrative and have not been tested.
Start with the photograph that best shows the product you sell. Choose a sharp image with the entire mug visible, including its base and lid. Use a view from slightly above the rim so the drinking opening is visible. Avoid a source with deep shadows or a color cast that makes the glaze hard to judge.
Compare the photo with the physical mug and the correct product variant. A beautiful shot of an old lid design is a poor reference for current stock. Record the product identifier and approval date beside the file, then keep an untouched copy.
A single photograph only documents the surfaces it shows. Keep the original camera angle for this first campaign. Asking for the opposite side or an overhead view creates a need for information the source does not contain. Photograph those views if the campaign requires them.
AI generation suits background concepts, campaign mood studies, and exploratory layouts around an existing product. Use photography when shoppers need evidence of texture, construction, capacity, or how the lid fits. An advertising scene still needs an accurate product; calling it creative imagery does not excuse invented features.
For a background replacement, consider manual compositing: cut out the actual product photo and place it on a separate background. Keep the mug’s proportions intact and match the background perspective and shadows. This gives the editor direct control over the product pixels.
If your immediate problem is uneven catalog presentation, Ecommerce Fastlane’s guide to AI image editing for Shopify product photos covers background cleanup and storefront consistency. Decide whether that narrower editing task will meet your campaign needs before generating a new scene.
Create a short approval sheet that someone else on the team can use. Separate the mug’s physical properties from your choices about its surroundings. A request for a warmer scene should not become permission to turn sage green into beige.
| Detail | Preserve | Allowed variation |
|---|---|---|
| Body | Straight cylinder; original height-to-width proportions; no handle | Position within the frame |
| Material and color | Matte sage-green ceramic | Background color within the campaign palette |
| Lid | Flat charcoal silicone; one oval drinking opening | Surrounding props, without covering the lid |
| Product view | Reference angle and visible features | Canvas shape and space around the mug |
| Campaign style | Soft light from the left; gentle rightward shadow | One named prop or background change per version |
For this example, use a pale sand tabletop, an off-white background, and muted neutral props. Keep the mug upright with its full outline visible. Reserve the right side for copy where the placement permits it, and use moderate contrast so the charcoal lid remains distinct.
Choose the copy font and headline treatment in your design file. Keep those decisions outside the image-generation prompt so you can edit campaign language without regenerating the product.
Give each variation one purpose. A discovery ad introduces the mug; a workday reminder places it near a notebook; a gifting ad uses a ribbon as a seasonal cue. You can express these purposes through one prop change while holding the product and composition steady.
Choose a tool that accepts a reference image and lets you describe the intended changes. Inspect a sample result before committing to a larger set. Judge the actual output against your approval sheet, including small features such as the lid opening.
One browser-based option is Nano Banana Pro. Check its current reference-image controls and usage terms against your campaign needs, then review each generated image against the approved product photograph.
Shopify merchants can also review the platform’s media-generation instructions for the file editor. Shopify documents background replacement and prompt-based image changes. Its guidance favors concise scene descriptions, so adapt the examples below to the interface instead of assuming every editor handles long prompts the same way.
Build your base prompt in this order: identify the attached reference, describe fixed product details, specify the setting and light, then define the composition. Give the tool concrete directions such as keeping the full base visible. Requests for a premium look leave more room for interpretation.
Treat those preservation instructions as review criteria. These untested example prompts cannot guarantee identical product details. If the first result changes the lid, reject it before spending time on the layout.
Save the base prompt, source filename, selected tool settings, and an approved output together. Record which settings you used if the interface offers a choice of models or image dimensions. Another team member should be able to understand how you made the asset.
Use one complete prompt per request and attach the same approved original product photograph each time. Keep that photograph as the reference throughout the campaign; do not use a previous generated image as the sole reference. Small product errors can become harder to spot once the original is out of view.For the first round, keep the same square composition and change only the prop. These are three campaign directions, not a controlled performance test: discovery, workday use, and gifting may involve different messages or audiences.
Each prompt is ready to copy on its own with the approved photograph attached. Keep props separate from the mug so shoppers can see its outline and reviewers can inspect its edges.
Ecommerce Fastlane’s overview of AI image-generation use cases for ecommerce provides broader context for concept and campaign imagery. Here, limit the initial set to these three directions so your team has a manageable comparison to approve.
Review product accuracy before visual appeal. Open each candidate beside the reference at full size, then view it at the approximate size shoppers will see. The first pass catches small defects; the second reveals whether the product remains clear in the placement.
Use three review outcomes: approve, revise the surroundings, or reject for product mismatch. If the mug is accurate but the notebook overlaps it, correct that area in an editor or generate another candidate. If the lid has changed, return to the source photo instead of disguising the mismatch with a crop.
Ask someone familiar with the physical product to approve the final set. For a solo merchant, make a separate review pass with the real mug beside the screen. Keep short rejection notes so the next attempt addresses a specific defect.
Create the required shapes from an approved composition. For a wide placement, add breathing room at the sides; for a vertical placement, retain the full mug and extend the surrounding scene above or below it. Avoid stretching the product to fit.
Check the specifications for the ad format you intend to use. For example, Google’s responsive display ad image guidelines recommend 1200 × 628 pixels for horizontal images and 1200 × 1200 for square images. Those dimensions belong to that format, not every advertising placement. Google also advises avoiding overlaid text, logos, and buttons in these image assets.
Keep a clean image master. Where a placement permits designed overlays, add approved copy in a layout editor and inspect it in the platform preview. Check interface overlaps and crop behavior there. If you extend a background with AI, repeat the product review after the edit.
Export files with clear names, such as mug-sage-discovery-square-v01.jpg. Keep the approved exports, editable layouts, reference photo, and review record in the campaign folder. Note the intended placement for each export so a teammate does not upload the wide version into a square slot by mistake.
Before launch, view the three directions together. Confirm the same glaze, lid, light direction, and product proportions across the set. Keep a record of image edits apart from campaign results. A consistent look alone does not prove that an ad will sell more.
Reuse the scene instructions, but give each variant its own approved photo and product facts. For a different glaze, start with a photo of that glaze. Asking AI to recolor the sage-green mug would remove the reference you need to check the result.
Use the original mug photo as a cutout in a layout editor. Build the scene around it and check the contact shadow. If the original lid is unclear, take a sharper photo before continuing.
Keep accurate photos for product documentation. A generated scene cannot establish a feature that the source photo does not show. Use a new photograph when shoppers need to inspect that feature.
For your next campaign, choose one product and prepare its approval sheet before opening a generator. Produce one base composition, approve the product, then request the two prop variations. Finish by checking one required placement from end to end, including its landing page, before exporting the rest.