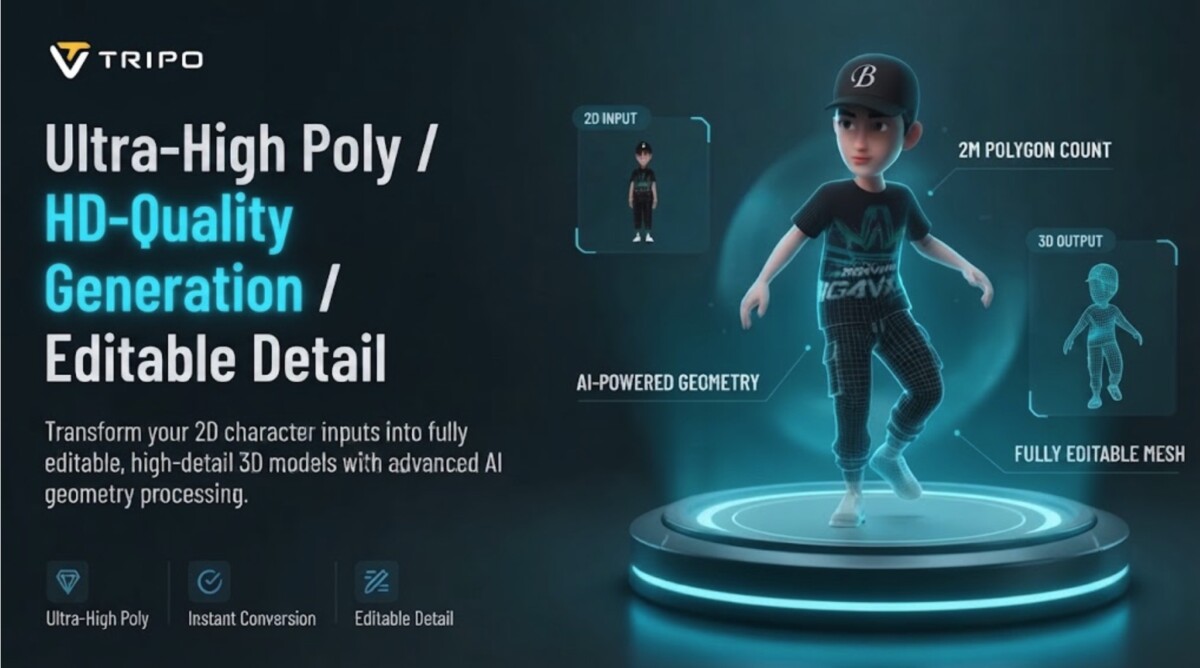
Image to 3D tools can now generate triangle meshes of up to two million polygons from a single photo, but that count is a ceiling, not a quality score. Generate dense when the asset feeds printing, rendering, or editing, then ship a lighter version to the product page.
Two million polygons is the most detail the tool can give you. Whether you should take all of it depends entirely on where the model is going next.
A single product photo can now become a textured, exportable 3D model in minutes. Image based 3D workflows reconstruct depth, form, surfaces, and proportions from carefully selected reference images, and an AI 3d model generator like Tripo 3D offers flexible generation options for high resolution 3D content across modeling, visualization, printing, and ecommerce work.
The setting that matters most is polygon count. Geometric density determines how much detail is visible, how easy the mesh is to edit, how much processing it demands, and how heavy the final file becomes. A two million polygon target can hold complex shapes when the source imagery has enough structure to support it. The workflow below brings topology, textures, inspection, refinement, and export decisions into a single pass, and it closes with the question most merchants should ask before generating anything: where is this model going to live?
A 2 million polygon model gives you enough geometric density to describe small contours, smooth curves, crisp edges, and intricate physical features, but only where the source imagery supports that detail. Polygons are the flat faces that make up every visible surface of a 3D object. The more of them a mesh has, the more finely it can describe shape.
Density is not distributed evenly, and it cannot invent detail that was never in the photo. The final geometry depends on the subject’s complexity, the quality of the source imagery, the model version chosen, and the generation settings. A good generator concentrates density in visually relevant areas (the stitching on a bag, the knurling on a grinder, the relief on a ceramic mug) based on the image evidence available, and spends less on flat or hidden surfaces.
That is why polygon count should be treated as a deliberate setting, not an overall quality indicator. A 2M mesh of a simple cylindrical candle holds no more meaningful detail than a 50K mesh of the same object. It just costs more to store, open, and edit. A 2M mesh of a carved wooden figurine, on the other hand, can preserve detail a lighter mesh would flatten.
It is also worth knowing that the 2M ceiling applies to triangle meshes. On Tripo’s image to 3d model page, triangle output runs up to 2 million polygons on the high detail model, while native quad meshes are controlled in a much tighter range of 500 to 25,000. If you need a quad mesh for rigging or animation, plan for the lower count from the start.
Image quality sets the ceiling on geometry quality, because the generator can only reconstruct structure it can infer from the photo. Clearly defined subject boundaries give the model more visual cues for silhouettes, proportions, and the relationships between parts. Visible shapes and surface detail are what a clean image to 3D workflow is built on.
Three things degrade the input most often. Harsh or uneven lighting hides edges, and strong shadows make depth and surface separation harder to interpret. Busy backgrounds blur where the product ends. Occlusion is the third and least obvious problem: any side of the object that the camera cannot see in a single view has to be guessed, and guessed surfaces are where artifacts appear.
Multiple viewpoints solve most of this. A front, side, and back shot of the same product, taken against a plain background in soft, even light, gives the generator real evidence for the surfaces a single image would leave to inference, and the resulting model is more consistent across all visible sides. If you already shoot clean white background product photography for your store, you likely have usable inputs sitting in your media library today. Input quality has more influence on the inferred depth and structure than any setting you will change later.
Generating a 2M-poly asset takes three stages: open high detail image conversion, configure geometry and texture settings, then inspect and export. The interface labels below reflect Tripo 3D’s current workspace and may shift as the product updates.
Sign up for Tripo 3D, then open the “Model” tab from the vertical menu bar on the left. Under the “Generate Model” menu, select the “HD Model” option. Next, open the “Image to Model” tab and drag your image into the upload area, or use the “Upload” button to select an image from your device.
Open the “General settings” tab to adjust your “Geometry and Texture” options. Turn on “Ultra Mesh Quality” when you want a detailed, realistic model with a high polygon count.
You can let the AI generate both geometry and texture by enabling the “AI Complete” switch in the Geometry and Texture panel. Alternatively, enable texture generation yourself and choose your preferred “Texture Quality”, with options including 2K, 4K, and 8K. Turn on “PBR” if you want the generated materials to carry physically based properties such as roughness and metallic response, which is what makes a product look right under different lighting.
Choose “Triangle” or “Quad” topology based on how the model will be used, then set a custom polycount. For the full 2M target, use triangle topology; quad output is capped far lower and is better suited to models you plan to rig or animate.
Members can access the “Generate in Parts”, “8K Texture”, and “Privacy” options in the Members Only area, with a single trial available per session. Generate in Parts is billed separately using points. Finally, choose a model version from the available list (versions differ in generation quality, stability, and intended use, and the newest high detail model may take longer), then click “Generate Model”.
Once generated, review the model across the available display modes, including Wireframe, White Model, Texture, Shader, and HDRI views. Click “Refine” from the bottom menu if the first pass needs improvement. Adjust “Environment Settings” to change the viewing environment, and use “Reset Camera” to return to a neutral angle while you examine the geometry under different conditions.
If you want a physical version, select “3D Print”, or share the model directly with “Share”. To save your asset, click “Export” in the bottom menu, choose the resolution, format, and filename, then click “Export” again to download the model to your device.
Configure geometry for the job the model has to do next, not for the highest number the tool allows. Custom polygon settings change geometric density, editing difficulty, processing load, and compatibility with downstream software all at once. Higher targets preserve more contours and more gradual shape transitions across complex surfaces, and the more visual information the source images contain, the denser the structure Ultra Mesh Quality can produce. But dense meshes demand more memory and make retopology, animation, and real time deployment harder.
The intended application decides the trade off. If you plan to edit the model by hand later, a lighter mesh is easier to work with than a dense one. If the model will be animated, topology matters more than count, because the mesh has to deform cleanly around joints and moving parts. For real time use in a browser, game engine, or AR viewer, a detailed source mesh almost always needs optimizing before it performs well. And for fabrication, closed geometry, accurate dimensions, and surface continuity matter as much as polygon density.
A practical rule: generate at the density your most demanding use requires, keep that file as your master, and derive lighter versions from it. It is far easier to reduce a dense mesh than to recover detail that was never generated.
Textures should carry the detail whenever it is visual rather than structural: printed labels, fabric weave, wood grain, surface scratches, and fine embossing rarely need to exist as real geometry. Geometry defines the physical shape of the object. Textures are the visual information displayed on that shape.
Each map does a different job. BaseColor maps hold the visible color, or albedo, of each surface. Normal maps fake small surface relief by changing how light hits the surface, so a model can look finely detailed without the polygon count that detail would otherwise require. Roughness and metallic data (often packed together into an ORM map) control how glossy or matte each material reads.
High resolution textures can hold a lot of detail without modeling every feature as geometry. Tripo 3D supports texture workflows up to 8K on supported configurations, where an 8K BaseColor map measures 8192 by 8192 pixels, and 4096 by 4096 Normal and ORM maps are also available for export. For many products, a moderate mesh with strong textures looks just as convincing as a 2M mesh, at a fraction of the file size.
Inspect a high polygon model by rotating it through several view modes and camera angles before you export, because a single source image never shows every surface the generator had to build. Different viewports expose different problems: silhouette errors, surface artifacts, topology patterns, and texture inconsistencies.
Untextured views such as the white model or solid view show pure form, which makes lumps, holes, and collapsed areas easy to spot without color distracting the eye. Textured view reveals material orientation, missing data, and visible texture seams across the areas that matter most. Wireframe shows how density has been distributed, which tells you whether the generator spent its polygons where the detail actually is. Shader and HDRI views show how materials respond to realistic lighting.
Pay closest attention to the sides the source photo could not see, such as the back, the underside, and any recessed areas. Turn the model fully around and check those surfaces from multiple perspectives before exporting. Treat refinement as its own evaluation stage rather than expecting the first generation to suit every application.
Move a detailed asset downstream by exporting in the format your next tool expects and reducing density wherever the destination cannot handle it. Detailed meshes feed modeling and visualization, prototyping, animation, game development, 3D printing, and ecommerce media. The common export formats each serve a different need: GLB for the web and AR, FBX for animation and game engines, OBJ for broad editing compatibility, STL and 3MF for printing, and USD for production pipelines.
Retopology helps when a dense asset has to run in an interactive environment. Automated retopology or decimation (for example, the Decimate modifier in Blender’s free 3D software) can preserve important silhouettes while cutting the polygon count dramatically. Animated assets may need topology rebuilt so the mesh stretches and bends cleanly around joints. A detailed mesh is one step in a larger asset pipeline, not the end point of quality.
For Shopify merchants, this is where the decision gets concrete. Shopify’s product media requirements accept 3D models as GLB or USDZ files up to 500 MB, and automatically optimize any 3D file over 15 MB. That means a full 2M-poly, 8K textured master will upload, but it will not reach shoppers in the form you exported it. Exporting a deliberately lighter GLB for the product page, and keeping the dense master for renders and print, gives you control over what shoppers actually load on a phone.
Interactive 3D and AR earn their place on product pages where shoppers struggle to judge size, shape, or fit from photos alone. The furniture, home goods, and accessories brands covered in this breakdown of AR’s impact on ecommerce sales are the clearest examples. When reference imagery is unavailable or limited, the text to 3d model workflow is another way to produce a starting asset.
3D product media fits best once your product photography and product page fundamentals are already working, because a 3D viewer amplifies a strong page rather than rescuing a weak one. Whether you are doing $10K months or $1M months, the sequencing matters more than the tool.
If you are just starting out, use image to 3D generation as a low cost experiment on your single best seller. Generate a model, export a lightweight GLB, and add it to that one product page. Before you add anything, make sure the basics covered in these elements of a high converting product page are in place.
If you are scaling through the $500K to $2M range, resist the urge to roll 3D across the whole catalog at once. Pick the categories where shoppers hesitate over size, material, or shape, measure engagement and return reasons on those pages, and expand from evidence. On our podcast conversation on realistic 3D product models, Spase CEO Sahil Gupta described digitizing products into 3D as doubling customer engagement; treat that as his reported outcome and test it against your own numbers.
If you are running an established catalog, the dense master file becomes an asset in its own right. One 2M-poly source can produce product page GLBs, AR files, lifestyle renders, ad creative, and print prototypes, which is where high polygon generation pays for itself. The broader shift is laid out in how augmented reality is changing retail.
The detail in a generated 3D asset comes from the combination of image quality, polygon density, topology, textures, and refinement, not from polygon count alone. Two million polygons is the geometric ceiling available, not a requirement for every project. Strong reference images give the generator more structure to work with, the right settings put density where it matters, and high resolution textures carry detail that does not need to be geometry. Configure deliberately, keep a dense master, and ship the version each destination can actually use.
A Shopify product page model should be as light as it can be while still looking right on a phone, which usually means far fewer than 2 million polygons. Shopify accepts GLB and USDZ files up to 500 MB but automatically optimizes any 3D file over 15 MB, so a dense export will not reach shoppers as you made it. The better approach is to generate a high detail master for renders and printing, then export or decimate a lighter GLB specifically for the product page. Check the result on a mid range phone before publishing.
Yes, you can turn a single product photo into a 3D model with an image to 3D generator, but the sides the camera never saw will be inferred rather than reconstructed. Use a sharp photo on a plain background with soft, even lighting so the generator can read edges and proportions clearly. If the back, underside, or recessed areas matter, shoot front, side, and back views and use multi view input where your plan supports it. Then inspect the hidden surfaces closely before exporting, because that is where artifacts most often appear.
Triangle topology builds the surface from three sided faces and can reach much higher counts, while quad topology uses four sided faces with predictable edge loops that deform cleanly. On Tripo 3D, triangle meshes go up to 2 million polygons, while native quad meshes run from 500 to 25,000. Choose triangles for static, high detail assets such as renders, product viewers, and 3D prints. Choose quads when the model will be rigged, animated, or edited by hand, and accept the lower count as part of that trade off.
You rarely need 8K textures for ecommerce 3D models shown in a browser, because most product viewers display the model at a size where 2K to 4K maps look the same and load faster. 8K textures earn their place in close up marketing renders, large format visuals, and master files you will reuse across many outputs. A sensible pattern is to generate at the highest resolution you may need, keep that version as your source, and export a lighter texture set for the product page and AR viewer.
Export your 3D model in the format your next destination expects. GLB is the standard for web viewers and Shopify product pages, and USDZ covers AR viewing on Apple devices. FBX suits animation and game engines, OBJ offers broad compatibility for editing, STL and 3MF are built for 3D printing, and USD fits larger production pipelines. If one model will serve several destinations, keep a high detail master and export a separate, appropriately optimized file for each use rather than forcing one file to do everything.