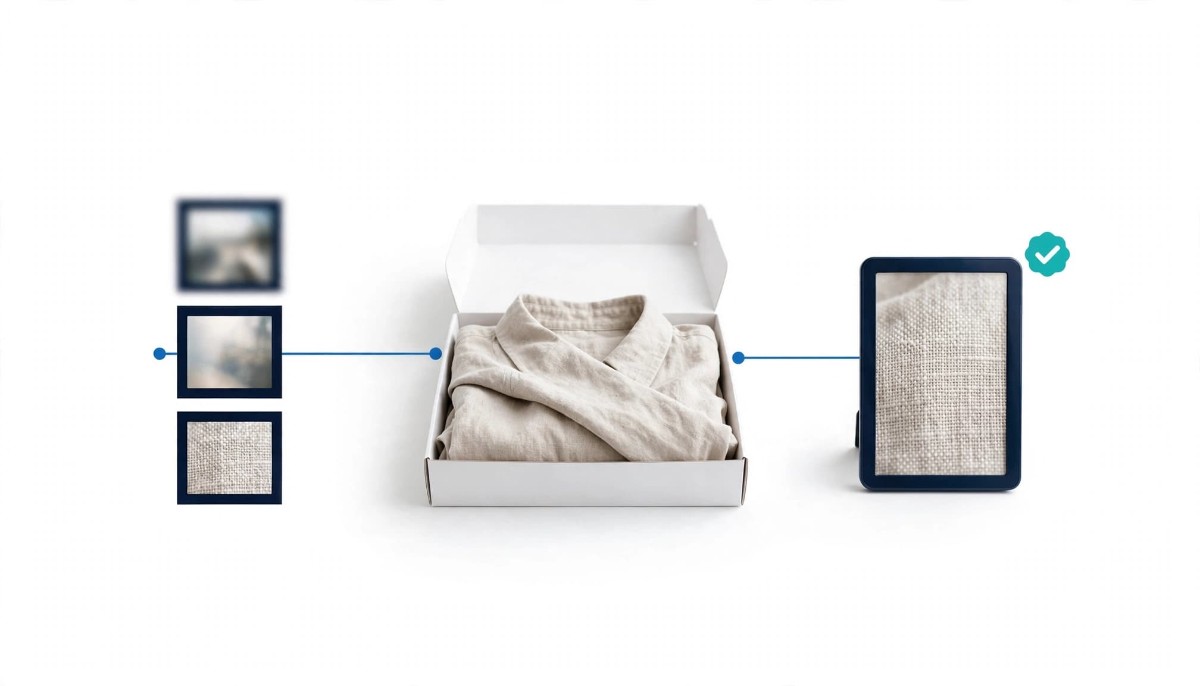
You can improve most ecommerce product video without reshooting when the problem is resolution, compression, noise, or color drift. Trim the clip first, upscale and color correct second, check the result against the real product, then export a separate version for each channel.
A blurry product video does not look cheap. It looks uncertain, and uncertainty is what makes a shopper close the tab or send the item back.
If you sell online, product video stopped being optional a while ago. Shoppers want to see how a fabric moves, how a lid closes, and what a color looks like outside a retouched photo. And with an AI HD video converter, the soft, compressed clips already sitting in your drive can usually be restored instead of reshot.
That matters because video quality is a trust signal. In Wyzowl’s 2026 State of Video Marketing survey (266 respondents, fielded in late 2025), 85% of people said a video had convinced them to buy a product or service, and 89% said video quality affects their trust in a brand. When a clip is blurry or the color looks off, shoppers start asking the questions you never want them to ask: Is the color accurate? Will this look cheap in person? Can I trust this store?
This guide walks through a practical workflow for answering those questions with footage you already own, including the cases where enhancement is the wrong tool and a reshoot really is the better spend.
Most weak product video suffers from one of four fixable problems: softness, poor lighting or color, shake and noise, or a low resolution export. The common mistake, especially for small teams, is treating every low quality clip as a reshoot. Most of the time it is not.
Before you run anything through a tool, watch the clip the way a customer will. Play it on your phone, then on a laptop, inside your actual product page or a draft post rather than in the editing timeline. Then name the problem precisely, because each one has a different fix.
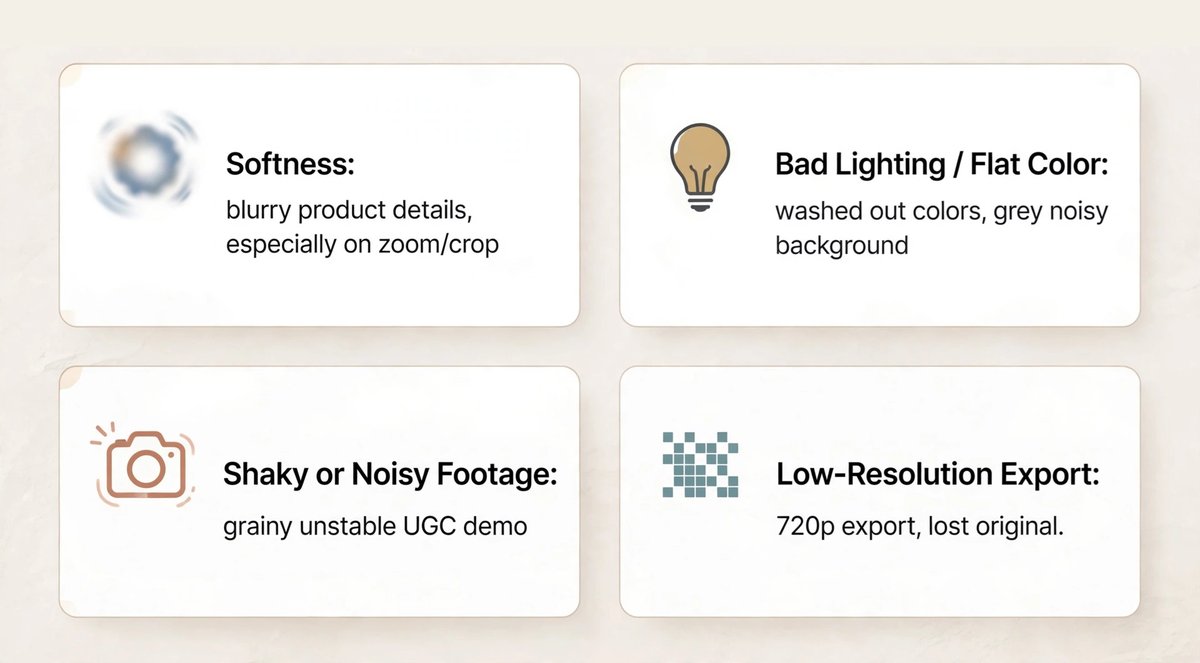
Softness. Product details blur, especially once the clip is cropped into a square or vertical frame for social. Fabric weave, stitching, and label text are usually the first casualties.
Poor lighting or flat color. Colors look washed out and the background turns grey or grainy. Automatic white balance on phones is a frequent culprit, quietly shifting a warm neutral toward grey.
Shake and noise. A creator’s UGC demo often has exactly the right feel, but it was shot handheld in a living room, so it is jittery and grainy.
Low resolution export. The only surviving copy was exported at 720p years ago, or a supplier sent a compressed file, and the original is gone.
All four are candidates for enhancement. What enhancement cannot fix is content: the wrong colorway, an angle that was never filmed, a product that has since been redesigned, or a shot where the focus landed on the background instead of the product. If your support inbox keeps asking about something the clip never shows, Fastlane’s guide to planning product video around shopper hesitations is the better starting point, because that gap needs new footage, not sharper old footage.
Clean up the clip before you enhance it: trim dead seconds, cut reach ins and shaky moments, and keep only the parts where the product is clearly shown and in focus. Enhancement works on every frame you give it, so anything you leave in gets upscaled too, including the noise.
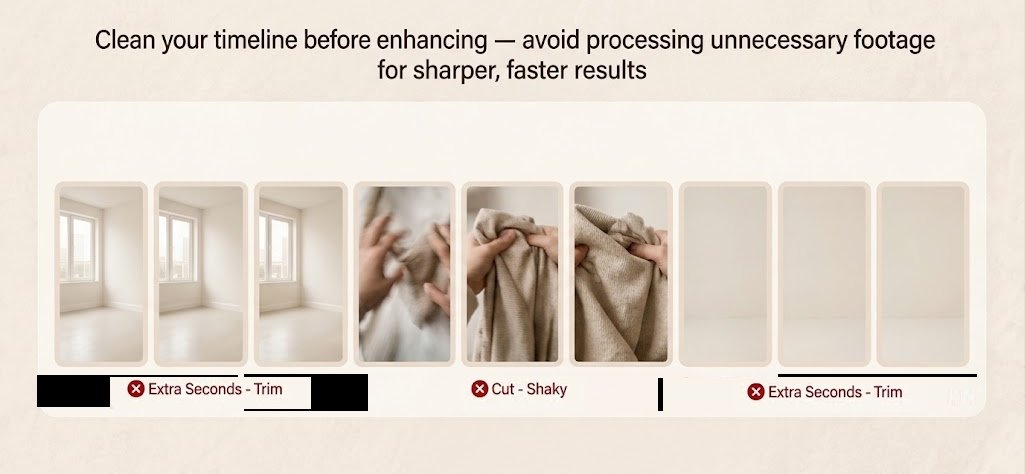
Work on one problem at a time and check the result as you go. Trying to fix everything in a single pass is how clips end up looking oversharpened or plasticky, which is its own kind of untrustworthy. A short, clean clip also renders faster and keeps the edit focused on what actually sells the product: texture, fit, and true color.
Strip background audio if the clip will play muted on a product page or carry a new voiceover. There is no reason to process a hum or a barking dog. If the clip will run on social with sound off, decide now whether it needs captions; Fastlane’s breakdown of adding subtitles to product videos covers when to burn them in and when to upload a caption file.
The goal of this step is a tight master clip, often 10 to 30 seconds, that shows the product doing the one thing a shopper needs to see. Everything downstream, from upscaling to platform exports, is faster and better when it starts from that master rather than from the raw recording.
Run the trimmed clip through an AI video upscaler that handles resolution, noise, sharpening, and color in one pass, and choose the output resolution based on where the video will live rather than defaulting to the highest setting. Basic sharpening filters cannot rebuild detail lost to a 720p export or repeated compression; AI upscaling reconstructs it frame by frame.
Wink is one option built for this job. It combines upscaling, color correction, noise removal, and sharpening, aims to keep texture and motion looking natural, and runs online, on mobile, and as a desktop app for Mac and Windows. Its converter page also lists batch and folder uploads, which matters once you are restoring a catalog rather than a single clip. The process is simple: open the converter and upload your video.
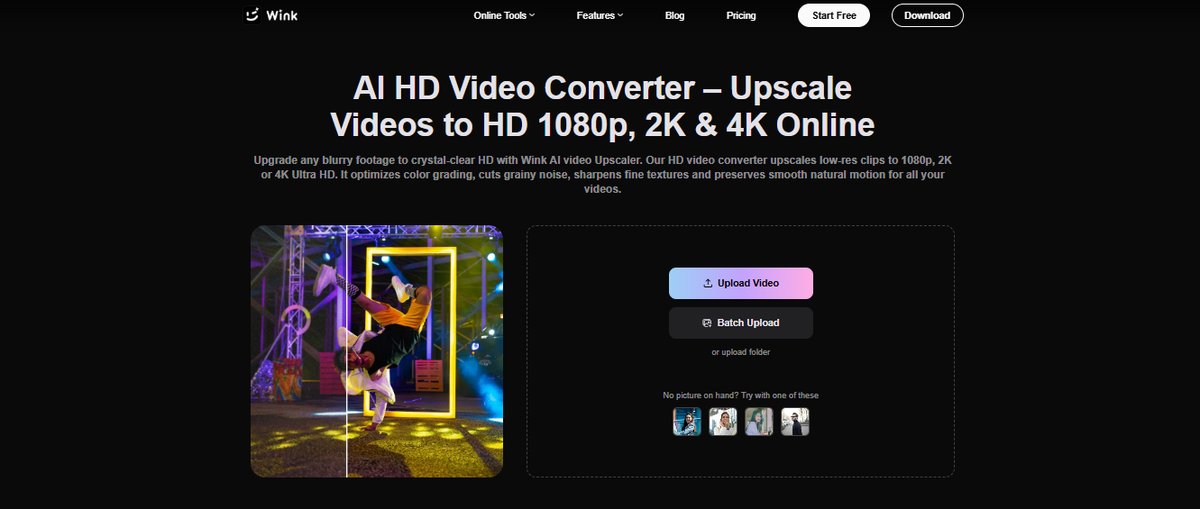
Next, pick an enhancement level. The upscaler shown below offers 1080p, 2K, 4K, and 8K tiers. You do not need the top tier for every product video. For Shopify product pages, 1080p is the practical target: Shopify’s product media requirements accept uploads up to 4K, 1 GB, and 10 minutes, but browsers that support streaming play product video at 480p, 720p, or 1080p. Higher tiers earn their place as a master file. If you plan to crop a vertical close up of fabric weave, stitching, or label text out of a wider shot, the extra resolution keeps that crop sharp.
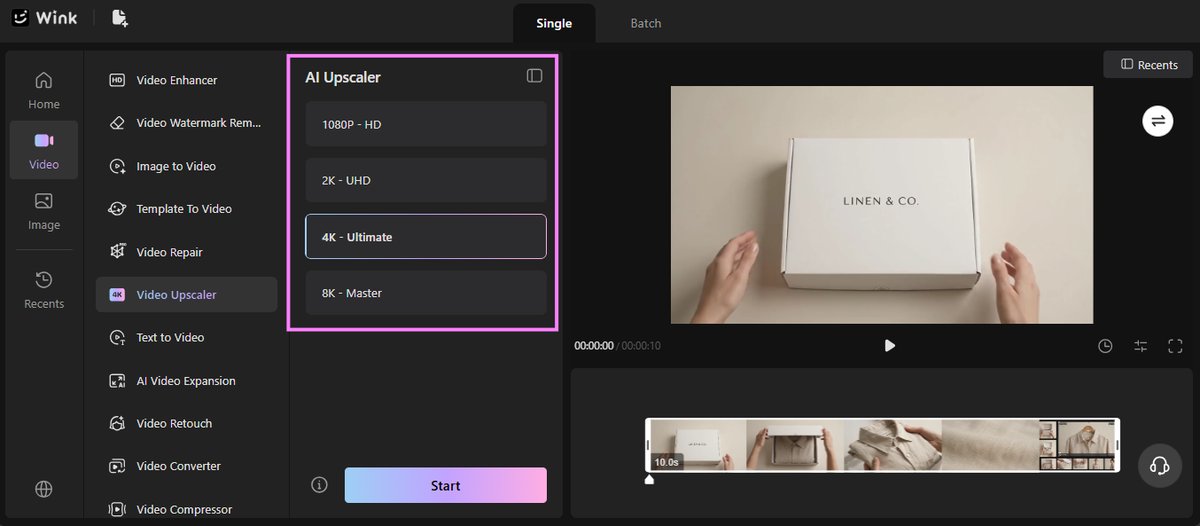
Then start the job. The tool upscales the clip, reduces grain, enhances texture, and restores color automatically, without manual settings. A short clip comes back in minutes.
Other AI upscalers and the enhancement features inside some video editors do similar work, and results vary by footage, so if a clip matters, run it through more than one and compare. Whatever you use, judge the output on the product, not on how impressive the sharpening looks.
In our own test at Wink, a compressed linen shirt clip went from soft, grey, and murky to sharp, warm, and true to the fabric, without a single new frame being shot. Here is the original, frame by frame.
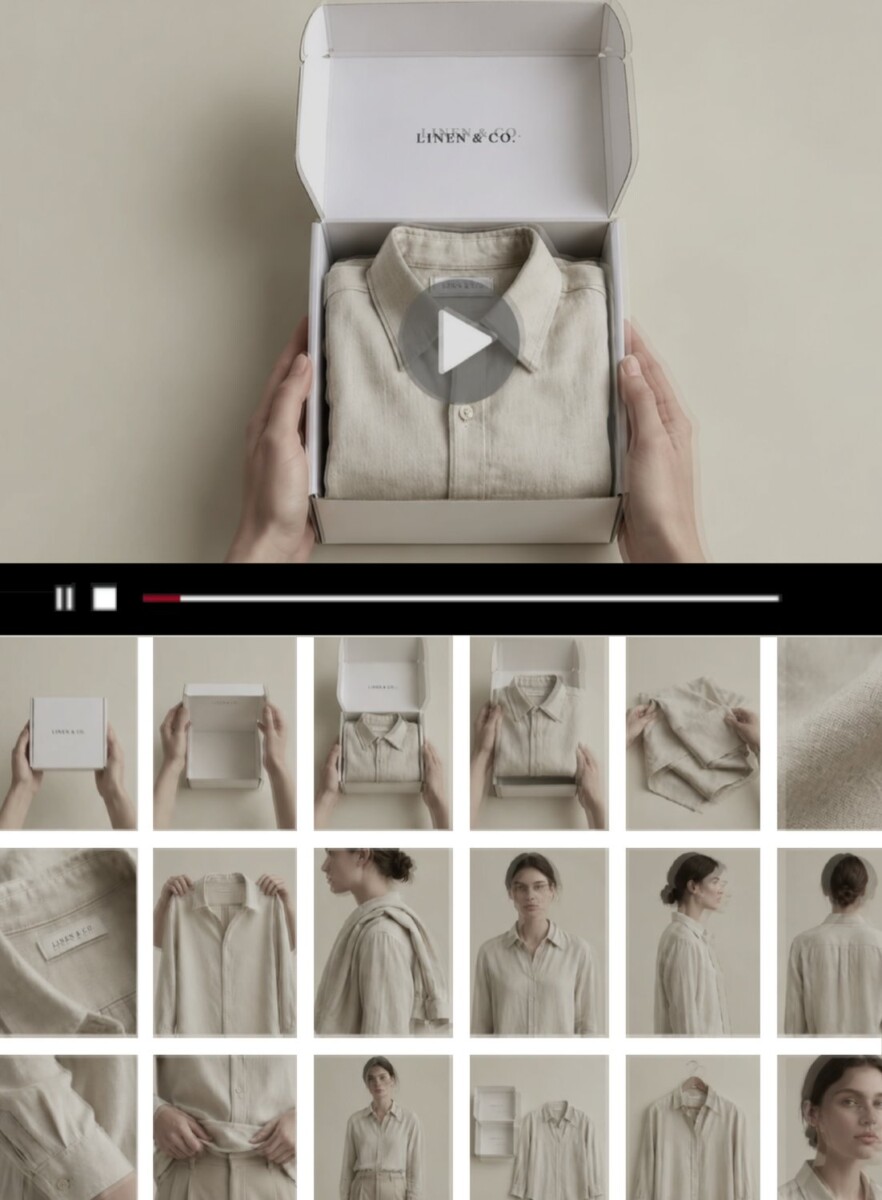
The clip had been saved and compressed again and again, which left motion blur and smeared detail. Automatic white balance had turned the oatmeal linen a grayish beige, the shadows looked dirty, and skin tones were dull. For a product sold on texture and color, that is exactly the kind of footage that creates doubt.
Here is the same footage after enhancement.
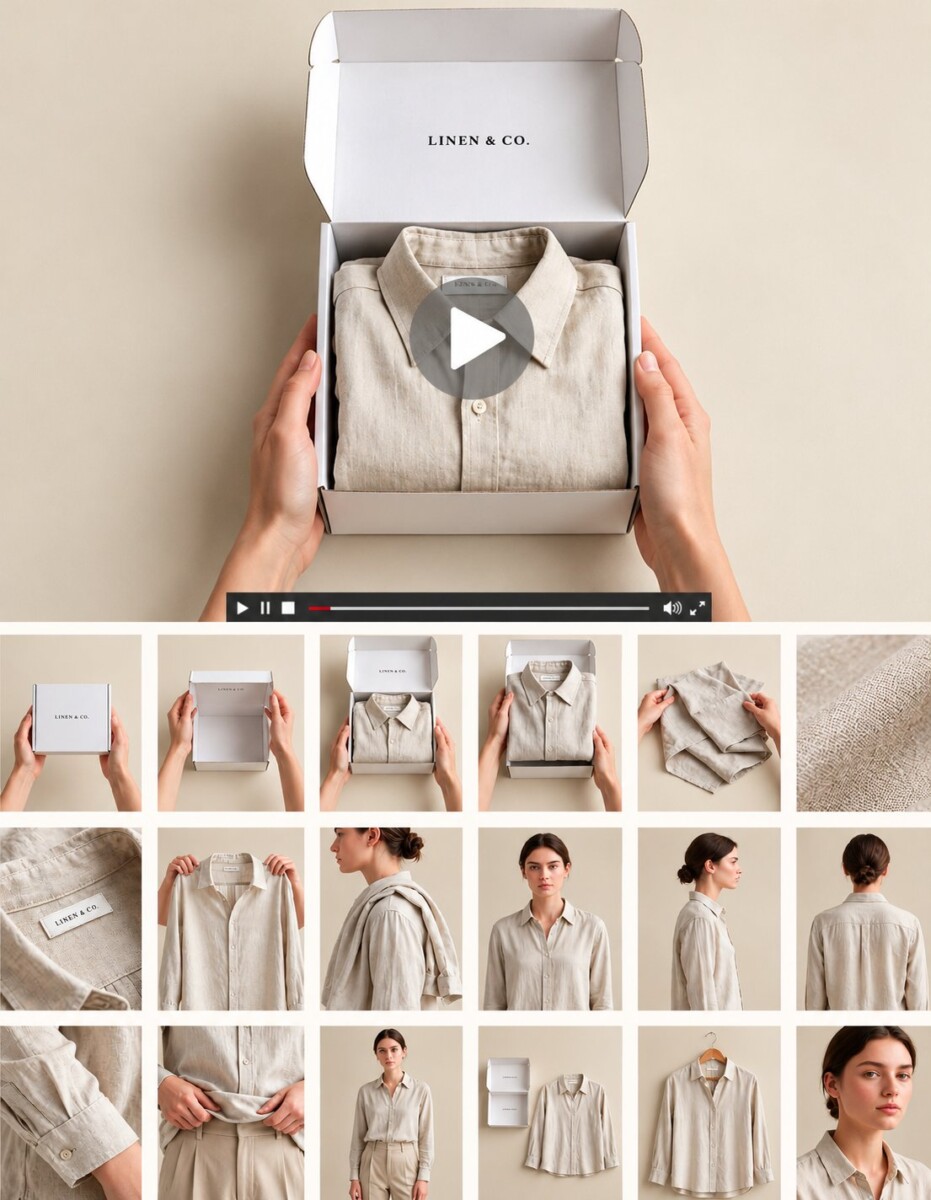
The softness is gone. The linen weave reads line by line instead of as a blur. The color is back to a rich oatmeal rather than compression grey, the whites are clean rather than bluish, and skin tones look natural. There was no studio time and no new samples, and the same clip now works for a product page, an Instagram square post, and a TikTok video.
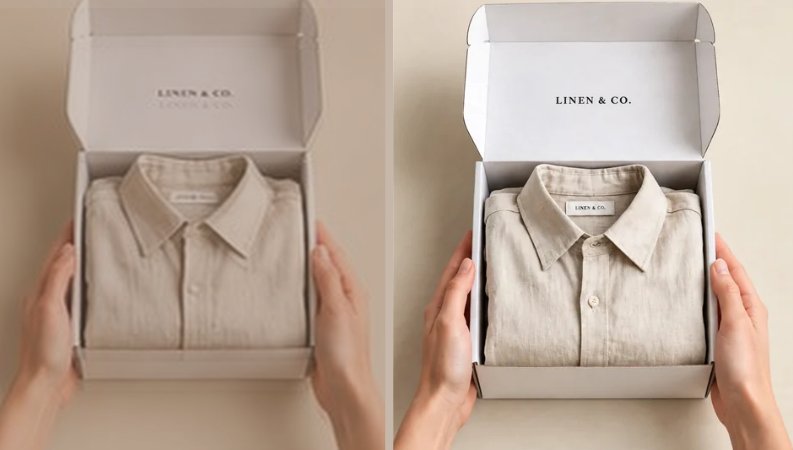
One check matters more than any other at this point: put the physical product next to your screen and compare. AI enhancement reconstructs detail, and on a tight weave or a printed pattern it can occasionally produce texture or color that is crisper, or slightly different, than the real item. If the enhanced clip is more flattering than the product, you have traded a trust problem for a returns problem. Approve the clip only when the color and texture match what the customer will unbox.
Export a separate version of the enhanced master for each channel, because one export does not fit Shopify, Instagram, TikTok Shop, and Amazon equally well. This is the step small teams skip, and it is why good footage still looks off on the site.
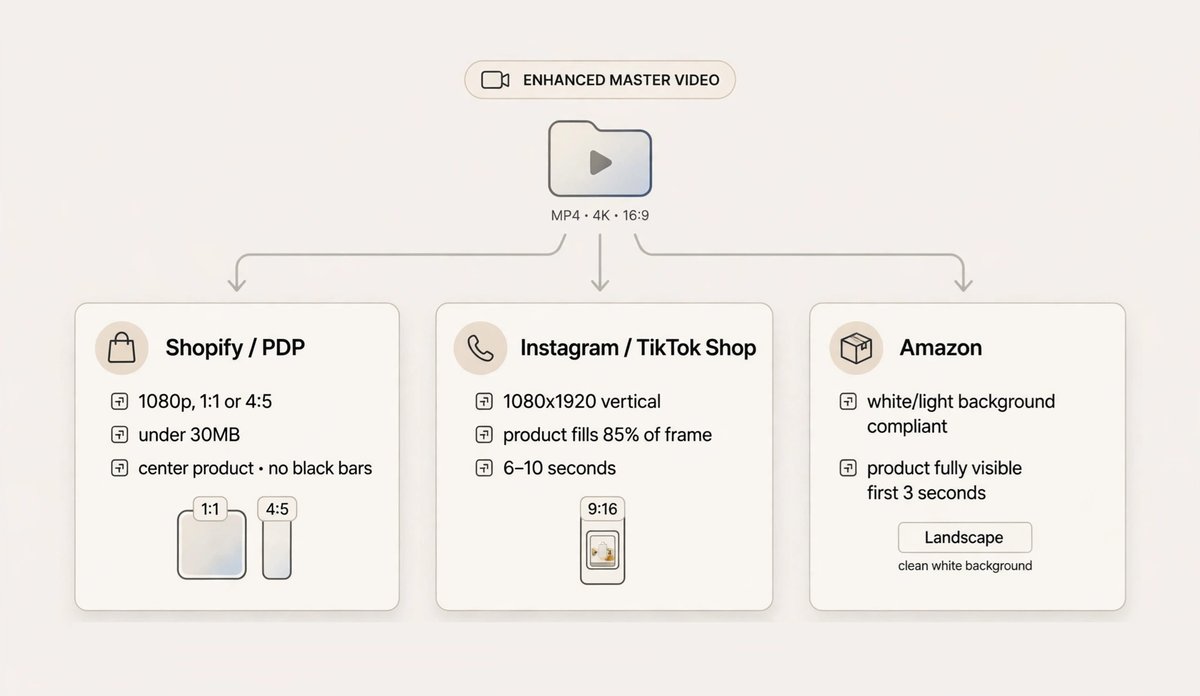
The figures in the diagram are the working targets our team uses, not platform requirements. Each platform publishes its own specifications, and those change, so treat the table below as a starting point.
For a Shopify product page, keep the product centered with no black bars, and favor square or 4:5 framing so the video sits cleanly in the media gallery. A lean upload, around 30MB, keeps files quick to manage, although Shopify re-encodes and streams every uploaded video, so compressing hard before upload mostly costs you quality. Page speed depends more on how the video loads; Fastlane’s Shopify product page speed audit explains why video should load on interaction so the hero image and buy button appear first.
For Instagram and TikTok Shop, go vertical at 1080×1920 and let the product fill most of the frame. Six to ten seconds is usually enough to show texture, fit, and color before the viewer scrolls.
For Amazon, keep the background clean and the product clearly visible from the opening seconds. Amazon reviews uploaded videos before they appear on a listing, and its specifications vary by marketplace, so confirm the current requirements inside your seller account on the day you upload.
Same footage, repurposed correctly. Exported with the channel in mind, it stops looking like a recycled clip and starts looking like content made for that placement.
Fix the clips closest to revenue first: the product pages with the most traffic and the products with the most color or fit related returns, then work outward to social and marketplace placements. Enhancement is cheap enough that the temptation is to run the whole archive, but prioritizing keeps the work tied to results.
If you are under roughly $50K a month, start with your one or two best sellers. Restore the hero clip, export the product page and vertical versions, and stop there until you see whether shoppers engage with it. Fastlane’s guide to the product page question gap is a useful lens for deciding which clip answers the question your shoppers are actually stuck on.
If you are between roughly $50K and $500K a month, you likely have a backlog of supplier clips and creator UGC. Batch them, set one quality bar for color accuracy, and assign one person to do the side by side check against physical samples before anything goes live.
If you run a large catalog, treat enhancement as a pipeline step with a written checklist: trim, enhance, compare to product, export per channel, log the version. The risk at scale is not blurry video; it is inconsistent video, where one product page looks restored and the next looks five years old.
At every stage, the reshoot still has a place. Book one when the product has changed, when shoppers need an angle you never filmed, or when enhancement cannot make the color match the item in your hand. And if the product is on your desk and the only problem is lighting or framing, a ten minute reshoot by a bright window may honestly be quicker than enhancing and checking. For everything else, the footage you already paid for is probably good enough to use again.
AI can fix most blurry product video when the blur comes from low resolution, repeated compression, or mild noise, but it cannot fix a shot that was badly out of focus or never captured. Modern upscalers reconstruct detail frame by frame, so a soft 720p clip can become a usable 1080p or 4K file with clearer texture and corrected color. They work best on short, trimmed clips where the product is already visible and roughly in focus. If the camera focused on the background, or the clip shows the wrong variant, enhancement only makes the wrong thing sharper. Always compare the enhanced result with the physical product before publishing, because reconstructed detail should match what the customer receives.
For most Shopify product pages, 1080p is the right resolution for product video. Shopify accepts uploaded product videos up to 4K, 1 GB, and 10 minutes, but it converts uploads for streaming, and browsers that support streaming play them at 480p, 720p, or 1080p. That means a 4K upload will not show shoppers more detail on a typical product page. Higher resolution earns its place as a master file you crop from, for example a vertical close up of fabric weave, stitching, or label text cut from a wider shot. Square or 4:5 framing usually sits better in the product media gallery than wide landscape footage, and keeping the product centered with no black bars matters more than raw pixel count.
Make old UGC look professional by trimming it hard first, then enhancing resolution, noise, and color, then exporting a version framed for the product page. Creator clips usually have the right authentic feel but suffer from handheld shake, grain from indoor lighting, and phone white balance that shifts colors. Cut every shaky or off topic second so only the clearest product moments remain, run the shortened clip through an AI enhancer, and check the color against the physical product. Keep some of the natural feel: UGC that looks overproduced can lose the credibility that made it useful. Confirm you have the creator’s permission to reuse and edit the footage on your product pages.
A reshoot is better when the problem is what the footage shows rather than how it looks. That includes clips of an old product version or the wrong colorway, missing angles shoppers keep asking about, footage where focus landed on the background, and cases where enhancement still cannot make the color match the item in your hand. Enhancement repairs resolution, compression, noise, and color drift; it cannot add information the camera never captured. A quick test is to list the questions in your support inbox and returns notes, then check whether the existing clip answers them. If it does but looks rough, enhance it. If it does not, plan a new shoot around those questions.
You need a different export for each channel, but not a different shoot. Start from one enhanced master clip, then create versions for each placement: square or 4:5 at 1080p for a Shopify product page, vertical 1080×1920 at roughly six to ten seconds for Instagram and TikTok Shop, and a clean, product first landscape version for Amazon. Each platform frames, crops, and plays video differently, so a single export usually looks wrong somewhere, with black bars, cropped products, or a slow opening. Amazon also reviews uploaded videos, and its specifications change by marketplace, so check the current requirements in your seller account before uploading.