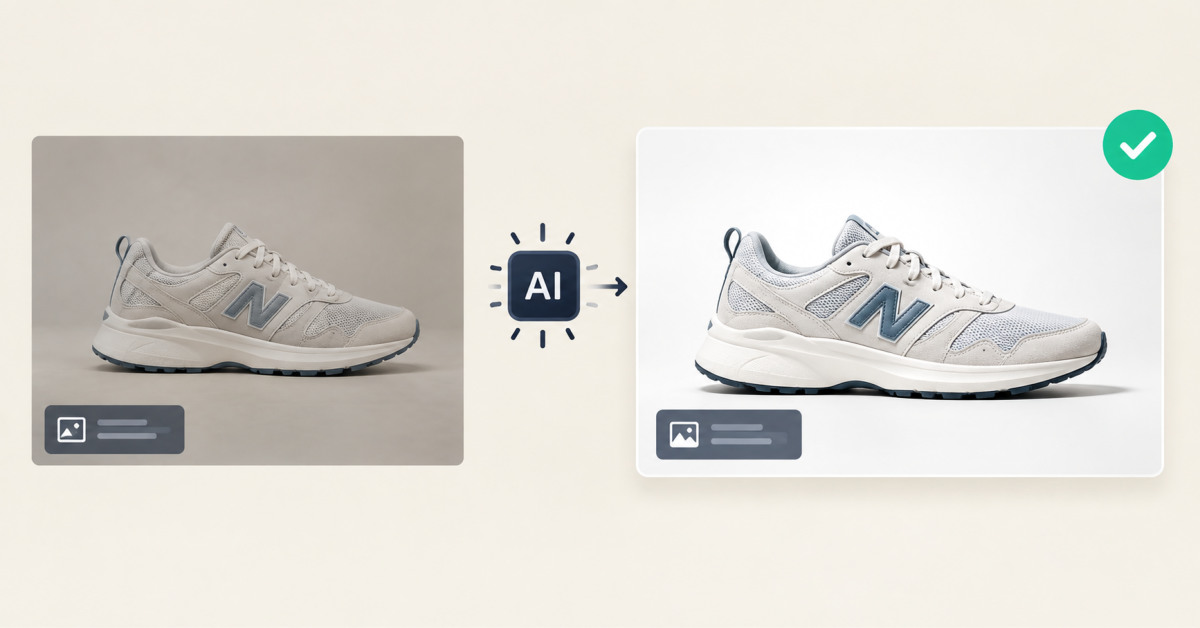
AI photo enhancement helps Shopify stores when it repairs defects that are not part of the product, such as blur, noise, scratches and low resolution, and hurts when it changes the product itself. Color, texture, stitching and label text must match the physical item.
The fastest way to lose trust with an AI edited photo is not a bad edit. It is a good edit that makes the product look better than the thing in the box.
Somewhere in most Shopify catalogs there is a product photo that came from a supplier’s spec sheet, a 900 pixel square that looked fine in 2019 and looks soft on a modern phone screen. There is usually also a founder photo on the About page scanned from a print, with a crease across one corner. AI tools like EzEnhancer.ai can fix both in under a minute, in the browser, often for free. That speed is the reason to be careful.
Call the careful approach Authentic Mode: remove the damage, keep the character. The idea comes from family archive restoration, where aggressive AI settings are notorious for turning grandparents into wax figures. The same failure shows up on product pages, with a commercial cost attached. A leather bag that gets smoothed into vinyl, or a navy sweater that gets pushed toward royal blue, is a return waiting to happen.
If you are just starting, this guide will help you make supplier images usable. If you are scaling, it gives you a review standard you can hand to a VA so the catalog stays honest as it grows.
The Authentic Mode rule says an AI tool may fix anything that is not part of the product, and may change nothing that is. Blur, sensor noise, JPEG blocking, dust, scratches, glare and low resolution are defects of the photograph. Color, material texture, stitching, printed text, proportions and wear on a vintage item are facts about the product. The first list is fair game. The second list is off limits, even when changing it would make the image prettier.
Getty Images’ Building Trust in the Age of AI research, drawn from more than 30,000 adults across 25 countries, found that 98% agree authentic images and video are pivotal to trust, almost 90% want to know whether an image was created with AI, and 76% say they are getting to the point where they cannot tell whether an image is real. A shopper who cannot tell what is real looks harder at your product photos, and forgives less when the delivered item does not match.
Enhancement and generation are different activities, and the rule treats them differently. Enhancement starts from a real photograph of your real product and removes flaws from that photograph. Generation creates pixels that never came from a camera, such as a new background, a model wearing the item, or a lifestyle scene. Authentic Mode is about enhancement: you should be able to hold the physical product next to the edited image and see the same object.
Ask one question of every edit: would the customer who receives this item consider the change a lie? Removing lens dust is not. Removing a visible seam is. Sharpening a blurry logo is not. Redrawing letters the AI could not see is.
Three kinds of Shopify images benefit most from AI enhancement: low resolution supplier and manufacturer photos, older catalog shoots that no longer meet current display sizes, and archival photos used for brand story pages. Each carries a different risk, so each gets a different set of allowed fixes.
Supplier photos carry the highest stakes, because the photo is the only evidence a shopper has. Upscaling a soft 800 pixel image to a clean 2048 pixel image is a real improvement. Letting the tool reinvent a matte finish as gloss is not.
Older catalog shoots are usually good photography at the wrong size, and rarely need more than light upscaling and dust removal.
Archive photos are the one place the original restoration conversation applies almost word for word. A scanned photo of the founder in the first workshop, or the family farm the brand grew out of, does real work on an About page; the Fastlane breakdown of About Us pages that put founder faces and history front and center shows why. Here the grain and the slight fade are part of the proof that the history is real. Repair the damage and leave the age.
The quality ceiling for any AI enhancement is set by the file you feed it, so always start from the largest, least compressed original you can get. When the pixels have already been squeezed by a social platform, a chat app or a thumbnail, the model is guessing at detail that is gone, and guesses are where the plastic look comes from.
For product images, that means asking suppliers for their master files rather than downloading from their website, and pulling your own old shoots from the photographer’s archive or your drive rather than from your live store. For physical prints such as founder photos, scan on a flatbed at 600 DPI as a minimum, and 1200 DPI for small prints you plan to enlarge. Clean the scanner glass first, because a speck of dust becomes a scar once the image is upscaled, and save as TIFF or PNG so nothing is lost before the AI step.
Know your target before you start. Shopify’s product media specifications accept images up to 5000 by 5000 pixels and under 20 MB, and note that 2048 by 2048 pixels usually displays best for square product images. That gives you a sensible upscale target: take a 1000 pixel source to roughly 2048 pixels, not to 5000. Pushing further multiplies invented detail that no shopper sees on a phone. The Fastlane complete guide to ecommerce photography covers the same 2048 pixel target from the shooting side if you are planning new photos alongside the fixes.
Save every enhanced image as a new file and never overwrite the source. When a customer questions a color months later, the original is your only evidence.
Start every image at low to medium enhancement strength and raise it only until the defect you are fixing disappears, because the plastic look comes from strength, not from the tool. Most AI enhancers, including the free browser tools, apply denoising and sharpening together. At high settings the denoiser treats fine texture as noise and removes it, and the sharpener then puts hard edges on the smooth result. That is how cotton becomes vinyl and skin becomes wax.
Before you run the tool, pick one area where texture proves the material: the weave of a knit, the grain of a wooden handle, the pores of leather. After enhancement, zoom to 100% on that area and compare it with the original. If the texture has flattened, drop the strength and run it again.
Grain deserves its own decision. For archive photos, keep it or add a fine layer back if the tool removed it; grain is what makes a 1970s photo read as a real 1970s photo rather than a digital painting. For modern product photos the same logic applies to natural softness: a shallow depth of field should stay soft, or the product looks pasted onto its own photo.
Small details are where AI guesses go wrong. Watch label text, which some models redraw into plausible shapes that say nothing. Watch counts of buttons or prongs. Watch faces in founder photos, where a mole or a scar is part of the person and some models will quietly remove it as dirt. If a tool cannot enhance an area without guessing, crop around it or leave that area alone. The buyer’s checklist for AI product photo tools flags the same weak spots on reflective items and small text, and it is worth reading before you commit to any paid plan.
Color accuracy matters more than sharpness on product pages because a slightly soft photo costs you a little conversion, while a wrong color costs you a return and a customer who no longer trusts your photos. Shoppers forgive a photo that undersells a product. They rarely forgive one that oversells it.
Most AI enhancers adjust color as a side effect, lifting saturation, shifting white balance and adding contrast. On a family photo that is taste. On a product image it changes the facts. Navy drifts toward royal blue, oatmeal goes pink, and a brushed metal finish picks up a cast from the surroundings.
The fix is a simple comparison habit. Put the physical product, or a color swatch from the manufacturer, next to your screen in daylight and compare it with the enhanced image. If the color moved, correct it back by hand or rerun the enhancement with color adjustment switched off, if the tool allows that. For stores with a color-critical catalog (apparel, cosmetics, paint, home textiles), do this for every image. For stores selling items where color is incidental, spot check one image per batch.
Colorizing is separate. A black and white founder photo can be colorized in muted, period-appropriate tones if it is labeled as colorized. A product image should never be colorized.
Returns are where this shows up in your numbers. Among the practical ways to reduce ecommerce returns, clear multi-angle images that show the product as it really is sit near the top of the list. Enhancement that improves clarity supports that goal. Enhancement that shifts color works directly against it.
Google Merchant Center expects product images to accurately show the product and warns against scaled-up images, and it requires a disclosure tag on images created with generative AI. If your Shopify catalog feeds Google Shopping, those rules apply to every image you enhance.
Google’s Merchant Center image requirements set a minimum of 500 by 500 pixels, recommend around 1500 by 1500 pixels or more, ask that the image accurately display the entire product, and include a direct instruction not to scale up an image or submit a thumbnail. That last point is the one to take seriously. A heavy upscale from a tiny thumbnail shows smeared edges and invented texture, which is exactly the image Google is telling you not to submit. When the source is too small to enhance cleanly, the honest fix is a new photo, not a stronger setting.
For generated content the rule is explicit. Google’s policy on AI-generated content in Merchant Center requires images created with generative AI to carry the IPTC DigitalSourceType metadata value TrainedAlgorithmicMedia, and asks merchants not to strip embedded metadata from those images. The policy does not address images that were only enhanced or upscaled. The cautious reading is that an image which gained a generated background, a generated model, or generated product parts should be tagged, while an image that only had noise and scratches removed is still a photograph. If you are unsure which side an edit falls on, treat it as generated.
Shoppers and AI shopping agents also read the words around the image. Descriptive alt text that names the product, color and material gives both a check against what the photo shows; the guide to structuring Shopify product data for AI agents walks through how to write it.
The right enhancement tool depends on how many images you fix each month and how color-critical your catalog is, not on which tool has the most features.
If you are doing $10K a month or less, a free browser tool is enough. EzEnhancer runs upscaling, restoration, unblur and denoise in the browser on a daily free quota, which covers the handful of supplier images most new stores need to fix. Pair it with Shopify’s built-in media editor, which uses Shopify Magic to remove or replace backgrounds but does not document upscaling or restoration, so it complements rather than replaces an enhancer.
Between roughly $50K and $500K a month, volume and consistency start to matter. A desktop tool like Topaz Photo processes batches locally and gives finer control over denoise and sharpening. Its $199 a year Personal plan allows limited commercial use only under $1M in annual revenue; the $599 Pro plan carries full commercial rights. For archive prints that need hand finishing, Adobe’s Photo Restoration neural filter in Photoshop is still marked beta, and it works best in the hands of someone who can clean up after it.
Beyond that, the question shifts to producing new images at scale, a generation workflow with its own trade-offs; the conversation with Dreem on turning one phone photo into a full content kit is a good place to see how brands keep a human art director in that loop.
A three step review, done before any enhanced image goes live, keeps AI enhancement honest: compare side by side, check the product facts, then record what changed. It takes three to five minutes per image, and it is the step most stores skip.
Step one is a side by side comparison at 100% zoom, original on the left and enhanced on the right. Look at the texture area you chose earlier, the edges of the product, and any printed text. Anything present in the enhanced image and absent from the original is invented detail, the clearest sign the setting was too strong.
Step two is a product facts check against the physical item or its spec sheet: color, material finish, count of visible components, logo and label wording. Hand it to someone other than the person who ran the tool, because they tend to see what they expected.
Step three is a simple record. A spreadsheet with the image file name, the tool, the settings, the date and who approved it is enough. At three hundred images it is the only way to answer a customer who says the photo did not match, or a marketplace asking whether an image was AI generated.
The pattern to avoid is common at the $500K to $2M stage: a store adds an AI enhancement step, a background generator and a model generator in the same quarter, runs the whole catalog through all three, and cannot say afterwards which change caused a jump in returns. Add one tool, review its output for a month, then decide on the next. Enhancement that you can explain in eighteen months is worth more than enhancement that looked impressive in the first week.
Yes, you can use AI to upscale low resolution supplier photos, as long as you start from the largest file the supplier can send and review the result against the physical product. Ask for master files rather than downloading website images, and aim for about 2048 by 2048 pixels, which Shopify says usually displays best for square product images. Check color, printed text and material texture at 100% zoom after upscaling. If the source is a tiny thumbnail, the upscale will invent detail, and Google Merchant Center tells merchants not to submit scaled-up images, so a new photo is the better fix.
You stop AI photo enhancement from making products look fake by keeping enhancement strength low to medium and checking one texture-rich area before and after. High settings make the denoiser remove fabric weave, wood grain and skin pores, and the sharpener then adds hard edges to the smooth result. Raise strength only until the specific defect disappears. Turn off automatic color adjustment if your tool allows it, and compare the result side by side with the original. If an area such as small label text cannot be enhanced without guessing, leave it untouched.
You have to label product images created with generative AI in Google Merchant Center, but Google’s policy does not address images that were only enhanced or upscaled. Generated images must carry the IPTC DigitalSourceType value TrainedAlgorithmicMedia, and Google asks merchants not to remove that embedded metadata. An image that gained a generated background, model or product part should be tagged. An image that only had noise, blur or scratches removed is still a photograph of the real product. When you are unsure which category an edit falls into, the safer choice is to tag it.
Scan old photos at a minimum of 600 DPI before restoring them with AI, and use 1200 DPI for small prints you plan to enlarge. Higher resolution gives the AI more real detail to work with, which reduces invented texture. Use a flatbed scanner rather than a phone camera, clean the glass first so dust does not turn into scratches after upscaling, and save the scan as TIFF or PNG rather than JPEG so no data is lost before enhancement. Keep the raw scan as your archive master and do all restoration on a copy.
Free browser-based enhancers such as EzEnhancer work for occasional Shopify product image fixes, and Shopify’s own media editor covers background removal inside the admin. EzEnhancer offers upscaling, unblur, denoise and restoration on a daily free quota with no install, which suits a new store fixing a handful of supplier photos. Shopify’s media editor uses Shopify Magic to remove or replace backgrounds but does not document upscaling. Once you are processing hundreds of images a quarter, a paid desktop tool with batch processing and finer controls usually saves more time than it costs.