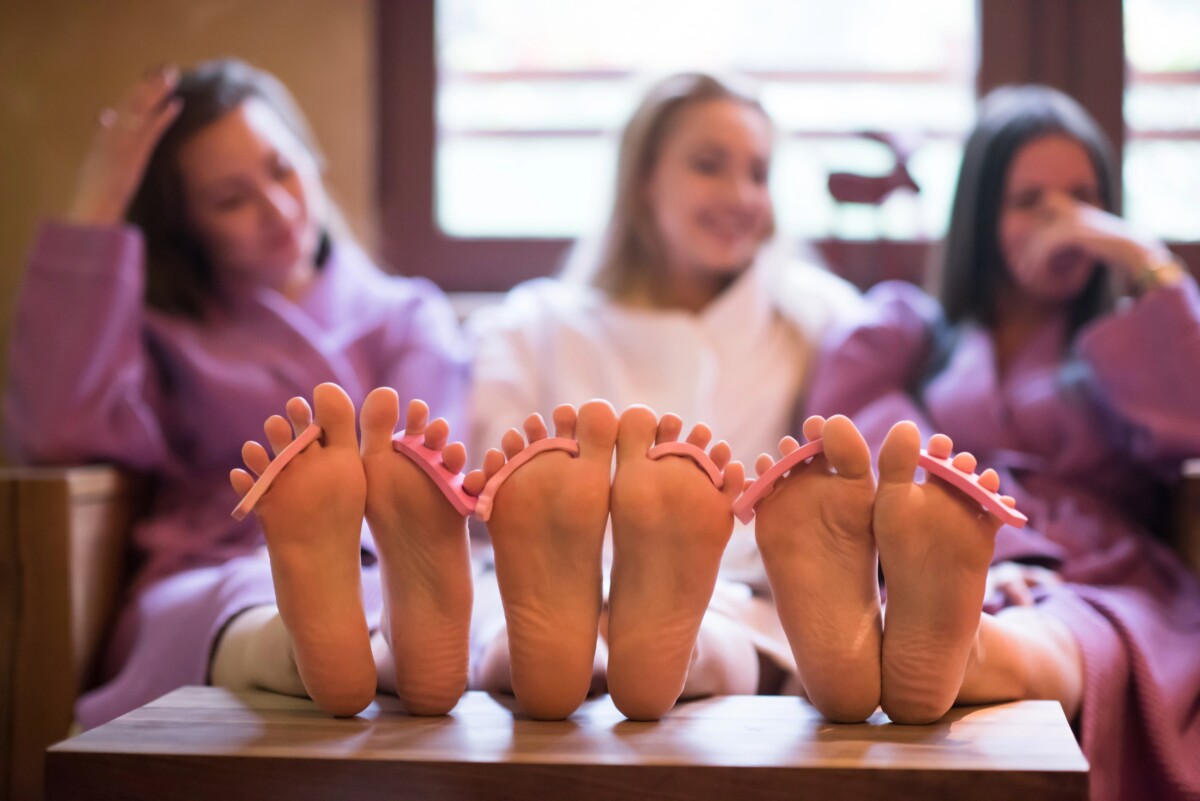
The best feet poses to start with are simple: a pointed foot with a visible arch, a relaxed flat foot with spread toes, and crossed ankles, shot from ankle height in window light. Clean angles and consistent lighting matter more than elaborate styling.
A good pose is a repeatable decision, not a lucky frame. A process you can run again next week is worth more than one great shot you cannot reproduce.
A common first attempt is one foot, flat on the floor, under an overhead bulb. The frames show the foot, but nothing in them gives a browsing buyer a reason to stop scrolling.
A short list of poses, one rule for camera height, one light source, and a habit of shooting in batches will not fix everything, but they are the part of a listing you control completely. This guide is written for Stage Two creators who already have a profile and need photos that hold up as thumbnails, with notes for Stage One readers who are still working out whether a phone is enough.
Everything below is a craft rule of thumb, not a performance guarantee. Views and sales depend on your niche, your pricing, and how often you post, and most people who try this earn modest amounts, so treat a 4 week review as a first checkpoint and longer trends as the real signal.
A foot pose sells when it reads clearly at thumbnail size: a clean line from ankle to toes, relaxed toes, one sharp focal point, and nothing distracting in the frame.
Listings may appear as small thumbnails, so check how your marketplace shows them and plan for small. A useful test is to shrink the photo to about 1 inch wide on your screen and squint. If you cannot tell what the pose is, or your eye lands on the bedsheet instead of the foot, simplify the frame before you list it.
Four things help a pose pass that test. The first is line: the leg and foot should form one unbroken shape rather than a cluster of angles. The second is tension: a pointed foot should look elegant, not strained, so stop pointing before the tendons stand out. The third is focus: choose the toes or the arch as the sharp point and let the rest soften slightly. The fourth is negative space, meaning the empty margin around the foot, so a thumbnail crop does not slice off a heel.
Skin prep matters as much as angle. Moisturize the night before, trim and clean your nails, and check for dry patches in a test shot, because a camera at 12 inches shows everything. If you are just starting, aim for clean and clear and stop there. Stage Three creators can go one step further and track views per pose over 4 weeks as a rough signal, keeping in mind that small numbers can mislead.
Start with six poses: the pointed foot, the flexed foot, the flat foot with spread toes, crossed ankles, the heel lift, and the seated edge of the bed.
Shoot the pointed foot and the flat foot with spread toes first, because they are the simplest to hold steadily and the easiest to reproduce next week in the same light. Crossed ankles and the heel lift come next; both add variety to a set without changing your setup. The flexed foot and the seated pose are worth adding once you are comfortable, since they need a little more control over camera height.
Resist the urge to invent a new pose every session. A set of 6 poses on 2 backgrounds gives you 12 combinations to rotate through over several shoots, which is plenty for months of listings and far easier to keep consistent. If you want to see which looks are in demand before you pick your first two, our breakdown of the content categories buyers are searching for shows how demand splits across styles.
Hold the camera at ankle height or slightly above, 12 to 24 inches from the foot, and use a 2x or telephoto setting if your phone has one (step back if it will not focus), because ultra-wide lenses exaggerate whatever is closest to the camera.
Distance and lens choice have a large effect on how natural proportions look, often more than editing can repair. A wide lens held close makes toes look enormous and an arch look flat. Stepping back to 18 inches and zooming in slightly keeps proportions natural. On some phones the 2x setting is a digital crop rather than a separate lens, which still beats ultra-wide here. If your phone has neither, shoot from 24 inches and crop later; a recent phone leaves plenty of resolution to spare.
Height matters because it changes how much of the arch the camera can see. At ankle height you see the profile line clearly. Raise the camera to knee height and the foot starts to look shorter, which suits the seated pose and not much else. Use a small tripod, a stack of books, or a phone stand rather than a hand, because a steady camera lets you adjust the pose without re-framing every shot.
Before each pose, turn on the grid lines in your camera settings and level the phone. Tap on the ball of the foot to set focus and exposure, then take a burst, which is a rapid series of frames. A reasonable target is 20 to 30 frames per setup, from which you keep 3 to 5. It feels wasteful in the first session. By the third, you will know which angle you prefer and shoot fewer frames.
One large window beside the foot, about 3 feet away as a starting point, plus a plain light floor or bedsheet, keeps attention on the foot: the light shows skin texture without harsh shadows, and the background adds no distraction.
Overhead bulbs are the most common lighting mistake. They often cast a shadow under the arch, and warm bulbs can add a yellow tint to skin. Direct midday sun through a window is nearly as hard to work with, because it makes bright highlights on the toes and deep shadows everywhere else. Pull a sheer curtain across the glass or shoot in the morning or late afternoon, when the light is gentler. You do not need a ring light, and its circular reflection can show up in glossy nail polish.
For backgrounds, plain wins. A light wood floor, a white or gray bedsheet, or a neutral rug lets the foot stand out and keeps your photos looking like one collection. Patterned bedding, cluttered shelves, and visible furniture all compete for attention. They also carry information about where you live, which we cover next.
Lock your white balance, the color setting that keeps whites neutral, if your camera app allows it, so a set shot over 45 minutes does not drift from cool to warm. Edit lightly: adjust brightness, trim the crop, and stop there. Heavy filters shift skin tone and make buyers wonder what the real foot looks like. Consistency across a set, with the same light and background, also makes your profile look like a considered brand rather than a camera roll.
Location metadata, background objects, tattoos, and distinctive jewelry are four details that can link a photo back to you, and each can be reduced or avoided with care before you upload.
Location metadata is the invisible one. Phones can embed the coordinates of where a photo was taken, and Apple publishes a support guide on reviewing and removing location metadata, including the Camera app’s location services settings. Android camera apps usually have a location setting too, so check yours. Turn location tagging off before the first shoot, then check a test photo’s info panel to confirm no coordinates remain.
Background objects are the visible one. A window view with a recognizable street, a framed photo, mail on a table, or a distinctive rug can all identify a home. Shoot against a bedsheet or blank floor, and scan every frame at full size before you pick a favorite. Tattoos, birthmarks, and unusual jewelry work the same way; decide before you shoot whether they are in or out of frame, because it is much harder to change course after listings are live.
These steps protect you from buyers and strangers. The marketplace and its payment providers may still hold your identity details, so anonymity is partial. If you want the full system, including separate email addresses, device habits, and payment details, our guide to identity protection for anonymous sellers covers each layer in order. For this article, the rule is simple: review every photo twice, once as a thumbnail and once at 100 percent zoom, where a stray name on an envelope or a street sign in a window becomes readable.
Treat a custom pose request as separate work: confirm the details in writing, price it above your standard listings, agree a turnaround you can keep, and shoot only what you were already comfortable shooting.
Custom requests are separate work and deserve separate pricing, because you are giving one buyer your time to plan, shoot, edit, and deliver one set. Price them above your regular listings, set a limit of one revision round so a single request does not swallow a week, and quote a turnaround you can meet, such as 48 to 72 hours. If a request falls outside your usual style, check whether buyers actually search for it, using the category demand breakdown linked earlier. If it does not feel right, decline, whatever the demand data says.
Custom requests are also one place where pressure and fraud can show up. Be wary of buyers who rush you, ask to move the conversation off the marketplace, or want a payment arrangement that skips the normal checkout. Keep communication and payment inside the marketplace so there is a transaction record, and keep your own copies as well. Under FeetFinder’s current terms, a refund or chargeback can be deducted from your earnings, so write down what was agreed and what you delivered. Our guide to avoiding payment fraud and chargebacks goes through the warning signs.
Two saved replies make the whole process easier: one that confirms the details and price of a request, and one that declines politely. With the wording ready, a no costs you 30 seconds instead of an hour of second-guessing.
Block 90 minutes, shoot four poses on two backgrounds, take 20 to 30 frames per setup, and keep 24 to 40 images, which you can schedule across 4 weeks of posting.
The first 15 minutes go to setup: clean your feet, set up the window light, level the phone, and take a test shot to check focus and metadata. The next 45 minutes are the shoot itself, eight setups of about 5 minutes each (four poses on two backgrounds) plus a short break between backgrounds. The final 30 minutes are culling and editing: delete the blurry and cluttered frames, keep the best 3 to 5 from each setup, apply the same light edit to all of them, and save every file with a name that includes the pose and the date.
Then schedule. Posting 3 to 4 times a week, with each post using 2 to 3 images, uses roughly 24 to 48 images over 4 weeks, so a batch of 24 to 40 covers most of a month. Consistency is the point: a profile with fresh listings every few days may look active to a returning buyer, and a steady rhythm is easier to sustain than occasional bursts. Keep a simple log of each shoot date and each file set alongside your income records, since the rules for age requirements, taxes, and payment handling are covered in our guide to the age, tax, and payment rules for selling.
After 4 weeks, look at your numbers. Which pose drew the most views, and which led to sales? Cut the weakest pose and put its shooting time into the strongest. Stage Three creators can run this as a monthly cycle, and it will teach you more about your audience than any advice article can.
Cutting the weakest pose after four weeks is a real experiment with a clear stopping rule, and your shoot log is the evidence behind it. That habit of testing, logging, and cutting travels with you to anything else you sell, and the hub spells out the skills that carry over at every stage.
This week, shoot a 45 minute starter batch of three poses on one background, then review your views after 4 weeks and cut the weakest pose.
Keep the first batch deliberately small. Three poses on one background gives you about 9 to 15 keepers, which is enough to teach you how your light behaves and how long each step takes, and it prevents the overwhelm that makes a first shoot feel like a chore. Write down the camera height, distance, and time of day you used so that the next session matches the first. If one pose clearly feels better to hold and look at, build the second batch around it, grow to the full 90 minute routine next time, and keep that block on your calendar every 4 weeks so the habit survives a busy month.
If you have not chosen what to shoot yet, start with the demand breakdown by content category linked earlier and pick styles that fit your comfort level. If you sell on more than one marketplace, compare each one’s rules on reusing photos before you upload this batch, since payout timing and content rules differ and some may restrict listing the same photos elsewhere. FeetFinder is one to look at, and its seller account setup is a reasonable first stop.
Treat the first batch as a test of your process rather than a verdict on your photos, and judge it after a full 4 weeks of listings. A slow first month tells you little either way, because 4 weeks of listings is a small sample, and the point of this week’s work is a repeatable routine you can improve, not an instant result.
Start with a pointed foot, a relaxed flat foot, and crossed ankles, then adjust until the line from ankle to toes looks smooth. Point only as far as feels comfortable, since straining shows in the tendons. Keep toes relaxed and slightly spread, rest the weight of the leg so the foot is not tense, and check a test shot at full size before shooting a full set. Hold each pose for a few seconds, take a burst of frames, and review them for blur and awkward angles. Consistent poses on the same background look more professional than a mix of unrelated ones, so repeat your best three poses before adding new ones.
Ankle height, slightly from the side, is the best starting angle for most poses, because it shows the arch and the line of the foot clearly. Keep the camera 12 to 24 inches away and level, then adjust. Keep the camera at ankle height for most poses, raise it to knee height for the seated pose, and use a 45 degree downward angle only for the flat-foot shot. A wide-angle lens held close exaggerates toes, so step back and use a 2x or telephoto setting when possible. Test two or three angles with the same pose in the first session, and keep the one that looks most natural at thumbnail size.
No, a recent smartphone is enough for good feet photos when you control light and angle. Natural window light, a plain background, a steady phone stand, and a 2x or telephoto setting often do more for quality than a more expensive camera. The details that separate amateur from polished work are focus, even lighting, and a clean background, and all three are low cost. If you later want to upgrade, a basic tripod and a sheer curtain for diffusing light cost far less than a new camera and often improve results more for sellers who are just starting.
Plan for about 160 to 240 frames in a 90 minute shoot and keep 24 to 40 of them. That works out to 20 to 30 frames for each of 8 setups (four poses on two backgrounds), with 3 to 5 keepers from each setup. Taking many frames feels wasteful at first, but small differences in toe position and focus are hard to see until you review them at full size. After your third or fourth session you will know your best angles and can shoot fewer frames per setup. Delete weak frames the same day so your library stays organized and easy to schedule from.
Turn off location tagging in your camera settings before you shoot, then check a test photo’s info panel to confirm no coordinates are attached. Apple’s support page explains how to review and remove location metadata, including through the Camera app’s location services settings, and Android camera apps usually have a similar setting. Check every new batch before uploading, since settings can change after an update. Also look at the background of each frame at full size, because a visible street sign or piece of mail can identify you just as well.
Soft natural light from a single large window works best for feet pictures. Place the foot about 3 feet from the glass as a starting point, with the light coming from the side, and soften direct sun with a sheer curtain. Avoid overhead bulbs, which often cast shadows under the arch, and skip ring lights if you wear glossy nail polish, since a circular reflection can show. Shoot in the morning or late afternoon for gentler light, and lock your white balance so the color stays steady across a 45 minute session.